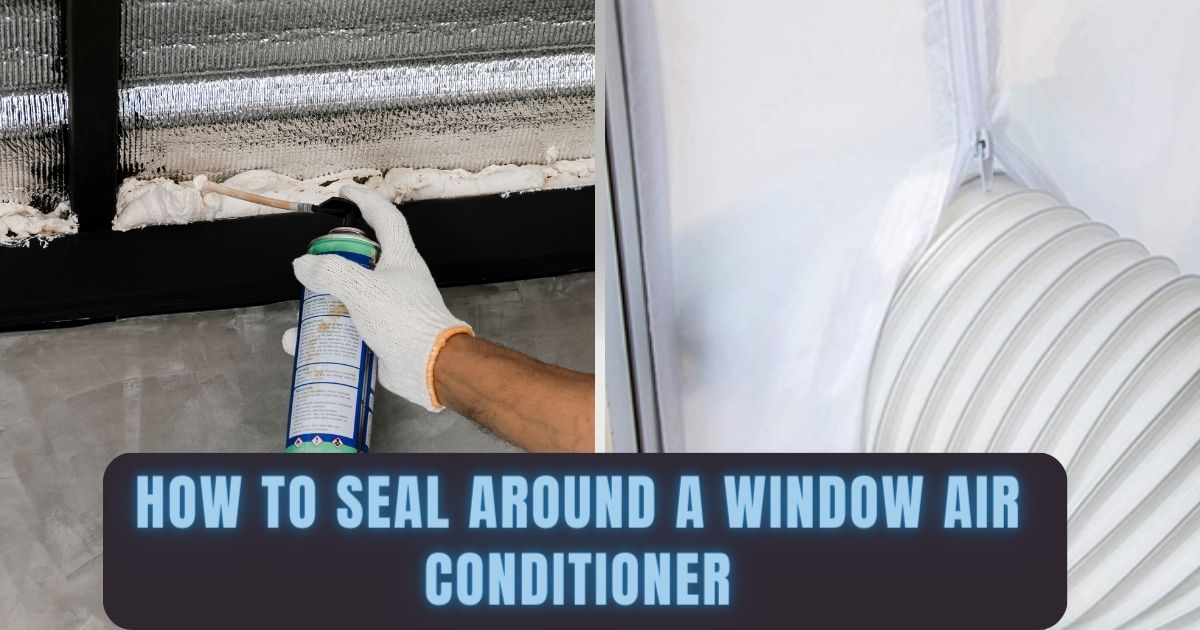
How To Seal Around A Window Air Conditioner For Improved Efficiency
To seal around a window air conditioner, you can take the following steps:
- Clean the window area and remove any debris.
- Install foam weatherstripping along the edges of the window.
- Apply caulk or sealant around the window frame.
- Use a window AC insulation kit to cover any gaps.
- Ensure a tight fit and proper insulation to prevent air leakage and improve efficiency.
Do you often find yourself cranking up the AC during the scorching summer months, only to have a pesky draft spoil your cool oasis? Or perhaps you dread opening your energy bill, knowing that your inefficient window air conditioner is sucking up precious energy and costing you a small fortune. If these scenarios sound all too familiar, then you’ve come to the right place.
Sealing around a window air conditioner may seem like a small task, but its impact can be significant. It not only prevents air leaks and drafts, but it also enhances the energy efficiency of your cooling system, leading to lower energy bills and a more comfortable living space.
Moreover, proper sealing can protect your home from potential water damage caused by condensation buildup. In this comprehensive guide, we will walk you through the steps to effectively seal around your window air conditioner. Whether you’re a homeowner looking to improve energy efficiency or a renter seeking cost-effective solutions, our easy-to-follow instructions and practical tips will equip you with the knowledge and skills to tackle this DIY home repair project.
Throughout the article, we will explore the common challenges faced by window air conditioner users, such as air leaks, drafts, high energy bills, and water damage. By the end, you’ll have the confidence to seal your window air conditioner like a pro, ensuring a comfortable and energy-efficient living space. So, let’s dive in and unlock the secrets to sealing around a window air conditioner, saving you money and keeping you cool all summer long.
Understanding the Importance of Sealing Around a Window Air Conditioner
Before we dive into the step-by-step process of sealing around a window air conditioner, let’s take a moment to understand why this task is so crucial. By sealing the gaps and cracks around your unit, you can experience a host of benefits that will enhance both your comfort and your wallet.
Preventing Air Leaks and Drafts
One of the primary reasons for sealing around a window air conditioner is to prevent air leaks and drafts. Over time, small gaps and cracks can develop around the unit, allowing outside air to seep in and conditioned air to escape. This leads to an inefficient cooling process, as your air conditioner has to work harder to maintain the desired temperature.
By effectively sealing these gaps, you create an airtight barrier that keeps the cool air inside your home and the hot air outside. This not only reduces energy waste but also ensures that your air conditioner operates at its optimal capacity, providing you with an even and comfortable indoor environment.
Improving Energy Efficiency
Air leaks and drafts can significantly impact the energy efficiency of your window air conditioner. When conditioned air escapes through gaps around the unit, your air conditioner has to compensate by running longer and working harder, leading to increased energy consumption.
By sealing around your window air conditioner, you create a tight seal that prevents air from escaping, allowing your air conditioner to operate efficiently. This, in turn, reduces your energy usage and lowers your monthly utility bills.
Reducing Energy Costs
By improving the energy efficiency of your window air conditioner, you can significantly reduce your energy costs. According to the U.S. Department of Energy, air conditioning accounts for approximately 6% of all electricity consumption in the United States.
Sealing around your window air conditioner allows you to optimize its performance, reducing the amount of energy required to cool your space. This can result in substantial savings on your monthly electricity bill, especially during the hot summer months when your air conditioner is running constantly.
Minimizing Water Damage
Condensation buildup is a common issue with window air conditioners, especially in humid climates. When warm, moist air from inside your home comes into contact with the cold surfaces of the unit, it condenses into water droplets.
If not properly addressed, this water buildup can lead to water damage, including mold growth and rotting of the surrounding window frame. Sealing around your window air conditioner helps to minimize condensation and redirect any water away from your home, protecting it from potential damage.
Creating a More Comfortable Living Space
By effectively sealing around your window air conditioner, you can create a more comfortable living space. A tight seal prevents drafts, drastically reducing the amount of outside noise, dust, and pollutants that enter your home.
Additionally, sealing around your unit helps to maintain a consistent indoor temperature, eliminating hot and cold spots in your home. This ensures that every room receives adequate cooling, providing you with a comfortable and enjoyable environment.
Step-by-Step Guide to Sealing Around a Window Air Conditioner
Now that you understand the benefits of sealing around a window air conditioner, let’s walk through the step-by-step process of completing this DIY home repair project. With the right tools and a little bit of time, you can seal your window air conditioner like a pro.
Step 1: Gather Your Tools and Materials
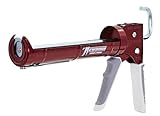
- Steel half-barrel (also called cradle) frame caulking gun for 1/10-gal. cartridges
- Thrust ratio of 10:1 for use with low viscosity materials
- Smooth pressure rod requires less force and is quieter than a ratchet-style pressure rod
- Rod retracts after each pull of the trigger to help prevent dripping
- Handle and trigger are padded for comfort
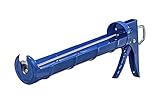
- Introducing the Bates caulking gun, your versatile companion designed to seamlessly dispense a variety of materials – from acrylic and adhesives to asphalt, butyl, and cement – with utmost precision.
- With its superior 10:1 thrust ratio, this caulking gun ensures precise bead control and consistent flow, making every application smoother than a jazz ballad.
- Crafted to perfection, this tool promises both durability and efficiency, standing up to the demands of professionals while also being user-friendly for the DIY enthusiasts.
- Its ergonomic design ensures a comfortable grip, allowing users to tackle extensive caulking jobs without a hint of hand fatigue.
- Whether you’re sealing gaps, binding materials, or waterproofing surfaces, the Bates Caulking Gun is your go-to tool, promising precision with every squeeze.

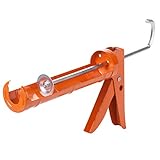
- 【Easy to operate】Cocew Caulking Gun is lightweight, the Smooth Pressure Rod is available with a high thrust ratio. 360°revolving barrel to maintain bead orientation when caulking around corners. Effortless to use for a long time.
- 【Perfect set】Use together with dripless caulk gun and sealant finishing tool grout scraper, remove stubborn old glue,smooth sealing lines,is your good helper in the process of caulking.
- 【Applicable in many scenarios】This professional caulking tool set is the ideal choice for home use (toilets, kitchens, living rooms) or outdoor decoration (walls, windows, roofs)
- 【Full fuction】The caulking gun is equipped with a through-needle to unclogging the blockage and the spout cutter could open caulk tubes easily.Drip free technology prevents dripping by releasing the trigger,easily control the flow of materials.The whole set of Caulk Remover& Glass Glue Angle Scraper can be used for different angles and shapes for caulking and waste removal.
- 【Best choice】High quality Cocew Caulking Gun can hold standard size 10oz cartridges.Well-designed packaging, you can send it as a gift to your families and friends.If there is any problem during use,please feel free to contact us.
- Package Dimensions: 7.9 cm (L) X 18.5 cm (W) X 36.1 cm (H)
- Model Number: 34-239

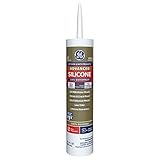
- 100% Waterproof: This 100% silicone formula offers ultimate protection against water damage, providing a reliable seal in areas prone to consistent water exposure
- Strong and Flexible: Stays permanently flexible with a high-performing, durable seal
- 30-Minute Water-Ready: Ready for water exposure in as little as 30 minutes
- Shrink- and Crack-Proof: Withstands extreme expansion and contraction associated with temperature fluctuations
- Compatible with Most Materials: Adheres to most metals, plastics, and woods; glass, drywall, plaster, granite, cultured marble, ceramic and porcelain tile, and more
- Strong and Flexible: Stays permanently flexible with a high-performing, durable seal
- 30-Minute Water-Ready: Ready for water exposure in as little as 30 minutes
- Shrink- and Crack-Proof: Withstands extreme expansion and contraction associated with temperature fluctuations
- MARINE SILICONE SEALANT: Available in black, white, and clear, this superior heavy-duty adhesive bonds to fiberglass, wood, glass, metal, and plastics. Ideal for above and below the waterline applications
- WATERPROOF & DURABLE: Provides a waterproof, airtight bond that won’t crack, shrink, or turn yellow. Resistant to sunlight, weathering, chemicals, and solvents. Dries tack-free in under an hour and cures completely in 24 hours
- VERSATILE APPLICATIONS: Perfect for mounting deck hardware and as a gasketing material under compression – Also great for windshields, portholes, through-hull fittings, joints, cracks, bathtubs, sinks, windows, doors, gutters, and more
- EASY TO APPLY & REMOVE: Applies easily with continuous pressure, tools into cracks or openings, and skins over in 10 minutes – Can be easily removed when desired, leaving no residue or damage behind
- LONG-LASTING PERFORMANCE: Forms a durable silicone rubber that remains flexible from -60°F to +450°F. Resistant to UV rays, weathering, chemicals, and solvents – Perfect for marine and home use alike

- IDEAL FOR: SEALING METAL ROOFS, WINDOWS, DOORS, SIDING, GUTTERS AND VENTS.
- SEALS: KYNAR COATED METALS, ALUMINUM, GALVANIZED STEEL, COPPER, PVC, WOOD, CONCRETE, MASONRY, STUCCO, WALL PANELS, VINYL, GLASS, PLASTIC, SIDING, FLASHING, SHEET METAL AND MOST COMMON BUILDING MATERIALS.
- OUTPERFORMS SILICONE, TRIPOLYMER AND URETHANE SEALANTS
- APPLIES IN EXTREME WEATHER CONDITIONS
- JOINT MOVEMENT CAPABILITY ± 50%

- Practical and High Quality: The film formed by invisible waterproof agent can isolate air, water, and moisture, ensuring long-lasting and roof waterproofing. The use of transparent waterproof coating can form a long-term protective film, and multi-layer overlap can form permanent bonding, saving time, cost, and manpower.
- Invisible repair: The waterproof agent is water-based, with a safe and environmentally friendly composition. After the transparent waterproof glue has solidified, it is transparent and it is difficult to see repair marks.
- Long lasting effect: Whether in winter or summer, waterproof insulating sealant will not easily crack or peel off. As time goes by, the waterproof layer will become more and more firm, with strong adhesion and sealing effect.
- Easy to use: Invisible waterproof anti-leakage agent can be used indoors or outdoors, making it easy to apply and repair. Use a brush to evenly and thinly apply glue to the surface of tiles, floor tiles, wall tiles, cement, etc. Wait for the water proof agent to completely dry before proceeding with a second application. It is recommended to apply 2-3 times to enhance the effect. After completing several applications, wait for 24-48 hours to ensure complete drying.
- Wide application: Transparent waterproof coating agent is suitable for ceramic tile walls, floors, concrete, cement surfaces, toilet edges, bathtubs, balconies, wood, exterior wall cracks, roofs, drainage ditches, skylights, chimneys, windows, exterior wall pipes, sealed pipe leaks, walls, corners, toilet leaks, etc.
Before you get started, it’s essential to gather all the tools and materials you’ll need for the project. Here’s a list of items you’ll likely require:
- Caulking gun
- Silicone caulk
- Weathertight sealant
- Putty knife or scraper
- Paintbrush or foam brush
- Rag or paper towels
- Window cleaner
- Tape measure
- Screwdriver
Make sure you have all these items on hand before you begin the sealing process.
Step 2: Clean the Area Around the Window Air Conditioner
Before you start sealing, it’s important to clean the area around your window air conditioner. Use a window cleaner and a rag or paper towels to remove any dirt, debris, or residue that may interfere with the sealing process.
Ensure that both the interior and exterior surfaces are clean and dry before proceeding to the next step.
Step 3: Inspect and Identify Gaps and Cracks
Thoroughly inspect the area around your window air conditioner to identify any gaps, cracks, or areas that require sealing. Common areas that may need attention include:
- The gap between the air conditioner and the window frame (applicable also for when installing window AC without drilling into window frame)
- Cracks or gaps in the caulking or sealant
- Spaces between the window frame and the wall
Take note of these areas, as they will be the focus of your sealing efforts.
Step 4: Remove Old Caulking or Sealant
If you find any old caulking or sealant that is cracked, deteriorated, or no longer effective, it’s important to remove it before applying new sealant. Use a putty knife or scraper to gently scrape away the old caulking, taking care not to damage the surrounding surfaces.
Ensure that the area is clean and free from any loose debris or residue.
Step 5: Apply New Sealant
Now it’s time to apply the new sealant. Load your caulking gun with a tube of silicone caulk or weathertight sealant, following the manufacturer’s instructions.
Starting from one corner, carefully apply a thin and even bead of sealant along the identified gaps and cracks. Use steady and consistent pressure to ensure proper coverage.
As you apply the sealant, use a paintbrush or foam brush to smooth and feather the edges, creating a seamless finish. This helps to blend the sealant with the surrounding surfaces and provides a professional appearance.
Step 6: Check for Proper Sealing
After applying the sealant, take a step back and inspect your work. Check for any missed areas or gaps that may require additional sealant.
You can also use your hand to feel for any drafts or air leaks around the window air conditioner. If you detect any, apply more sealant to those areas and smooth it out using your paintbrush or foam brush.
Step 7: Let the Sealant Cure
Once you’re satisfied with your sealing job, allow the sealant to cure according to the manufacturer’s instructions. This usually takes about 24 to 48 hours, but it’s essential to follow the recommended curing time to ensure proper adhesion and effectiveness.
Step 8: Test for Improved Efficiency
After the sealant has cured, it’s time to test your newly sealed window air conditioner for improved efficiency. Turn on your air conditioner and monitor its performance.
If you notice a significant reduction in drafts, air leaks, and noise, then you can rest assured that your sealing efforts have paid off.
It’s important to remember that regular maintenance and inspection are key to ensuring the longevity and effectiveness of your seal. Periodically check the sealant for any signs of cracking or deterioration, and reapply as necessary.
Sealing around a window air conditioner may seem like a small task, but its impact is significant. By preventing air leaks and drafts, improving energy efficiency, reducing energy costs, minimizing water damage, and creating a more comfortable living space, proper sealing can transform your cooling experience.
With the step-by-step guide provided in this article, you now have the knowledge and skills to seal your window air conditioner like a pro. So go ahead, take control of your comfort and energy savings, and enjoy a cool and efficient living space all summer long.
Portable Air Conditioners – Why you shouldn’t like them
Frequently Asked Questions (FAQ)
How do I seal around a window air conditioner?
What type of weatherstripping should I use?
Can I use duct tape to seal around the air conditioner?
How often should I check the seal around my window air conditioner?
Can I use caulk to seal around the air conditioner?
Conclusion: Importance and Steps for Sealing Around a Window Air Conditioner
In conclusion, sealing around a window air conditioner is crucial for several reasons. First, sealing prevents air leaks and drafts, ensuring an efficient cooling process and maintaining a comfortable indoor environment.
Second, it improves energy efficiency by reducing energy waste and lowering monthly utility bills. Third, sealing minimizes water damage caused by condensation buildup.
Fourth, it creates a more comfortable living space by reducing outside noise and maintaining a consistent indoor temperature. To effectively seal around a window air conditioner, follow these steps: 1. Gather the required tools and materials.
2. Clean the area around the air conditioner. 3.