Introduction
Finding water leaking from your Carrier air conditioner can be alarming. Not only can it cause water damage to your home, but it also indicates that your AC system isn’t working efficiently. This guide will walk you through the common reasons why your AC might be leaking and provide step-by-step instructions to troubleshoot and fix the problem. Addressing this issue promptly can prevent further damage and costly repairs down the line, making it a priority for any homeowner.
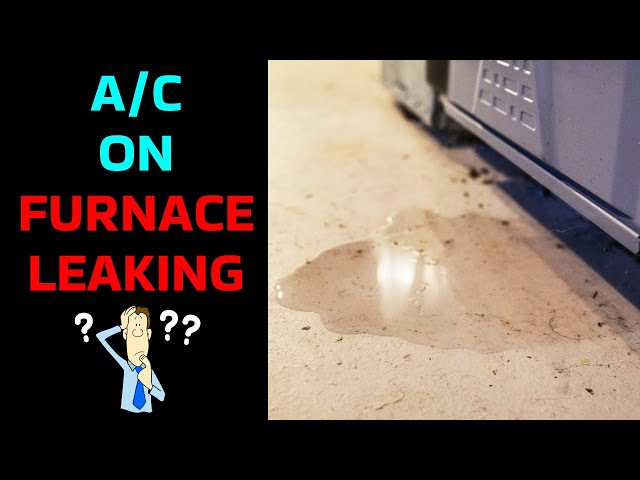
Common Causes of Carrier Air Conditioner Leaking Water
Here are some of the most frequent culprits behind a leaky air conditioner:
- Clogged Condensate Drain Line: This is the most common cause. Algae, mold, and debris can build up in the drain line, causing it to clog and water to back up.
- Dirty Air Filter: A dirty air filter restricts airflow, causing the evaporator coil to freeze. When the ice melts, it drips water.
- Low Refrigerant Levels: Low refrigerant can also cause the evaporator coil to freeze, leading to water leakage when the ice thaws.
- Damaged Drain Pan: The drain pan collects condensation. If it’s cracked or rusted, water will leak.
- Improper Installation: If the AC unit wasn’t installed correctly, it might not be properly leveled, leading to drainage issues.
- Broken Condensate Pump: Some AC systems use a pump to remove condensation. If the pump fails, water can overflow.
- High Humidity: On particularly humid days, the AC might produce more condensation than usual, potentially overwhelming the drainage system.
- Evaporator Coil Problems: Over time, the evaporator coil can become corroded or damaged, impacting its ability to manage condensation properly.
Symptoms Checklist
Here are some signs that your Carrier air conditioner is leaking water:
- Water stains on the ceiling near the AC unit.
- Puddles of water around the indoor unit.
- Dampness or moldy smell near the AC unit.
- The AC unit is running, but the house isn’t cooling properly.
- Visible ice forming on the evaporator coil.
How to Fix Carrier Air Conditioner Leaking Water Step-by-Step Guide
Follow these steps to troubleshoot and fix the leak:
- Turn off the AC: Switch off your Carrier AC unit at the thermostat and the breaker to avoid electrical hazards.
- Inspect the Air Filter: Remove the air filter and check if it’s dirty. If so, clean or replace it with a new one.
- Locate the Condensate Drain Line: This is usually a PVC pipe located near the indoor unit.
- Check for Clogs: Look for any visible obstructions in the drain line opening.
- Flush the Drain Line: Use a wet/dry vacuum to suck out any clogs. Attach the vacuum hose to the end of the drain line outside and run the vacuum for a few minutes. Alternatively, you can pour a cup of distilled vinegar into the drain line to dissolve clogs. Let it sit for 30 minutes, then flush with water.
- Check the Drain Pan: Inspect the drain pan for cracks or rust. If it’s damaged, it will need to be replaced (this is often best left to a professional).
- Inspect the Evaporator Coils: If you can safely access the evaporator coils (usually behind a panel), check for ice buildup. If you see ice, let it thaw completely before proceeding.
- Ensure Proper Airflow: Make sure that vents are not blocked by furniture or curtains. Good airflow helps prevent ice buildup.
- Check the Condensate Pump (If Applicable): If your system has a condensate pump, check if it’s working correctly. You might need to clean the pump reservoir.
- Level the Unit: Ensure that the indoor unit is level. Use a level to check, and adjust the unit as necessary.
- Run the AC and Monitor: Turn the AC back on and monitor it for leaks. It may take some time for the system to normalize.
- Repeat if Necessary: If the leak persists, repeat the steps above, paying close attention to the drain line and drain pan.
- Consider Professional Help: If you’ve tried these steps and the leak continues, it’s time to call a qualified HVAC technician.
Fix the Issue Without Buying Parts
Many leaks can be resolved without purchasing replacement parts:
- Regular Cleaning: Clean the air filter monthly and flush the condensate drain line every few months to prevent clogs.
- Proper Airflow: Ensure that vents are open and unobstructed.
- AC Reset: Sometimes, simply turning off the AC at the breaker for 30 minutes can reset the system and resolve minor issues.
- Inspect Regularly: Periodically inspect the AC unit for any signs of leaks or unusual noises.
- Maintenance Basics: Keep the area around the outdoor unit free of debris to ensure proper airflow.
When Replacement Might Be Necessary
In some cases, replacement of parts or the entire unit may be necessary:
- Damaged Drain Pan: If the drain pan is severely cracked or rusted, replacement is often the best option. Expect to pay between $50 and $200 for a replacement.
- Faulty Condensate Pump: A failing condensate pump may need replacement, costing around $50 to $150.
- Refrigerant Leaks: If the leak is due to low refrigerant caused by a refrigerant leak within the sealed system, repair could be very expensive. Depending on the age and condition of your unit, replacement may be the more economical option. A new AC unit can range from $3,000 to $7,000, including installation.
Safety Warning
Follow these safety precautions when working on your AC unit:
- Always turn off the power to the AC unit at the breaker before starting any work.
- Avoid touching any electrical components while the power is on.
- Be careful when working with water to avoid slips and falls.
- Wear gloves to protect your hands.
- If you are not comfortable performing any of these steps, consult a qualified HVAC technician.
Tools You May Need
Here’s a list of tools that can be helpful for troubleshooting and fixing the leak:
- Wet/dry vacuum
- Screwdrivers (Phillips and flathead)
- Adjustable wrench
- Level
- Distilled vinegar
- Gloves
- Flashlight
FAQ
Here are some frequently asked questions about AC leaks:
- Why is my AC leaking even after I cleaned the filter? There might be other issues like a clogged drain line or low refrigerant. Follow the troubleshooting steps outlined above.
- How often should I clean the condensate drain line? It’s recommended to clean it every 3-6 months to prevent clogs.
- Can a dirty air filter cause my AC to leak? Yes, a dirty air filter can restrict airflow and cause the evaporator coil to freeze, leading to water leakage.
- When should I call a professional? If you’ve tried the troubleshooting steps and the leak persists, or if you’re not comfortable working on the AC unit yourself, it’s best to call a qualified HVAC technician.
Conclusion
A leaking Carrier air conditioner can be a nuisance, but with a bit of troubleshooting and these DIY steps, you can often resolve the issue yourself. Remember to prioritize safety and take regular maintenance seriously. If you’re not comfortable tackling the problem on your own, don’t hesitate to call a professional HVAC technician for assistance. Good luck!
Youtube Video:
Looking for more useful options?
Check out recommended resources that others find helpful.