
Introduction
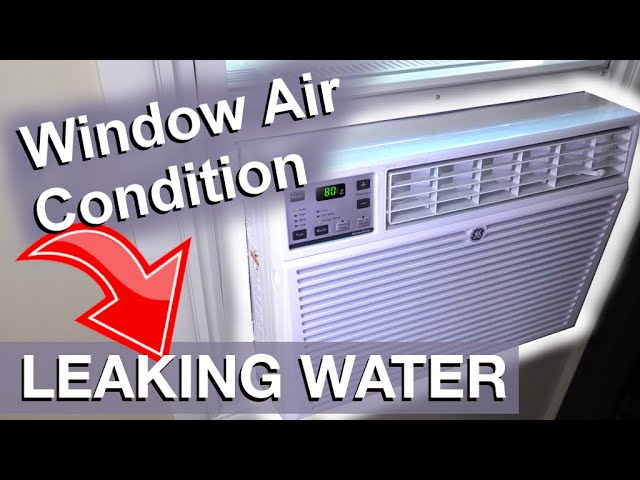
Finding water dripping from your window AC unit can be frustrating and concerning. Its a common issue, particularly during periods of high humidity or heavy use. While a little condensation is normal, excessive leaking suggests a problem that needs addressing. Ignoring a leaky AC can lead to water damage to your walls and floors, mold growth, and reduced cooling efficiency. Let’s get to the bottom of this problem before it gets worse!
💡 Technical Key Takeaways:
- Core Focus: Diagnostic schematic and terminal connection layout for My Window Ac Is Leaking Water.
- Target Scope: Field technicians, automotive DIYers, and residential/commercial electricians.
- Safety Rule: Always disconnect the primary power source/battery terminal and verify zero voltage with a multimeter before touching wires.
Common Causes of My Window AC is leaking water
Here are some of the most common reasons why your window AC unit might be leaking water:
- Clogged Drain: This is the most frequent cause. The drain hole or tube that channels condensation outside can become blocked by dust, dirt, or mold.
- Improper Installation: If the AC isn’t tilted slightly outward, water can’t drain properly and will leak inside.
- Dirty Air Filter: A clogged air filter restricts airflow, causing the evaporator coil to freeze. When the ice melts, it overwhelms the drainage system.
- Frozen Evaporator Coil: As mentioned above, this can result from a dirty air filter or a refrigerant leak.
- Damaged Drain Pan: The drain pan, which collects condensation, can crack or rust, leading to leaks.
- High Humidity: Extremely humid conditions can sometimes overwhelm the AC’s drainage capacity, causing temporary leaks.
- Refrigerant Leak: Low refrigerant levels can cause the evaporator coil to freeze, resulting in excess water when it melts.
- Broken Seal: The seal between the AC unit and the window frame can deteriorate, allowing water to leak inside.
Symptoms Checklist
Check these indicators to help pinpoint the problem:
- Water dripping from the front of the AC unit.
- Water pooling inside the room near the AC unit.
- Ice forming on the cooling fins (evaporator coil).
- A musty or moldy smell coming from the AC unit.
- Reduced cooling performance.
- Louder than usual operating noise.
- Water stains on the wall beneath the AC unit.
How to Fix my window ac is leaking water Step-by-Step Guide
- Unplug the AC: Safety first! Disconnect the AC unit from the power outlet.
- Inspect the Air Filter: Remove the air filter and check if it’s dirty. If it is, wash it with mild soap and water, let it dry completely, and reinstall it. If the filter is very old, consider replacing it.
- Locate the Drain Hole: Look for a small drain hole on the outside of the AC unit, usually at the back or bottom.
- Clear the Drain Hole: Use a straightened paperclip, pipe cleaner, or small wire to gently clear any blockage in the drain hole. Work slowly and carefully to avoid damaging the hole.
- Check the Drain Tube (if applicable): Some units have a drain tube connected to the drain hole. Disconnect the tube and check for clogs. Flush it out with water if necessary.
- Ensure Proper Tilt: The AC unit should be slightly tilted downward and away from the room. Use shims or small pieces of wood to adjust the angle if needed.
- Inspect the Drain Pan: Carefully remove the AC unit’s outer casing (refer to your user manual for instructions). Check the drain pan for cracks, rust, or debris. Clean it thoroughly.
- Melt any Ice: If you see ice buildup on the evaporator coils, allow the AC to thaw completely. You can speed this up by using a hairdryer on a low setting, keeping it at a safe distance.
- Clean the Evaporator Coils: Once thawed, clean the evaporator coils with a soft brush or vacuum cleaner attachment to remove dust and debris.
- Check the Window Seal: Make sure the seal between the AC unit and the window frame is intact and tight. If the seal is damaged, replace it with weather stripping or foam tape.
- Reassemble the AC: Carefully reassemble the AC unit’s casing, making sure all parts are properly aligned.
- Plug in the AC: Plug the AC unit back into the power outlet.
- Monitor for Leaks: Turn on the AC and monitor it for any signs of leaks. It may take a few minutes for the condensation to start draining properly.
- Repeat if Necessary: If the leaking persists, repeat the above steps, paying close attention to the drain hole and drain pan.
Fix the Issue Without Buying Parts
Many leaks can be resolved without spending any money:
- Reset the AC: Unplug the unit for 15 minutes, then plug it back in. This can sometimes reset the internal components and resolve minor issues.
- Thorough Cleaning: Regular cleaning of the air filter and surrounding areas can prevent future clogs and leaks.
- Recalibration (If Possible): Some AC units have calibration settings. Check your user manual to see if recalibrating the unit can help improve drainage.
- Inspection Tips: Regularly inspect the unit for any signs of damage or wear, such as cracks, rust, or loose seals.
- Maintenance Basics: Keep the area around the AC unit clean and free of obstructions.
When Replacement Might Be Necessary
In some cases, the problem might be too severe to fix with simple troubleshooting. Here are scenarios where replacement might be necessary:
- Extensive Rust or Corrosion: If the drain pan or other critical components are severely rusted or corroded, replacement is often the best option.
- Refrigerant Leaks: If you suspect a refrigerant leak, contact a certified technician to repair the leak and recharge the refrigerant. However, if the leak is significant or the AC unit is old, replacement might be more cost-effective.
- Major Component Failure: If the compressor or other major components fail, replacement is usually the most practical solution.
Estimated replacement cost ranges from $150 to $500+ USD, depending on the size and features of the AC unit. Commonly failing parts include the compressor, fan motor, and control board.
Safety Warning
- Always unplug the AC unit before performing any maintenance or repairs.
- Avoid working on the AC unit if you’re standing in water.
- Be careful when handling sharp objects or tools.
- If you’re not comfortable performing the repairs yourself, contact a qualified technician.
- Never attempt to repair refrigerant leaks yourself. Refrigerant is a hazardous substance and requires specialized equipment and training to handle safely.
Tools You May Need
- Screwdriver (Phillips and flathead)
- Pliers
- Paperclip or pipe cleaner
- Soft brush or vacuum cleaner attachment
- Mild soap and water
- Clean cloths
- Weather stripping or foam tape (if replacing the seal)
FAQ
Here are some frequently asked questions about leaky window AC units:
- Q: Why is my AC leaking more water on humid days? A: High humidity increases condensation, which can overwhelm the drainage system.
- Q: How often should I clean my AC filter? A: Ideally, clean it every 2-4 weeks, or more often if you have pets or allergies.
- Q: Can I use bleach to clean the drain pan? A: Avoid using harsh chemicals like bleach, as they can damage the drain pan and other components. Use mild soap and water instead.
- Q: Is it normal for my AC to make dripping sounds? A: Some dripping sounds are normal, especially when the AC is running. However, excessive or constant dripping might indicate a problem.
- Q: My AC is still leaking after I cleaned the drain hole. What should I do? A: Double-check the tilt of the unit, inspect the drain pan for cracks, and ensure the air filter is clean. If the problem persists, a frozen coil or refrigerant leak might be the issue.
Conclusion
Addressing a leaky window AC unit can seem daunting, but with these simple steps, you can often diagnose and resolve the problem yourself. Remember to prioritize safety and take your time. By regularly cleaning and maintaining your AC unit, you can prevent future leaks and keep your home cool and comfortable. If you’ve tried these steps and your AC is still leaking, don’t hesitate to call a qualified technician for assistance. Good luck!
Youtube Video:
Quick Wiring Specifications & Terminal Guide
| Component / Circuit | Standard Wire Gauge | Recommended Protection |
|---|---|---|
| Control & Trigger Signals | 18 – 20 AWG | 5A – 7.5A Inline Fuse |
| Standard Auxiliary Load | 14 – 16 AWG | 15A – 20A Circuit Breaker |
| Main Power Feed / Supply | 10 – 12 AWG | 30A – 40A Heavy-Duty Relay |
Images References
Looking for more diagnostic guides? Explore our complete Air Conditioner Troubleshooting 5 section for step-by-step troubleshooting solutions.
