Mastering The R134A: How To Use An Ac Manifold Gauge Set For Optimal Cooling
To use an AC manifold gauge set with R134a, follow these steps:
1. Familiarize yourself with the components of the gauge set, such as the high- and low-pressure gauges, valves, and hoses.
2. Attach the hoses to the corresponding ports on the AC system, ensuring a secure connection.
3. Open the valves on the gauge set to allow refrigerant flow.
4. Start the vehicle and turn on the AC system.
5. Monitor the pressure readings on the gauges, comparing them to the manufacturer’s specifications for the system.
6. If necessary, add or evacuate refrigerant to achieve the correct pressure levels.
7. Close the valves and disconnect the gauge set when finished.
These steps will help you effectively use the AC manifold gauge set with R134a, providing valuable information about your AC system’s performance and allowing you to optimize cooling.
The sweltering heat of summer is a relentless adversary to the comfort of our daily commute. As we flick the switch, hoping for a blast of cool air to provide sweet relief, all too often we are met with a feeble stream of lukewarm air.
The culprit? A struggling air conditioning system. But fear not, intrepid car owners, for there is a tool that holds the key to restoring icy coolness to our interiors: the AC manifold gauge set.
While many may be unfamiliar with this instrument, it possesses a wealth of knowledge waiting to be harnessed. By connecting it to your vehicle’s air conditioning system, you can unlock a treasure trove of information about its performance, efficiency, and health. With this newfound wisdom, you can diagnose issues, detect leaks, and optimize cooling to ensure a refreshing breeze on even the most scorching of days.
In this article, we will delve into the world of the R134a refrigerant and unravel the mysteries of the AC manifold gauge set. Together, we will master this powerful tool and discover the secrets to achieving optimal cooling for your beloved vehicle. So, gear up and get ready to become the hero of your own air conditioning saga.

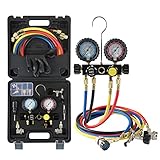
- COMPLETE GAUGE SET: This professional automotive AC tool kit includes a 3-way gauge, 3 color-coded hoses, 2 adjustable 1/4” quick couplers, a 1/4” to 1/2” 29° trap adapter, and a puncture-style can tap. Easily nip your HVAC problems in the bud
- HYBRID ANTISHOCK GAUGES: The 2.6″ high and low pressure gauges combine the best features of dry and liquid-filled designs, with an oil-filled core resisting wear and shock and a dry dial providing better winter performance
- BUILT TO LAST: Made from solid brass, ABS, and rubber, this AC manifold gauge set is designed for years of reliable heavy-duty use; the moisture indicator monitors your coolant’s condition in real time; and calibration screws ensure 1.6% accuracy
- COLOR-CODED HOSES: Blue for low, red for high, and yellow for charging, these PVC hoses have 4 reinforced layers to work with daily pressure up to 600 psi (3000 psi burst pressure)
- WIDE APPLICATION: This car AC gauge set works with R134a, R12, R22, and R502 refrigerants; ideal for both DIY and professional HVAC maintenance, it allows you to measure your system’s pressure, evacuate and refill coolant, and more

- EXCELLENT MAINTENANCE TOOL: The VIVOHOME 4 CFM Vacuum Pump features die-cast aluminum housing and a composite anti-slip rubber base, making it lightweight and durable; Ideal for diagnosing and recharging AC systems on your own; Efficiently removes moisture from air conditioning systems before refilling with refrigerant
- COMFORTABLE & PORTABLE DESIGN: The ergonomic grip handle provides superior comfort and portability; A built-in high-volume cooling fan ensures extended use; The oil sight glass lets you easily monitor oil levels and quality; An oil drain valve at the bottom enables quick and thorough emptying; Includes a 0.35 qt./330 ml bottle of vacuum oil
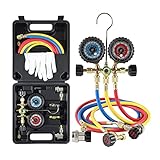
- MANIFOLD GAUGE SET: Designed to accurately measure pressure in refrigeration systems, the manifold gauge set comes with a carrying bag for easy storage and transport; Large viewing glasses on the manifolds allow clear visibility of refrigerant flow, and high-quality, color-coded pressure gauges provide precise readings
- COLOR-CODED HOSES: The color-coded hoses help differentiate the high-pressure side (red), low-pressure side (blue), and the filling hose (yellow); Made from durable, flexible rubber with a leak-proof seal design, they are built to last; Compatible with R134a, R12, R22, R502, and R410a systems and equipped with R410a fitting adapters from 1/4 in to 5/16 in
- ALL NECESSARY ACCESSORIES: Includes a single-stage vacuum pump, a bottle of oil, a leak detector, and a gauge set; Perfect for automotive air conditioning, HVAC work, refrigeration, and other applications requiring a high vacuum pull from a compact pump

- Exceptional Durability: The PBMT manifold gauge is crafted using high-quality raw materials for heavy-duty use, boasts a lightweight design, and can be easily transported
- Complete Set: Our professional manifold gauge set includes a 3-way gauge, 3 color-coded hoses, and 2 1/4″ straight quick couplers, eliminating the need for additional spare parts
- Outstanding Features: Our manifold gauge is crafted from solid metal that is durable and easy to use. The sight glass window assists in checking refrigerant levels, and the extra-large dials with rubber coating facilitate easy reading of temperature and results while safeguarding the gauge
- Color-coded & Versatile: Three color-coded hoses for high, low, and charging areas – 4 feet long with a 500 psi working pressure and 2500 psi burst pressure, ideal for standard refrigerants and suitable for DIYers and professionals
- Wide Compatibility: The PBMT manifold gauge set is perfect for automotive and domestic air conditioning maintenance. It is compatible with R134A R12, R22, R502 refrigerants, making it an incredibly versatile choice
- Multifunctional AC / HVAC Gauge Set: professional automotive air conditioning diagnostic manifold gauge set will compatible with R134A R410A R404A R22 refrigerants, perfect for AC HVAC freon charging, evacuation, diagnostic check and recovery work
- Colorful Four Valve Design: include 4 pieces extra long 5 FT and high impact hose, red (blue) hose connect with high (low) pressure quick coupler and compressor high (low) side, yellow hose connect with cans bottle, black hose connect with vacuum pump
- Complete Freon Gauge Set: (1) 4 way diagnostic gauge, (4) 5FT colored hose, (2) adjustable quick coupler, (1) adjustable can tap valve, (1) ACME Adapter, (2) Tank Adapter, (1) valve core remover
- Heavy Duty Tool Set: made from durable brass and aluminum for all metal parts, ideal for professional auto mechanics. Fahrenheit degree unit with easy to read instrument panel, pressure range: 0-550 PSI (blue gauge), 0-800 PSI (red gauge)
- Easy to Operate: Easy to assembly and operate design for an efficiently ac charging work, include step by step manual to help renew your ac cooling system safety and potency

- COMPLETE GAUGE SET: This professional automotive AC tool kit includes a 3-way gauge, 3 color-coded hoses, 2 adjustable 1/4” quick couplers, a 1/4” to 1/2” Acme adapter, and both self-sealing and puncture-style can taps
- HYBRID ANTISHOCK GAUGES: The 68 mm high and low pressure gauges combine the best features of dry and liquid-filled designs, with an oil-filled core resisting wear and shock and a dry dial providing better winter performance
- COLOR-CODED HOSES: Blue for low, red for high, and yellow for charging, these PVC hoses have 4 reinforced layers to work with daily pressure up to 600 psi (3000 psi burst pressure)
- WIDE APPLICATION: This car AC gauge set works with R134a, R12, R22, and R502 refrigerants; ideal for both DIY and professional HVAC maintenance, it allows you to measure your system’s pressure, evacuate and refill coolant, and more
- 2 CAN TAPS: This AC manifold gauge kit includes both puncture-style and self-sealing can taps to work with your refrigerant cannisters both new and old

- COMPLETE AC TOOL SET: This kit includes a 4-way gauge, 4 color-coded hoses, 2 adjustable 1/4” quick couplers, a 1/2” to 1/4” 29° trap adapter, a 1/4” to 5/16” tank adapter, 5/16” to 1/4” angled and straight adapters, and a puncture-style can tap
- HYBRID ANTISHOCK GAUGES: The 2.6″ high and low pressure gauges combine the best features of dry and liquid-filled designs, with an oil-filled core resisting wear and shock and a dry dial providing better winter performance
- BUILT TO LAST: Made from solid brass, ABS, and rubber, this AC manifold gauge set is designed for years of reliable heavy-duty use; the moisture indicator monitors your coolant’s condition in real time; and calibration screws ensure 1.6% accuracy
- COLOR-CODED HOSES: Blue for low, red for high, yellow for charging, and black for evacuation, these PVC hoses have 4 layers to work with pressure up to 800 psi (4000 psi burst pressure)
- WIDE APPLICATION: This car AC gauge set works with R134a, R22, and R410a refrigerants; ideal for both DIY and professional HVAC maintenance, it allows you to measure your system’s pressure, evacuate and refill coolant, and more

- COMPLETE GAUGE SET: Orion Motor Tech’s professional automotive AC tool kit includes a 3-way gauge, 3 color-coded hoses, 2 1/4” quick couplers, a 1/4” to 1/2” 29° trap adapter, and a puncture-style can tap. Easily nip your HVAC problems in the bud
- HYBRID ANTISHOCK GAUGES: The 2.6″ high and low pressure gauges combine the best features of dry and liquid-filled designs, with an oil-filled core resisting wear and shock and a dry dial providing better winter performance
- BUILT TO LAST: Made from solid brass, ABS, and rubber, this AC manifold gauge set is designed for years of reliable heavy-duty use; the moisture indicator monitors your coolant’s condition in real time; and calibration screws ensure 1.6% accuracy
- COLOR-CODED HOSES: Blue for low, red for high, and yellow for charging, these PVC hoses have 4 reinforced layers to work with daily pressure up to 600 psi (3000 psi burst pressure)
- WIDE APPLICATION: This car AC gauge set works with R134a, R12, R22, and R502 refrigerants; ideal for both DIY and professional HVAC maintenance, it allows you to measure your system’s pressure, evacuate and refill coolant, and more

- Professional A/C diagnostic manifold gauge set for R134A, R12, R22, R502 refrigerants. Made from solid brass + aluminum + PVC + plastic
- Blue Gauge (low): 0-350 PSI; Red Gauge (high): 0-500 PSI; 3000 PSI burst pressure, 600 PSI maximum working pressure, Fahrenheit(°F) degree unit.
- Include 3 color freon charging hose(5ft) for easily recognition, high (red) & low (blue) pressure.
- Complete diagnostic and service gauge set for use on air condition systems (home or automotive)
- Package included:1 x gauge (1/4″ male); 3 x hoses (36″, 1/4″ female); 2 x adjustable couplers (1/4″ male, adjustable); 1 x ACME adapter (1/4″ male to 1/2″ female); 1 x can tap(piercing-style) (1/4″ male); 1 x case; 1 x manual

- AIR CONDITIONING DIAGNOSTICS: A must-have tool kit for performing A/C system work in your home garage or mechanic shop. Professional quality 3-way diagnostic manifold gauge set for R134A, R12, R22, R502refrigerants for checking pressure in AC lines, leak determination, freon top-offs, and complete evacuation & recharges
- UPGRADED XL GAUGE DIALS: Fahrenheit units with large, easy-to-read fonts, thickened rubber covers on the dial heads offer extra grip and protection for premium, long-lasting performance
- EXTRA STRENGTH HOSES: Hoses rated 600 PSI working pressure & 3000 PSI burst pressure. A rugged neoprene coating offers flexibility and wear-resistance, ensuring expanded lifetime and dependability. Standard 1/4 inch female flare fittings with valve core depressor and 45° bend on one end for convenient access
- DURABLE CONSTRUCTION: Made from solid brass, aluminum, ABS and rubber, the AC manifold gauge set stands up to years of heavy use, ideal for professional auto mechanics. A detailed parts diagram and step-by-step instructions help average joes work independently
- SAFETY EQUIPMENT INCLUDED: Designed with your safety in mind, we included essential protective equipment: 1.) Strong & reliable nitrile-coated work gloves. 2.) Shatter-proof glasses for eye protection. Always use while performing vehicle maintenance
- MULTIFUNCTIONAL AIR CONDITIONER GAUGE KIT: Professional 3 way automotive air conditioning diagnostic manifold gauge set will compatible with R134A R12 R22 R502 refrigerants, perfect for AC freon charging, evacuation, diagnostic check and recovery work
- CLEAR DIALS: Extra large and colored dials with fahrenheit degree unit is easy to read, gauge rated 500 psi (red) and 350 psi (blue) max pressure. Sight glass design will help you see the flowing liquid refrigerant, when charging the refrigerant
- HIGH QUALITY HOSE: Include 3 pieces extra long 5 FT and high impact hose, thickening hose body with precise valve core depressor and 45 degree bend on one end for convenient access. Hose rated 600 psi max max working pressure and 3000 psi burst pressure
- COMPACT ACCESSORIES: Precise movement with upgraded gauge shell, stands up to heavy use and accidental drops, all metal parts made from durable brass and aluminum materials. Great for your home garage or mechanic shop
- PRODUCT INCLUDES: 3 way gauge, 3 pcs hoses, 2 pcs Adjustable R134A Adapters, 2 pcs puncture and self sealing can taps, acme adapter, valve core remover, gloves
I. Understanding the AC Manifold Gauge Set
A. Introduction to AC Manifold Gauge Set
The AC manifold gauge set is a versatile tool used for servicing and troubleshooting automotive air conditioning systems. It consists of several components that allow you to measure pressure, temperature, and vacuum levels in the system. With this information, you can diagnose problems, perform maintenance, and optimize the cooling performance of your AC system.
B. Components of AC Manifold Gauge Set
The AC manifold gauge set typically includes the following components:
- High-pressure gauge
- Low-pressure gauge
- High-pressure hose
- Low-pressure hose
- Vacuum pump hose
- Valves and knobs for controlling pressure and vacuum
These components work together to provide accurate readings and allow you to connect the gauge set to the AC system.
C. Importance of Using R134a Refrigerant
R134a refrigerant is the standard refrigerant used in most modern automotive air conditioning systems. It is environmentally friendly and does not deplete the ozone layer, making it a safer alternative to previously used refrigerants. Using the correct refrigerant is essential for maintaining the performance and efficiency of your AC system.
D. Safety Precautions and Tools Required
Before using the AC manifold gauge set, it is important to take proper safety precautions and ensure you have the necessary tools. Some key safety precautions include:
- Wearing protective eyewear and gloves
- Keeping flammable materials away from the working area
- Properly ventilating the area to avoid inhaling refrigerant vapors
In addition to these safety precautions, you will need basic tools such as wrenches, pliers, and a vacuum pump to effectively use the AC manifold gauge set.
II. Preparing for AC System Service
A. Gathering Necessary Materials and Tools
Before you can start using the AC manifold gauge set, gather all the necessary materials and tools. This includes the gauge set itself, the refrigerant, a vacuum pump, and any additional tools specified by the manufacturer.
B. Checking Manufacturer’s Specifications
Check the manufacturer’s specifications for your specific AC system to understand the recommended operating pressures, the type and amount of refrigerant required, and any other important details. Following these specifications will ensure optimal performance and prevent damage to the system.
C. Identifying the Service Port Locations
Locate the service ports on your AC system. These ports allow you to connect the AC manifold gauge set to the system. There are typically two ports: the high-pressure port and the low-pressure port. Refer to your vehicle’s manual or the manufacturer’s guidelines to find the exact location of these ports.
D. Ensuring Proper Safety Measures
Before starting any work on the AC system, ensure you have taken proper safety measures. This includes wearing protective gear, working in a well-ventilated area, and following all safety guidelines provided by the manufacturer.
III. Connecting the AC Manifold Gauge Set
A. Attaching the High-Pressure Hose
Start by attaching the high-pressure hose of the AC manifold gauge set to the high-pressure service port on the AC system. Ensure a secure connection by tightening the hose fitting using the appropriate wrench or tool.
B. Connecting the Low-Pressure Hose
Next, connect the low-pressure hose of the AC manifold gauge set to the low-pressure service port on the AC system. Again, make sure the connection is secure to prevent any leaks.
C. Securing the Vacuum Pump Hose
If you need to evacuate the AC system, connect the vacuum pump hose to the dedicated port on the AC manifold gauge set. This hose will be used to remove any air and moisture from the system before recharging it with refrigerant.
D. Verifying Proper Attachment and Sealing
Once all the hoses are connected, double-check that each connection is secure and properly sealed. Any leaks can affect the accuracy of the readings and may lead to improper servicing of the AC system.
IV. Evaluating AC System Readings
A. Understanding Pressure Gauges
The AC manifold gauge set features two pressure gauges: the high-pressure gauge and the low-pressure gauge. These gauges provide readings that help diagnose potential issues with the AC system.
1. High-Pressure Gauge Reading
The high-pressure gauge measures the pressure on the high side of the AC system. Normal operating pressures vary depending on the ambient temperature and the type of AC system, so refer to the manufacturer’s specifications for specific guidelines.
2. Low-Pressure Gauge Reading
The low-pressure gauge measures the pressure on the low side of the AC system. Similar to the high-pressure gauge, the readings will depend on the system and ambient conditions. Refer to the manufacturer’s specifications for the proper range.
B. Interpreting Pressure & Temperature Relationship
Understanding the relationship between pressure and temperature is crucial for diagnosing AC system issues. As the pressure increases, so does the temperature, and vice versa. By comparing the pressure readings to the corresponding temperatures, you can identify potential issues such as refrigerant overcharge or undercharge.
C. Analyzing Pressure Readings for Diagnosis
Abnormal pressure readings can indicate various problems within the AC system. High-pressure readings coupled with poor cooling performance may suggest a restriction or blockage, while low-pressure readings can indicate a refrigerant leak or a faulty compressor. Analyzing these readings can help pinpoint the cause of the problem and guide your troubleshooting steps.
V. Evacuating the AC System
A. Importance of Vacuuming the System
Before recharging the AC system with refrigerant, it is crucial to evacuate or vacuum the system. This process removes any air and moisture that may have entered the system, ensuring optimal performance and preventing potential damage.
B. Connecting the Vacuum Pump
Connect the vacuum pump to the AC manifold gauge set using the dedicated hose. Make sure the connection is secure to avoid any air leaks during the evacuation process.
C. Evacuating Moisture and Air
Once the vacuum pump is connected, turn it on and allow it to run for the recommended duration specified in the manufacturer’s guidelines. This process will remove moisture and air from the AC system, creating a vacuum.
D. Monitoring and Maintaining Appropriate Vacuum Levels
While the vacuum pump is running, monitor the gauge readings on the AC manifold gauge set. The goal is to achieve and maintain the recommended vacuum level for a specific period. This ensures that all moisture and air have been effectively removed from the system.
VI. Recharging the AC System
A. Introduction to R134a Refrigerant
R134a refrigerant is the most commonly used refrigerant for automotive air conditioning systems. It is important to use the correct type and quantity of refrigerant as recommended by the manufacturer to ensure optimal performance.
B. Connecting the Refrigerant Canister
Attach the refrigerant canister to the AC manifold gauge set using the appropriate hose or adapter. Ensure a secure connection to prevent leaks during the recharging process.
C. Recharging the AC System
There are two methods for recharging the AC system: charging by weight and charging by pressure.
1. Charging by Weight
In this method, you measure the weight or amount of refrigerant used to refill the AC system. Refer to the manufacturer’s specifications for the recommended refrigerant quantity, which will depend on the system’s design and capacity.
2. Charging by Pressure
In the pressure method, you use the AC manifold gauge set to monitor the pressure and determine when the proper refrigerant charge has been achieved. Again, the manufacturer’s guidelines will provide the specific pressure readings for the desired charge.
D. Monitoring Refrigerant Levels
Throughout the recharging process, monitor the refrigerant levels in the system using the AC manifold gauge set. This will help ensure that you achieve the correct charge and prevent overcharging or undercharging the system.
VII. Testing AC System Performance
A. Evaluating System Pressure and Temperature
After recharging the AC system, evaluate the pressure and temperature readings on the AC manifold gauge set. The pressures should be within the manufacturer’s recommended range, and the temperature at the air vents should indicate proper cooling.
B. Checking for Proper Cooling
Test the AC system by running it at different fan speeds and temperature settings. Check if the air blowing from the vents is cool and consistent. If the cooling performance is inadequate, it may indicate a problem with the AC system that requires further diagnosis and troubleshooting.
C. Identifying Potential Issues
If you notice any abnormal readings or inconsistent cooling performance, it’s important to identify and diagnose potential issues. This may involve checking for refrigerant leaks, inspecting the compressor, or evaluating other components of the AC system for faults.
D. Making Final Adjustments
If necessary, make final adjustments to the AC system based on your observations and diagnostic findings. This may involve adding or removing refrigerant, inspecting and cleaning components, or making adjustments to the system’s settings.
VIII. Maintaining the AC Manifold Gauge Set
A. Proper Cleaning and Storage
After using the AC manifold gauge set, it’s important to properly clean and store it. Clean any debris or refrigerant residues from the gauges and hoses, and store the set in a cool and dry place to prevent damage and ensure its longevity.
B. Periodic Calibration and Maintenance
To maintain the accuracy of the AC manifold gauge set, it’s recommended to periodically calibrate and perform maintenance on the gauges and other components. Follow the manufacturer’s guidelines for calibration procedures and schedule regular maintenance to keep the set in optimal working condition.
C. Replacing Worn Out or Damaged Parts
If any parts of the AC manifold gauge set become worn out or damaged, it’s important to replace them promptly. This includes hoses, fittings, valves, and gauges. Using a faulty gauge set can lead to inaccurate readings and compromise the effectiveness of your AC system service.
IX. Troubleshooting Common Issues
A. Inaccurate Pressure Readings
If you encounter inaccurate pressure readings on the AC manifold gauge set, it could indicate a problem with the gauges, hoses, or connections. Check for any leaks or blockages and ensure all connections are secure and properly sealed. If the issue persists, consider calibrating or replacing the gauges.
B. Refrigerant Leaks
Refrigerant leaks can result in poor cooling performance and a gradual decline in the refrigerant level. Use a refrigerant leak detector to identify the source of the leak and repair it accordingly. Be sure to follow proper safety procedures and guidelines when handling refrigerants.
C. Insufficient Cooling
If your AC system is not cooling effectively, it could indicate a problem with the compressor, condenser, or other components. Perform a thorough inspection of the AC system, checking for any obstructions, faulty parts, or refrigerant issues. Consult a professional if needed.
D. Other AC System-related Problems
There may be other AC system-related problems that go beyond the scope of using the AC manifold gauge set. These could include electrical issues, faulty sensors, or problems with the HVAC control module. In such cases, it’s recommended to consult a qualified technician or mechanic for proper diagnosis and repair.
X. Advanced Techniques and Best Practices
A. Performing System Diagnostics
Beyond basic AC system servicing, the AC manifold gauge set can be used for advanced diagnostics. This includes evaluating system performance under different load conditions, performing leak tests, and identifying complex issues that require specialized knowledge.
B. Understanding Superheat and Subcooling
Superheat and subcooling are important concepts in AC system service. Superheat refers to the temperature of the refrigerant gas above its boiling point, while subcooling refers to the temperature of the refrigerant liquid below its condensing point. Understanding these concepts can help optimize system performance and diagnose specific problems.
C. Overcoming Challenges in AC System Service
AC system service can present various challenges, including hard-to-reach components, complex wiring systems, and specific vehicle requirements. By staying informed, constantly learning, and keeping up with advancements in AC technology, you can overcome these challenges and provide effective service.
D. Implementing Safety Measures and Environmental Considerations
When working with AC systems and refrigerants, it is crucial to prioritize safety and follow environmental regulations. Properly handling refrigerants, avoiding unnecessary leaks, and disposing of old refrigerants responsibly are essential practices to protect yourself and the environment.
Congratulations! You have now become well-versed in the art of using an AC manifold gauge set for optimal cooling. Armed with this knowledge, you can confidently service, diagnose, and maintain your vehicle’s air conditioning system. Remember to always prioritize safety, follow manufacturer guidelines, and consult professionals when needed. Stay cool and enjoy the refreshing breeze on your future travels!
How to Properly Recharge Your AC System
Frequently Asked Questions (FAQ)
How do I connect an AC manifold gauge set to an R134a system?
How do I read the pressure on an AC manifold gauge set for R134a?
Why is it important to use an AC manifold gauge set for R134a?
Can I use an AC manifold gauge set for R134a on other refrigerants?
What precautions should I take when using an AC manifold gauge set for R134a?
Final Summary: Understanding How to Use an AC Manifold Gauge Set
In conclusion, understanding how to use an AC manifold gauge set is essential for servicing and troubleshooting automotive air conditioning systems. The gauge set consists of various components, such as high-pressure and low-pressure gauges, hoses, and valves, which allow you to measure pressure, temperature, and vacuum levels in the AC system.
Using the correct refrigerant, such as R134a, is crucial for the performance and efficiency of the system. Before using the gauge set, it is important to take proper safety precautions, such as wearing protective gear and ensuring proper ventilation.
The process of using the AC manifold gauge set involves gathering necessary materials and tools, checking manufacturer’s specifications, identifying service port locations, and connecting the gauge set securely to the AC system. Pressure readings from the gauges help diagnose potential issues, and vacuuming the system before recharging it with refrigerant is crucial to remove air and moisture. When recharging the system, you can either charge by weight or pressure, depending on the manufacturer’s guidelines.
After recharging, it is important to test the AC system’s performance by evaluating pressure and temperature readings and checking for proper cooling. Maintaining the AC manifold gauge set involves proper cleaning, storage, periodic calibration, and replacing worn-out or damaged parts. In troubleshooting common issues, inaccurate pressure readings may indicate problems with the gauges or connections, refrigerant leaks require detection and repair, and insufficient cooling may be caused by faulty components.