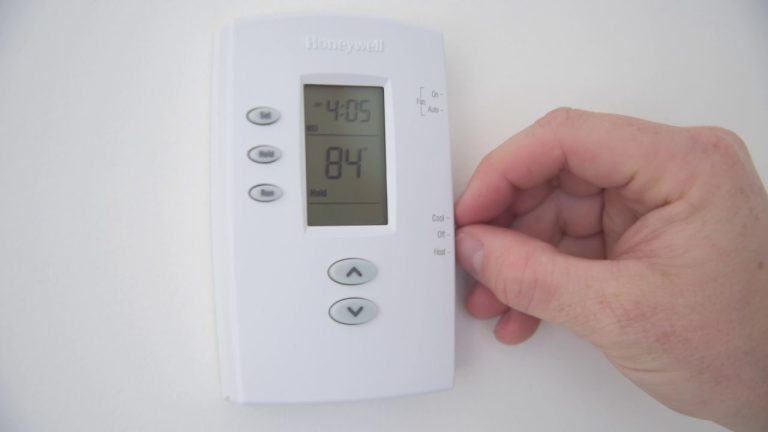
How To Turn Ac On Honeywell Thermostat: Quick And Easy Steps
To turn on the AC on a Honeywell thermostat, follow these steps: 1. Check the thermostat display: Ensure that the display is powered on and showing the current temperature. 2. Find the mode button: Look for a button labeled “Mode” or with an icon representing different modes. 3. Select the cooling mode: Press the mode button until the display shows the cooling mode, often represented by an icon of a snowflake or the letters “COOL.” 4. Adjust the temperature: Use the up or down arrows to set your desired cooling temperature. 5. Start the AC: Press the “On” or “Start” button to activate the AC. The thermostat will now control the cooling function based on the set temperature. Make sure to refer to your specific Honeywell thermostat model’s manual for detailed instructions as the buttons and interface may vary.
Did you know that the average American household spends approximately 48% of its energy consumption on heating and cooling? That’s a significant chunk of your utility bills! In the scorching summer months, when the sun beats down relentlessly, turning on your air conditioning becomes an absolute necessity. But what if you’re struggling to figure out how to navigate your Honeywell thermostat and activate the AC function? Fret not, because in this article, we will guide you through the quick and easy steps to turn on the AC on your Honeywell thermostat.
Whether you’re a homeowner trying to stay cool or a renter looking to beat the heat, understanding how to operate your thermostat effectively is vital for both comfort and energy efficiency. So, let’s dive right in and unlock the secrets to effortless cooling with your Honeywell thermostat.

- [FULL CUSTOMIZABLE AND CONVENIENT OUTLET TIMER] Fosmon’s outlet timer gives you total control over when and how your lights or fixtures turn on and off. The outlet timer is ideal for seasonal lights and lamps, and is great to help deter break-ins as it automatically turn your lights on and off.
- [EASY TO PROGRAM] Simply press the buttons for the durations you want the light on, and leave the rest of buttons up. The schedule is set and will repeat every day automatically. An override switch comes in handy when you want to temporarily disable the timer function.
- [MULTIPLE SAFETY FEATURES] The timer is certified with ETL, ensuring it’s safe to use. The front-facing grounded outlet is not only easy to access, but also protects you against electric shock. The power LED is helpful to determine whether your device is energized.
- [WIDE USES] The light timer is ¾ horsepower and rated at 125V/15A 1875W for general use. It’s compatible with incandescent, CFL, and LED lights. The outlet timer works perfectly with TVs, lighting, decorations, aquariums, diffusers, and other electronics.
- [LIMITED LIFETIME WARRANTY] Join millions of satisfied customers with our limited lifetime warranty, backed by our experienced and dedicated US-based customer service.

- Why Need This: If you often need to clean your AC lines with hand but feel painful, inefficient and expensive, this is good for you! It can help you save hundreds of dollars each year, and you don’t have to call service anymore.
- Easy To Use: Simply attach our cleaner tool end to your hose and turn on the wet vacuum, it has a good seal and fits perfect so you will see it works within tens of seconds. It is efficient for life and also help you liberate your hands.
- Visible Clear Tube: There is a clear section in the middle of the useful AC drain lines cleaner tool, so that you can see how it works more intuitively. You can get tons of gunk, sludge, and other sediment out. And the visibility adds convenience when you cleaning the tool.
- Fits For Most Sizes: The smaller part of this AC drain lines fits with 1 inch opening, so you need to confirm this before ordering that is most important. The larger part designed to fit with wet vacs 1.25″, 1.50″, 1 7/8″ and 2 1/2″ inch hoses which fits most size and you need no more guess work.
- After-sale Service: You just feel free to contact with us and we will help you to solve your problem as soon as possible.

- ❄【Desktop Air Conditioner Fan】Portable air conditioner has a strong DC motor which creat a new height in the industry with 3 seconds of cooling, instantly provide you with strong, cool and refreshing air flow. In contrast to the damage air conditioning can do to the body’s ability to self-regulate, our cooling fan mimic natural wind, eliminating dry heat and creating a moist, cool airflow. And you can also add cold water and ice cubes for a better cold wind effect.
- ❄【Multi-function & Touch Control】Its 4-in-1 design that acts as a small personal air cooler, a desk fan, a evaporative humidifier and a LED night light. Three adjustable speed, simple touch design, easy to adjust three wind gear. And This portable ac is low noise (less than 48 decibels) and will not disturb your life, work or sleep. It Equipped with USB charging interface, you can use mobile power, laptop, adapter, computer, car charger power supply.
- ❄【Large Capacity Water Tank & Timer】The mini air conditioner for room is equipped with a 600ml sealed water tank which can work for up to 8H after adding water, and the air grille angle can be manually adjusted. 3 automatic timings (2/4/8H), and automatically shuts off when the time is up. You can use this mini evaporative cooler that choose the most suitable gear to enjoy leisure, sleep or work time all year round to cool you in the hot summer and humidify you in the dry autumn and winter.
- ❄【Portable and Lightweight】This compact portable ac unit is light (860g), does not take up too much space, and power supply compatibility is strong (note: suitable for 5V 1.5A and above USB adapter). The mini ac is the ideal choice for bedroom, living room, study, kitchen, office, outdoor picnic, RV, wooden house and also perfect for camping and other outdoor activities during the hot summer months.
- ❄【Efficient Refrigeration】Our personal cooler can save energy while providing strong wind and fine fog refrigeration, long blow not wet body, not wet table, soft wind feeling not blunt. Ultrasonic nebulizer, spray cold air and humidification multi effect in one. Let you enjoy the cool summer. Our products are equipped with cooler, Type-C cable and user manual, we will provide a lifetime warranty for your new portable multi-function cooling fan partner.

- For R134A service ports quick coupler adapter, 1/4″ SAE male flare.
- Universal Compatibility: The adjustable Adapter Fittings provides universal compatibility for all models.
- Contain with Low side & High side. Blue: Low side quick connector/adapter; and Red: High side quick connector/adapter.
- Accuracy and Durability: Accurate snap lock & knurled grip ring for easy operation, detachable adapter for longer maintenance.
- How to Use: Connect bottoms with vehicle’s R134A service port; connect the ACME adapter with the refrigerant hose; turn on/off the switch at top to turn it on/off.

- ✮ High power Inflating & Deflating✮ : Quick-fill and High Pressure Design of our electric inflating&deflating air pump(130W/0.54psi) for faster inflates or deflates the inflatables than the traditional hand pumps to save half of the time.
- ✮ 3 Interchangeable Nozzles✮ : Each inflator adapter comes with a set of 3 air pump universal valves. Suitable for most inflatables you need to inflate or deflate,such as air mattress, pools, sofas, bathtub, water beds, boat, pool toys, swimming rings.
- ✮ Lightweight & Portable✮ : Mini air pump is lightweight and completely portable, making it convenient to use indoor and outdoor. It is the ideal choice for campers, travelers, beach goers, mobile entertainers, event decorators, etc.
- ✮ Easy to Use✮ :The air mattress pump is compatible with 110V -120V AC power supply. Simply place the inflated and deflated nozzles in the appropriate filling port, then press the switch and wait a few minutes.Saving time enjoy your vacation!
- ✮What You Get✮ : The Package Included:1 x 130w Air Pump, 3 x Nozzles, 1 x Manual. 90 Days Guarantee!

- Kate Hudson, Matthew McConaughey, Adam Goldberg (Actors)
- Donald Petrie (Director) – Brian Regan (Writer)
- English, French, Spanish (Subtitles)
- Audience Rating: PG-13 (Parents Strongly Cautioned)
- 【NEW VERSION AC TO DC CONVERTER 24V】New Upgrade 480w converter build with Imported Aluminum alloy shell ,Built-in wire integrated design, Dual power connection methods, Very convenient for 24V devices with clamps, Eagwell’s 20 amp power supply come with ul power cord ,24v converter with switch ,wire lugs,metal clip and screw.Super convenient for devices with clamps. You can clamp to the two cylindrical contacts directly. It is a patent design of 24v dc power converter.
- 【ADJUSTABLE VOLTAGE】24 Volt Power Supply is AC to DC 24V Converter.Input voltage Support AC 110V-120V / 220V-240V , Output Range (24V 1A-5A, 24W-120W ) or (24V 10A-20A 240W-480W) ,voltage input will adjust automatically to SMPS Model ,Output current Mainly depends on your device, such as 2A 48W ,5A 120W, 10A 240W, Max current up to 20A,Power 480W.
- 【HOW TO CHOOSE】The peak power is 20A,480W. It does not mean 24v power supply can fit rate power 480W. For motor device, the start current will be much higher that rate power. If use restrictive equipment , such like led strips, you can use higher power, such like 20A rated leds will also be OK.
- 【SMART COOLING SYSTEM】480W Power Converters Aluminum Shell are designed with many heat dissipation holes, Built-in Cooling fan and dust-proof net, which effectively prevent dust from entering, ensure the stable rotation of the electric fan and prevent the circuit board from burning ; moreover, anti-skid pads are added to the bottom in this 110v to 24v converter, which can also make the bottom better heat dissipation and work more stable, Converter Working Temperature Range : 14℉-140℉
- 【SAFE & STABLE,LONG SERVICE LIFE】AC to DC Converter 24V come with overload ,over voltage protection,Leakage protection and short circuit protection function.All copper nickel-plated terminal material, which has good electrical conductivity and high conversion efficiency , corrosion resistance,aging resistant, power converter free from time and space constraints. Eagwell’s 480w converter power supply, power cord and plug all have passed UL,CE,RoHS Certifications

- 33000mAh CAPACITY: This laptop battery bank has a power capacity of 120Wh/33,000mAh which the camping power supply can power most electronic devices efficiently. It can fully charge mobile phone 15 times, the laptop 2 times, the CPAP machine 3 hours (the time will be different according to the power of the machine), the led light more than 20 hours, and the mini refrigerator about 3 hours. Applicable for emergency situations such as hurricanes, off-grid camping, short blackouts, earthquakes.
- CHARGING UP TO 6 DEVICES SIMULTANEOUSLY: The portable battery pack with outlet is equipped with 1* AC outlet (110V 200W ), 2* USB ports (5V, 3.1A total),1* USB-C port , 2* DC Outputs(9~12.6V/10A) which can charge smartphone, tablet, camera, mini refrigerator, night light, mini fan, CPAP and other electronic devices under 200W.
- MULTIPLE RECHARGING WAYS: The portable power bank for laptop has 3 methods to get recharged. The package includes two adapters, you can charge it via wall socket or car adapter(12V). And it also can be recharged under the sun with a solar panel(15V-24V/2.6A)(NOT included).
- PERFECT PARTNER FOR OUTDOOR AND EMERGENCY USE: The portable battery pack weighs only 3.2lbs, and a comfortable and ergonomic handle makes it easy to take anywhere. This portable laptop charger is built with dual white LED flashlight to meet your different needs. Press the flashlight button to switch on the light and single press the button to switch to blink/ SOS mode, Press the button again to switch off. When you go out camping or experience power outages, powkey power bank may be a good choice.
- WHAT YOU GET: 1 x 33,000mAh/110v power bank, 1 x Car Cigarette Lighter Adapter, 1 x AC Power Adapter, 1 x Car Charging Cable, 1 x User Manual, we also provide 7*24 hours customer service and 24 months product guarantee. so you can worry-free.

- 𝐓𝐨𝐮𝐜𝐡 𝐂𝐨𝐧𝐭𝐫𝐨𝐥 𝐁𝐞𝐝𝐬𝐢𝐝𝐞 𝐋𝐚𝐦𝐩 – This smooth dimmable touch control table lamp featured with touch-sensitive sensor, to make quick changes to 3 different level brightness (Low, Medium, High), and soften the atmosphere quickly for you. Simply a touch or a pat on the bedside lamps’ base or lamps’ supporting pole when you want the nightstand lamp On/Off, brighter/dimmer. (used as a night lamp at low brightness, medium/high is enough to meet your needs for reading/working)
- 𝐔𝐒𝐁 & 𝐔𝐒𝐁-𝐂 𝐂𝐡𝐚𝐫𝐠𝐢𝐧𝐠 𝐏𝐨𝐫𝐭𝐬 𝐚𝐧𝐝 𝐎𝐮𝐭𝐥𝐞𝐭 – Power 3 devices at once bedside lamp! With a usb-c port (5V/2.1A) and a usb-a port (5V/2.1A) and a outlet (120v) on the small nightstand lamp for fast charging, getting your phones, pad, laptops, humidifier, kindle, headsets, speaker, earbuds and other electronics fully charged all from a single small table lamp no matter if the bed side table lamp is on or off. Your best bedroom desk lighting lamp!
- 𝐏𝐥𝐮𝐠 𝐚𝐧𝐝 𝐏𝐥𝐚𝐲 𝐓𝐚𝐛𝐥𝐞 𝐋𝐚𝐦𝐩 – Package included a non-flicker FREE E26 led light bulb (worth $9), a install-free light beige fabric shade, a stable lamp body and a touch control black metal base. Put all together for a minimalism lamp is really perfect to decorate anywhere of your house. An ideal USB nightstand lamp for bedroom, guest room, living room, study room, kids room for girls and boys, office room, desk, etc. at the same time.
- 𝐋𝐄𝐃 𝐋𝐢𝐠𝐡𝐭 𝐁𝐮𝐥𝐛 𝐈𝐧𝐜𝐥𝐮𝐝𝐞𝐝 – For saving you more time on finding a correct bulb, we particularly pair with an non-flicker E26 LED light bulb. Unlike other dazzling side table light lamp, our bedside lamp with dual usb port and outlet provides no-flickering lights, to protect you and your kids and family’s eyes from eye strain, or eyesight damages. You’ll love how easy it is to get to your device when you need it. Gone are the days of running to the nearest power outlet.
- Fenmzee – Our team was founded by three interior designers who had been working with a head lighting manufacturer over the years to strive to design practical, aesthetic and well made lighting room decoration for customers. Fenmzee team design all our products in house, using only the selected materials to ensure they not only look good in your home, but will last for years to come.
- WEATHERPROOF REMOTE CONTROL CONVERTER: the remote control converter kit has a durable; water tight construction with a 6” grounded cord and is compatible with 3-wire plugs for outdoor use
- USER-FRIENDLY DESIGN: the Woods 32555 weatherproof outdoor outlet remote control converter kit is rated at 125-Volt; 13 Amp; 1625W Resistive/8 Amp; 1000W Tungsten – this means that it will work with fans; lamps; small fountain pumps; rope lights and others
- 60-FT FREQUENCY RANGE: this outlet remote control converter kit offers hassle-free control and lets you conveniently adjust your outdoor security lights; patio lights or holiday decor without having you step out of the house or car
- NIFTY-SIZED OUTDOOR OUTLET REMOTE CONTROL CONVERTER KIT: fitting into the glove box of a car; purse and can even be attached to a keychain; you don’t have to hunt high and low for the remote control converter whenever you need it
- HASSLE-FREE INSTALLATION: this weatherproof outdoor outlet remote control converter kit requires no tools to set up; simply plug and use
I. Understanding the Honeywell Thermostat
A. Introduction to the Honeywell thermostat
The Honeywell thermostat is a popular and reliable device used to control the temperature in residential and commercial buildings. Designed with user-friendly features and advanced functionalities, this thermostat offers convenience, energy efficiency, and optimal comfort.
With a sleek and modern design, the Honeywell thermostat seamlessly integrates into any home or office décor. It is equipped with a bright and intuitive display that allows users to easily navigate through various settings and options.
B. Features and functionalities of the Honeywell thermostat
The Honeywell thermostat is packed with a wide range of features and functionalities that enhance its performance and usability. Some of the key features include:
- Programmable schedules: This thermostat allows users to set customized schedules to automatically adjust temperature settings based on their daily routines and preferences.
- Smart response technology: With smart response technology, the thermostat learns the heating and cooling patterns of the building and adjusts the temperature accordingly to maximize comfort and energy savings.
- Energy-saving mode: The energy-saving mode helps reduce energy consumption and lower utility bills by optimizing temperature settings when the building is unoccupied.
- Wi-Fi connectivity: Many Honeywell thermostat models offer Wi-Fi connectivity, allowing users to control and monitor the thermostat remotely through their smartphones or other connected devices.
- Voice control: Some Honeywell thermostat models are compatible with voice assistants like Amazon Alexa and Google Assistant, enabling users to control the thermostat using voice commands.
C. Understanding the different modes of the Honeywell thermostat
The Honeywell thermostat provides various modes to suit different weather conditions and user preferences. The most common modes include:
- Cooling mode: This mode is used during hot weather to activate the air conditioning system and cool the building.
- Heating mode: In colder months, the heating mode is used to activate the heating system and raise the temperature inside the building.
- Auto mode: The auto mode automatically switches between heating and cooling based on the temperature settings and the current weather conditions.
- Fan mode: The fan mode allows users to control the operation of the fan independently from the heating or cooling system.
II. Basic Setup of the Honeywell Thermostat
A. Mounting the thermostat on the wall
The first step in setting up your Honeywell thermostat is to mount it on the wall in a suitable location. Choose a central area on an interior wall that is away from direct sunlight, drafts, and sources of heat or cold. Use a level to ensure the thermostat is mounted straight.
B. Connecting the thermostat to the HVAC system
After mounting the thermostat, you need to connect it to your HVAC (Heating, Ventilation, and Air Conditioning) system. Turn off the power to the system before making any connections. Follow the manufacturer’s instructions to identify the correct wires and terminals for your specific HVAC system.
Typically, the thermostat will have labeled terminals for Rh, Rc, W, Y, and G. Connect the corresponding wires from your HVAC system to these terminals. If you have an additional wire for the C (common) terminal, connect it as well. Make sure all connections are secure.
C. Initial configuration and setup of the Honeywell thermostat
Once the thermostat is mounted and connected to the HVAC system, you can proceed with the initial configuration and setup. Turn on the power to the HVAC system and follow the on-screen prompts on the thermostat’s display.
Set the date, time, and language preferences. If your thermostat has Wi-Fi connectivity, connect it to your home network by following the instructions provided. This will allow you to access additional features and control the thermostat remotely.
III. Navigating the Honeywell Thermostat Interface
A. Exploring the main screen and its components
The main screen of the Honeywell thermostat displays key information and provides access to various settings and functions. The components commonly found on the main screen include:
- Temperature display: This shows the current temperature inside the building.
- Setpoint display: The setpoint display indicates the desired temperature set by the user.
- Mode indicator: The mode indicator displays the current operating mode of the thermostat, such as cooling, heating, or auto.
- Fan status: The fan status indicator shows whether the fan is on or off.
B. Accessing the menu and settings options
To access the menu and settings options of the Honeywell thermostat, look for a button or icon with a menu symbol, usually located on the side or bottom of the thermostat’s display. Press this button to enter the menu.
Once in the menu, you can navigate through the options using the arrow buttons or touch screen (if applicable). The menu may include settings for temperature, scheduling, Wi-Fi, energy-saving features, and more.
C. Understanding the buttons and navigation methods
The Honeywell thermostat may feature various buttons and navigation methods to make it easier for users to interact with the device. Some common buttons and navigation methods include:
- Up and down arrows: These buttons are used to adjust the temperature setting or navigate through menu options.
- Selector wheel: Some thermostats have a selector wheel that allows users to scroll through options and make selections.
- Touch screen: Touch screen thermostats allow users to directly touch the display to access and adjust settings.
IV. Adjusting Temperature Settings on the Honeywell Thermostat
A. Setting the desired temperature for cooling
To set the desired temperature for cooling, locate the temperature control buttons or icons on the thermostat. Use the up and down arrows or the touch screen to adjust the temperature to your preference. Press the “Enter” or “Save” button to confirm the new temperature setting.
B. Selecting the appropriate cooling mode
Once you have set the desired temperature for cooling, you need to select the appropriate cooling mode. Use the mode selector button or icon to switch to the cooling mode. The thermostat will activate the air conditioning system to cool the building to the set temperature.
C. Configuring the fan settings for optimal cooling
To optimize cooling and air circulation, you can configure the fan settings on the Honeywell thermostat. Look for the fan control options in the menu or on the main screen. Depending on your preferences, you can choose to keep the fan running constantly or set it to turn on only when the cooling system is active.
V. Scheduling and Programming the Honeywell Thermostat
A. Understanding the importance of scheduling
Scheduling is a valuable feature of the Honeywell thermostat that allows you to set specific temperature preferences for different times of the day. This helps optimize energy usage and maintain comfort levels without manual adjustments.
By programming a schedule, you can ensure the thermostat automatically adjusts the temperature based on your daily routine. For example, you can set higher temperatures when you are away from home and lower temperatures when you are likely to be at home.
B. Setting up a weekly schedule for cooling
To set up a weekly cooling schedule, access the scheduling menu on the Honeywell thermostat. Follow the prompts to select the days of the week, time slots, and desired temperature settings for each period. Once the schedule is programmed, the thermostat will automatically adjust the temperature according to the specified settings.
C. Configuring temperature setbacks and sleep mode
Temperature setbacks and sleep mode are additional programming features that help conserve energy during specific periods. Temperature setbacks allow you to temporarily raise or lower the temperature during times when you are less active or away from the building.
Sleep mode is designed to create a comfortable sleeping environment by automatically adjusting the temperature to a predetermined level. This helps promote energy savings and better sleep quality.
VI. Using Additional Features of the Honeywell Thermostat
A. Exploring advanced settings and preferences
The Honeywell thermostat offers advanced settings and preferences that allow users to personalize their experience and optimize energy efficiency. These settings may include options for humidity control, air circulation, system alerts, and more. Explore the menu and reference the user manual to understand and adjust these advanced settings.
B. Understanding the energy-saving features
The Honeywell thermostat is equipped with various energy-saving features that help reduce energy consumption and lower utility bills. These features may include adaptive recovery, which learns how long it takes to reach the desired temperature and adjusts the heating or cooling accordingly. Other energy-saving features might include reminders to change air filters or notifications when energy usage exceeds set limits.
C. Utilizing the smart/home automation capabilities
If your Honeywell thermostat has smart or home automation capabilities, take advantage of these features to enhance convenience and energy efficiency. Connect the thermostat to your home network and download the compatible mobile app. This allows you to control and monitor the thermostat remotely, receive alerts, and integrate it with other smart devices or voice assistants for seamless automation.
VII. Troubleshooting and Common Issues with the Honeywell Thermostat
A. Identifying potential issues and error codes
Like any electronic device, the Honeywell thermostat may encounter issues or display error codes from time to time. Common issues include incorrect temperature readings, unresponsive buttons, or connection problems. Consult the user manual or the manufacturer’s website to identify potential issues and error codes, and follow the recommended troubleshooting steps.
B. Resetting the thermostat to default settings
If you encounter persistent issues with your Honeywell thermostat, you may need to reset it to its default settings. Locate the reset button, usually located on the back or side of the thermostat. Press and hold the button for a few seconds until the thermostat resets. Note that resetting the thermostat will erase any customized settings and schedules, so be prepared to reconfigure them afterwards.
C. Troubleshooting common problems and solutions
Some common problems with Honeywell thermostats can often be resolved without the need for professional assistance. These may include issues with Wi-Fi connectivity, temperature calibration, or incorrect wiring. Refer to the user manual or online resources for specific troubleshooting steps and solutions tailored to your thermostat model.
VIII. Enhancing the Honeywell Thermostat Experience
A. Integrating the thermostat with other smart devices
To enhance the functionality of your Honeywell thermostat, consider integrating it with other smart devices in your home. Connect it to a smart hub or automation platform that allows seamless control and coordination between various devices. This integration enables you to create personalized scenes and routines, such as adjusting the thermostat when you lock the front door or turn off the lights.
B. Utilizing mobile apps and remote control features
The mobile app associated with your Honeywell thermostat offers a convenient way to control and monitor the device remotely. Install the app on your smartphone and connect it to your thermostat. This allows you to adjust temperature settings, monitor energy usage, and receive alerts no matter where you are.
C. Exploring compatibility with voice assistants and smart home systems
If you have voice assistants like Amazon Alexa or Google Assistant, check if your Honeywell thermostat is compatible with these platforms. Integrating the thermostat with a voice assistant enables you to control it using voice commands, making temperature adjustments even more effortless. Additionally, your Honeywell thermostat may be compatible with popular smart home systems like Apple HomeKit or Samsung SmartThings, allowing you to create a fully connected and automated home environment.
IX. Maintenance and Care for the Honeywell Thermostat
A. Regular cleaning and maintenance procedures
To ensure the optimal performance and longevity of your Honeywell thermostat, regular cleaning and maintenance are essential. Follow these procedures:
- Cleaning the display: Use a soft, lint-free cloth to wipe the display and remove any dust or fingerprints. Avoid using chemicals or abrasive substances.
- Checking wiring connections: Periodically inspect the wiring connections to ensure they are secure and free from corrosion or damage.
- Changing batteries: If your thermostat is battery-powered, replace the batteries according to the manufacturer’s recommendations.
B. Checking for software updates and firmware upgrades
Manufacturers often release software updates and firmware upgrades for their thermostats to improve performance, add new features, or address any known issues. Check the manufacturer’s website or the mobile app for any available updates and follow the instructions to install them for your Honeywell thermostat.
C. Troubleshooting and handling hardware malfunctions
In the event of hardware malfunctions or failures, it is recommended to contact a certified technician or the manufacturer’s support team for assistance. They will be able to provide professional guidance and repair services to ensure your Honeywell thermostat continues to operate reliably.
X. Conclusion
In conclusion, operating and utilizing the full potential of your Honeywell thermostat is essential for optimal comfort, energy efficiency, and cost savings. Understanding the features, modes, and settings of the thermostat allows you to customize temperature preferences, create schedules, and enjoy the convenience of remote control and automation. Regular maintenance and troubleshooting ensure the longevity and performance of your Honeywell thermostat. So, go ahead, take control of your indoor climate, and enjoy the perfect balance of comfort and energy savings.
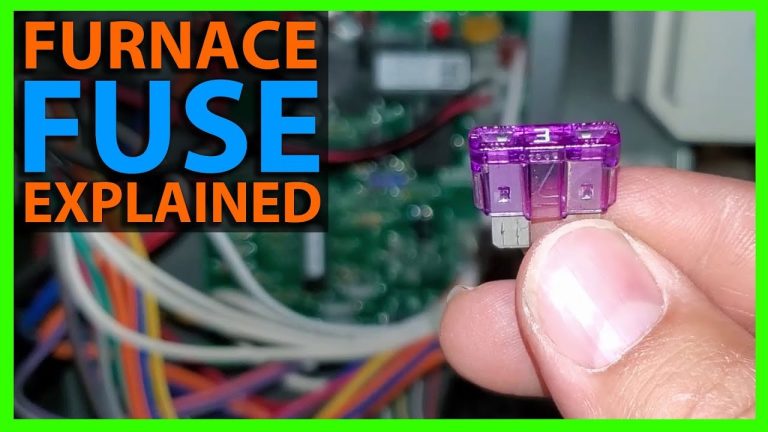
AC Wont Turn On – The Most Common Fix
Frequently Asked Questions (FAQ)
How do I turn on the AC on my Honeywell thermostat?
Why isn’t my AC turning on when I set the temperature on my Honeywell thermostat?
How do I set a specific temperature for my AC on a Honeywell thermostat?
Can I schedule the AC to turn on and off at specific times on my Honeywell thermostat?
How do I turn off the AC on my Honeywell thermostat?
Final Words: Mastering the Use of Your Honeywell Thermostat for Comfort, Efficiency, and Savings
In conclusion, mastering the use of your Honeywell thermostat is crucial for achieving optimal comfort, energy efficiency, and cost savings. Throughout this article, we have explored the various features, modes, and settings of the thermostat, enabling you to customize temperature preferences, create schedules, and take advantage of remote control and automation capabilities.
We have also discussed the importance of regular maintenance and troubleshooting to ensure the longevity and performance of your Honeywell thermostat. By understanding the basics of the Honeywell thermostat, including its design, features, and modes, you can easily navigate its interface and access the menu and settings options.
We have provided step-by-step instructions for setting up the thermostat, connecting it to your HVAC system, and configuring the initial settings. Additionally, we have discussed how to adjust temperature settings for cooling, select the appropriate cooling mode, and configure fan settings for optimal air circulation. Furthermore, we have delved into the scheduling and programming capabilities of the Honeywell thermostat, emphasizing the importance of creating a personalized schedule to optimize energy usage and maintain comfort levels.
We have also highlighted additional features, such as humidity control and energy-saving options, as well as the smart/home automation capabilities of the thermostat. To ensure a seamless experience, we have provided troubleshooting tips for common issues and potential error codes that may arise with the Honeywell thermostat. Additionally, we have suggested ways to enhance the functionality of the thermostat by integrating it with other smart devices, utilizing mobile apps and remote control features, and exploring compatibility with voice assistants and smart home systems.