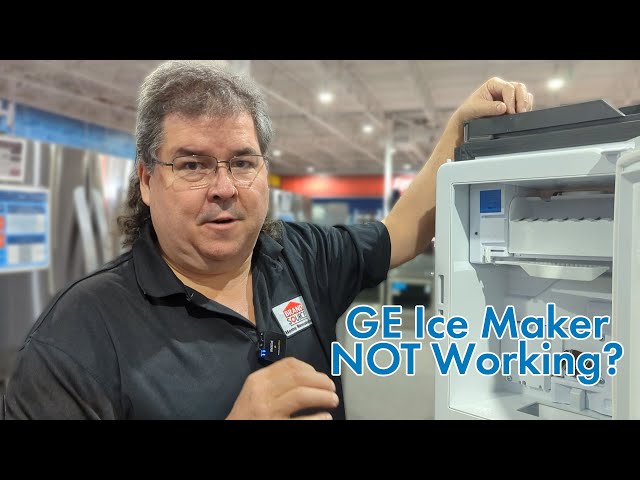
Introduction
A malfunctioning ice maker in your GE Profile freezer can be a real inconvenience. No ice for drinks, parties, or everyday use! It’s often frustrating when you expect ice, especially during hot weather, only to find an empty ice bin. This guide is designed to help you diagnose and fix the most common issues causing your GE Profile freezer ice maker to stop producing ice, saving you time and money on potential repair bills.
Common Causes of GE Profile Freezer Ice Maker Not Working
Several factors can prevent your GE Profile ice maker from doing its job. Here are some common culprits:
- Freezer Temperature Too High: The freezer needs to be cold enough (ideally 0-5F or -18 to -15C) for the ice maker to function.
- Water Supply Issues: A kinked, frozen, or disconnected water line can prevent water from reaching the ice maker.
- Water Filter Clogged: A dirty water filter restricts water flow, hindering ice production.
- Ice Maker Arm Stuck: The ice maker’s feeler arm might be stuck in the “off” or raised position.
- Ice Jam: Ice cubes can get stuck in the ice maker, preventing it from cycling.
- Faulty Water Inlet Valve: This valve controls the water flow to the ice maker and can fail over time.
- Defective Ice Maker Module: The ice maker module controls the entire ice-making process and can malfunction.
- Power Outage: A recent power outage may have reset the ice maker settings.
- Freezer Overfilled: Too many items in the freezer can block airflow and affect ice maker performance.
Symptoms Checklist
Use this checklist to narrow down the possible causes:
- No ice production at all.
- Ice maker producing only small or misshapen ice cubes.
- Ice maker cycles but no water enters.
- Ice maker overflowing or leaking.
- Unusual noises coming from the ice maker.
- Ice tastes or smells bad.
How to Fix GE Profile Freezer Ice Maker Not Working Step-by-Step Guide
Follow these steps to troubleshoot your ice maker:
- Check the Freezer Temperature: Use a thermometer to verify that the freezer temperature is between 0-5F (-18 to -15C). Adjust the freezer settings if necessary. Give it a few hours to stabilize.
- Inspect the Water Line: Locate the water line connected to the back of your freezer. Ensure it’s not kinked, crushed, or frozen. Straighten any kinks or thaw frozen sections.
- Check the Water Supply Valve: Make sure the water supply valve connected to the water line is fully open. It’s usually located under the sink or in the basement.
- Replace the Water Filter: Locate and replace the water filter. GE recommends replacing it every six months. Refer to your owner’s manual for the filter location and replacement instructions.
- Check the Ice Maker Arm: Ensure the ice maker’s feeler arm is in the “down” position. This allows the ice maker to cycle. Manually lower the arm if it’s stuck up.
- Clear Any Ice Jams: Carefully remove any ice cubes that are stuck in the ice maker. You may need to use a plastic utensil to gently dislodge them.
- Reset the Ice Maker: Many GE Profile freezers have a reset button on the ice maker. Press and hold the reset button for a few seconds. Refer to your owner’s manual for the exact location.
- Listen for the Water Inlet Valve: With the freezer door open, have someone press the ice maker arm down. Listen for a buzzing sound from the water inlet valve at the back of the refrigerator. If you don’t hear it, the valve might be faulty.
- Check for Frost Buildup: Excessive frost buildup in the freezer can block the ice maker. Manually defrost the freezer if needed.
- Ensure Proper Airflow: Avoid overfilling the freezer, as this can restrict airflow and affect the ice maker’s performance.
- Power Cycle the Freezer: Unplug the freezer for 5 minutes, then plug it back in. This can sometimes reset the ice maker’s control board.
- Consult Your Owner’s Manual: Refer to your GE Profile freezer owner’s manual for specific troubleshooting tips and diagrams.
- Leave it Alone for 24 Hours: After performing these checks, give the ice maker 24 hours to start producing ice. It can take some time for the system to stabilize.
Fix the Issue Without Buying Parts
Many ice maker problems can be resolved without needing to purchase new parts:
- Regular Cleaning: Clean your ice maker every 6 months to prevent mineral buildup and ice jams.
- Filter Replacement Schedule: Stick to the recommended water filter replacement schedule (usually every 6 months).
- Freezer Temperature Monitoring: Regularly check your freezer temperature to ensure it’s within the ideal range.
- Proper Freezer Loading: Avoid overfilling the freezer to maintain proper airflow.
- Visual Inspection: Periodically inspect the water line and ice maker components for any signs of damage or wear.
When Replacement Might Be Necessary
If you’ve tried all the troubleshooting steps and your ice maker still isn’t working, you might need to consider replacing a part. Common parts that fail include the water inlet valve (estimated cost $50-$100), the ice maker module (estimated cost $100-$200), or the water filter housing (estimated cost $30-$70). Consider calling a qualified appliance repair technician for diagnostics and repair options before replacing any parts yourself. They can accurately diagnose the problem and recommend the best course of action.
Safety Warning
- Always unplug the freezer before performing any troubleshooting or repairs.
- Avoid working with water near electrical components.
- Be careful when handling sharp objects or tools.
- If you are not comfortable performing repairs yourself, contact a qualified appliance repair technician.
- Ensure the floor around the freezer is dry to avoid electrical shock hazards.
Tools You May Need
- Screwdrivers (Phillips and flathead)
- Pliers
- Adjustable wrench
- Thermometer
- Towel
- Bucket
FAQ
Here are some frequently asked questions about GE Profile ice maker problems:
- Q: My ice maker is making a grinding noise. What could be the problem?
- A: This could indicate an ice jam or a problem with the ice maker motor. Clear any ice jams and inspect the ice maker for damage.
- Q: Why is my ice maker producing cloudy ice?
- A: Cloudy ice is usually caused by air bubbles in the water. This is normal and doesn’t affect the quality of the ice. Changing the water filter can sometimes help.
- Q: How long should it take for my ice maker to make ice after I’ve reset it?
- A: It can take up to 24 hours for the ice maker to start producing ice after a reset.
- Q: Can I manually fill the ice maker with water?
- A: No, do not manually fill the ice maker with water. This can damage the ice maker and potentially cause leaks.
Conclusion
Troubleshooting a GE Profile freezer ice maker can seem daunting, but by following these steps, you can often identify and fix the problem yourself. Remember to prioritize safety and consult your owner’s manual for specific instructions. If you’ve exhausted all troubleshooting options and the ice maker is still not working, it’s best to call a qualified appliance repair technician. Good luck, and enjoy your ice!
Youtube Video:
Looking for more useful options?
Check out recommended resources that others find helpful.