
Introduction
Discovering your fridge is leaking water and not cooling properly can be a frustrating experience. Not only can it lead to a messy cleanup, but it also puts your food at risk of spoiling. This issue often arises unexpectedly and can range from a minor inconvenience to a sign of a more serious problem. Addressing this promptly is crucial to prevent food waste, potential water damage to your floors, and higher energy bills. This guide will walk you through common causes and provide simple steps to troubleshoot the problem before calling a professional. Explore more in our Refrigerator Problems 2 collection.
💡 Technical Key Takeaways:
- Core Focus: Diagnostic schematic and terminal connection layout for Fridge Leaking Water And Not Cooling.
- Target Scope: Field technicians, automotive DIYers, and residential/commercial electricians.
- Safety Rule: Always disconnect the primary power source/battery terminal and verify zero voltage with a multimeter before touching wires.
Common Causes of Fridge Leaking Water and Not Cooling
Here are some typical reasons why your fridge might be leaking and not cooling:
- Clogged Defrost Drain: This drain carries water away during the defrost cycle. When blocked with food particles or ice, water overflows and leaks.
- Frozen Evaporator Coils: Ice buildup on the coils prevents proper cooling. This can happen due to a faulty defrost system.
- Door Seal Issues: A damaged or dirty door seal allows warm air to enter, causing the fridge to work harder and potentially leak condensation.
- High Humidity: Excessive humidity in your home can cause condensation to form inside and outside the fridge.
- Incorrect Temperature Settings: Setting the temperature too low can lead to freezing and ice buildup, ultimately causing leaks when the ice melts.
- Faulty Water Inlet Valve: If your fridge has an ice maker or water dispenser, a malfunctioning valve can cause leaks.
- Damaged Water Line: A crack or loose connection in the water line leading to the ice maker/dispenser can result in leaks.
- Overfilled Fridge: Overpacking the fridge can block air vents and prevent proper cooling, leading to condensation and potential leaks.
Symptoms Checklist
Check for these indicators to help pinpoint the problem:
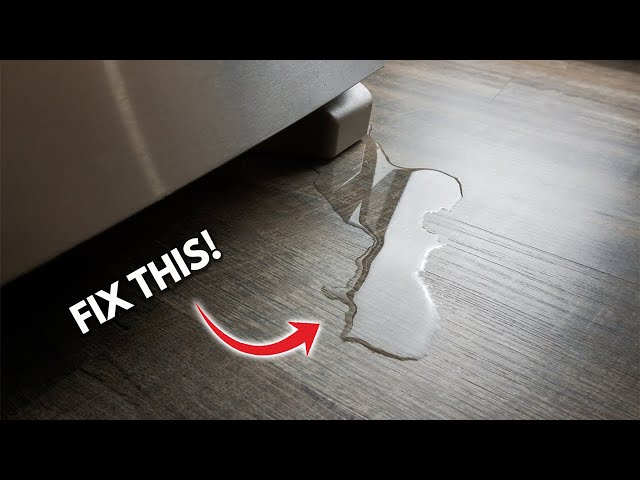
- Puddle of water on the floor in front of the fridge.
- Food spoiling faster than usual.
- Fridge interior feeling warm.
- Ice buildup on the back wall of the freezer.
- Excessive condensation inside the fridge.
- Unusual noises coming from the fridge.
- Ice maker not producing ice.
- Water dispenser not working or dispensing slowly.
How to Fix Fridge Leaking Water and Not Cooling Step-by-Step Guide
Follow these steps to troubleshoot the issue:
- Check the Temperature Settings: Ensure the fridge and freezer are set to the correct temperatures (typically 37-40F for the fridge and 0F for the freezer).
- Inspect the Door Seal: Clean the door seal with warm, soapy water. Check for any cracks or tears. A dollar bill test can help close the door on a dollar bill; if you can easily pull it out, the seal may need replacing.
- Locate and Clean the Defrost Drain: The drain is usually located on the back wall of the freezer, near the bottom. Use a turkey baster or a long, flexible object (like a pipe cleaner or thin wire) to clear any blockages. Warm water can also help melt ice.
- Check for Frozen Evaporator Coils: If you suspect frozen coils, unplug the fridge for 24 hours to allow them to thaw completely.
- Clean the Condenser Coils: These coils are usually located on the back or bottom of the fridge. Use a vacuum cleaner with a brush attachment to remove dust and debris. Dirty coils reduce efficiency and can cause cooling problems.
- Inspect the Water Line (if applicable): Check the water line leading to the ice maker/dispenser for any leaks or damage. Tighten connections if necessary.
- Check the Water Filter (if applicable): A clogged water filter can restrict water flow and cause issues. Replace the filter according to the manufacturer’s recommendations.
- Ensure Proper Airflow: Don’t overfill the fridge, and make sure vents are not blocked by food containers.
- Check the Drain Pan: The drain pan is usually located at the bottom of the fridge. Make sure it’s properly positioned and not overflowing. Empty it if necessary.
- Listen for Unusual Noises: A failing compressor or fan motor can cause cooling problems. If you hear unusual noises, it might be time to call a technician.
- Test the Defrost Timer (Advanced): If you’re comfortable working with electricity, you can test the defrost timer with a multimeter. Consult your fridge’s repair manual for instructions. (Otherwise, skip this step).
- Reset the Fridge: Unplug the fridge for 5-10 minutes, then plug it back in. This can sometimes reset the system and resolve minor issues.
Fix the Issue Without Buying Parts
Many fridge problems can be resolved without immediate part replacement:
- Regular Cleaning: Regularly clean the inside of your fridge, including the door seals and drain pan, to prevent buildup and blockages.
- Proper Temperature Management: Avoid setting the temperature too low and adjust it based on the ambient temperature of your home.
- Defrosting Schedule: Manually defrost your freezer if it’s not frost-free to prevent excessive ice buildup.
- Regularly clean condenser coils: this ensures proper heat transfer and cooling efficiency.
- Check and adjust leveling feet: make sure the fridge is leveled properly. An unleveled fridge may lead to door closing issues.
When Replacement Might Be Necessary
If you’ve tried all the troubleshooting steps and your fridge is still leaking and not cooling, it might be time to consider replacement. Common parts that fail and can be expensive to replace include the compressor, evaporator fan motor, and defrost control board. Replacing these parts can cost anywhere from $200 to $800+, depending on the fridge model and the complexity of the repair. If your fridge is older than 10 years, replacement might be a more cost-effective option in the long run.
Safety Warning
- Always unplug the fridge before performing any maintenance or repairs.
- Be careful when working with electrical components. If you’re not comfortable, call a qualified technician.
- Avoid contact with water when the fridge is plugged in.
- Clean up any spills immediately to prevent slips and falls.
- Ensure the area around the fridge is well-ventilated.
Tools You May Need
- Screwdriver (Phillips and flathead)
- Vacuum cleaner with brush attachment
- Turkey baster or flexible wire
- Warm water
- Multimeter (for advanced testing)
- Towels
- Bucket
FAQ
Here are some frequently asked questions about fridge leaking and cooling issues:
- Q: Why is my fridge leaking after I cleaned it? A: You may have dislodged debris that is now blocking the defrost drain. Try clearing the drain again.
- Q: How often should I clean the condenser coils? A: Ideally, you should clean them every 6 months, or more frequently if you have pets.
- Q: My fridge is still leaking after I thawed the frozen coils. What’s next? A: Check the defrost timer and defrost heater for malfunctions. You may need to call a technician for this.
- Q: Why is my new fridge leaking water? A: New fridges may leak due to improper leveling or a faulty water line connection (if equipped with an ice maker/dispenser).
- Q: How do I tell if the door seal is bad? A: Use the dollar bill test or visually inspect the seal for cracks or tears.
Conclusion
Troubleshooting a fridge that’s leaking and not cooling can seem daunting, but with a systematic approach, you can often resolve the issue yourself. Start with the simple fixes like cleaning and temperature adjustments, and then move on to more involved tasks like clearing the defrost drain. Remember to prioritize safety and don’t hesitate to call a qualified technician if you’re uncomfortable or unable to resolve the problem. Taking these steps can save you money and keep your food fresh!. Discover more free resources across our collection library.
Youtube Video:
Quick Wiring Specifications & Terminal Guide
| Component / Circuit | Standard Wire Gauge | Recommended Protection |
|---|---|---|
| Control & Trigger Signals | 18 – 20 AWG | 5A – 7.5A Inline Fuse |
| Standard Auxiliary Load | 14 – 16 AWG | 15A – 20A Circuit Breaker |
| Main Power Feed / Supply | 10 – 12 AWG | 30A – 40A Heavy-Duty Relay |
