
Introduction
An air conditioner that is leaking or throwing water from its indoor unit is a common problem that homeowners face, especially during periods of heavy AC use. This isn’t just a messy inconvenience; it can lead to water damage, mold growth, and even electrical hazards. The sooner you address the issue, the less likely you are to face expensive repairs or health concerns. This guide will walk you through identifying the cause of the leak and provide easy-to-follow steps to fix it. Explore more in our Air Conditioner Troubleshooting 2 collection.
💡 Technical Key Takeaways:
- Core Focus: Diagnostic schematic and terminal connection layout for Ac Indoor Unit Throwing Water.
- Target Scope: Field technicians, automotive DIYers, and residential/commercial electricians.
- Safety Rule: Always disconnect the primary power source/battery terminal and verify zero voltage with a multimeter before touching wires.
Common Causes of AC Indoor Unit Throwing Water
Here are some of the most frequent reasons why your indoor AC unit might be leaking water:
- Clogged Drain Line: This is the most common culprit. Condensation produced by the AC needs to drain somewhere. If the drain line gets blocked with algae, dust, or debris, the water backs up and overflows.
- Dirty Air Filter: A clogged air filter restricts airflow across the evaporator coil. This can cause the coil to ice up. When the ice melts, it overwhelms the drain pan.
- Frozen Evaporator Coil: As mentioned above, restricted airflow or low refrigerant levels can cause the evaporator coil to freeze.
- Broken Drain Pan: The drain pan is designed to catch the condensation. If it’s cracked or damaged, water will leak out.
- Incorrect Installation: If the AC wasn’t installed correctly, the drain line might be improperly sloped, preventing proper drainage.
- Low Refrigerant: Low refrigerant can cause the evaporator coil to become too cold, leading to icing and subsequent water overflow.
- Leaky Condensate Pump (for units with a pump): Some AC units use a condensate pump to move the water uphill. A faulty pump can cause water to leak.
- High Humidity: On extremely humid days, the AC unit might produce more condensation than it can handle, temporarily leading to some dripping.
Symptoms Checklist
Use this checklist to help pinpoint the problem:
- Water dripping or pouring from the indoor AC unit.
- Water stains on the ceiling or wall near the AC unit.
- A musty or moldy smell coming from the AC unit.
- Visible ice buildup on the evaporator coil (you may need to remove a panel to see this).
- The AC unit is running, but the room isn’t cooling properly.
- A gurgling sound coming from the AC unit.
How to Fix AC Indoor Unit Throwing Water Step-by-Step Guide
Follow these steps carefully to troubleshoot and fix the problem:
- Turn Off the AC: Before you start, turn off the AC unit at the thermostat and the breaker to prevent electrical shock.
- Inspect the Air Filter: Remove the air filter and check if it’s dirty. If it is, clean or replace it. A clean filter improves airflow and prevents icing.
- Locate the Drain Line: The drain line is usually a PVC pipe that exits the indoor AC unit. It’s often located near the floor.
- Check for Clogs: Examine the visible portion of the drain line for any obvious blockages.
- Flush the Drain Line: Use a wet/dry vacuum to clear the drain line. Place the vacuum hose over the end of the drain line outside and create a tight seal. Turn on the vacuum for a few minutes to suck out any clogs. You can also use a drain line clearing tool or a stiff wire (like a coat hanger) to break up clogs.
- Pour Vinegar into the Drain Line: After flushing, pour about a cup of white vinegar into the drain line. Vinegar helps to dissolve algae and other buildup. Let it sit for about 30 minutes.
- Flush Again: After the vinegar has soaked, flush the drain line with water to remove any remaining debris.
- Check the Drain Pan: Inspect the drain pan for cracks or damage. If the pan is damaged, it may need to be replaced. However, you can try patching small cracks with epoxy sealant.
- Check the Evaporator Coil for Ice: If you suspect a frozen evaporator coil, turn the AC off and let it thaw completely. This may take several hours. Once thawed, try cleaning the air filter (as mentioned in step 2) to improve airflow.
- Check the Condensate Pump (if applicable): If your AC unit has a condensate pump, check if it’s working properly. You can usually hear it running when the AC is on. If it’s not running, check the power supply and the float switch.
- Reassemble and Test: Once you’ve completed these steps, reassemble the AC unit and turn it back on. Monitor it closely to see if the leaking has stopped.
- Run the AC: Turn the AC back on and observe for at least an hour to see if the leak is resolved.
Fix the Issue Without Buying Parts
Before you rush out to buy replacement parts, try these free methods:
- Reset the AC: Turn off the AC unit at the breaker for a few minutes, then turn it back on. This can sometimes resolve minor issues.
- Routine Cleaning: Regularly clean the air filter and flush the drain line to prevent clogs.
- Inspection Tips: Regularly inspect the AC unit for any signs of leaks, ice buildup, or other problems.
- Maintenance Basics: Keep the area around the AC unit clean and free of obstructions to ensure proper airflow.
When Replacement Might Be Necessary
If you’ve tried all the troubleshooting steps and the AC unit is still leaking, it may be time to consider replacing a part or calling a professional. Common parts that might need replacing include the drain pan (estimated cost: $50-$150 USD), the condensate pump (estimated cost: $80-$200 USD), or, in severe cases, the entire AC unit. A professional assessment will determine the best course of action. Refrigerant leaks will also require a professional to repair.
Safety Warning
- Always turn off the power to the AC unit before working on it.
- Be careful when working with electrical components. If you’re not comfortable working with electricity, call a qualified electrician.
- Be aware of wet floors, and clean up any spills immediately to prevent falls.
- Never spray water or cleaner directly into the electrical components of the AC unit.
Tools You May Need
- Screwdriver
- Wet/Dry Vacuum
- White Vinegar
- Drain Line Clearing Tool or Stiff Wire
- Epoxy Sealant (for drain pan repairs)
- Flashlight
FAQ
Q: Why is my AC leaking even after I cleaned the drain line?A: There might be a crack in the drain pan, a frozen evaporator coil, or a refrigerant leak. Check these areas. Discover more free resources across our collection library.
Q: How often should I clean the AC drain line?A: It’s best to clean the drain line at least twice a year, preferably before the start of the cooling season and mid-season.
Q: What if I can’t find the drain line?A: The drain line is usually located near the indoor AC unit. If you can’t find it, consult your AC unit’s manual or contact a professional.
Q: Can low refrigerant cause my AC to leak water?A: Yes, low refrigerant can cause the evaporator coil to freeze, which will eventually melt and cause water to overflow.
Conclusion
Troubleshooting a leaking AC unit can seem daunting, but with a systematic approach, you can often identify and fix the problem yourself. Remember to prioritize safety and take your time. If you’ve tried these steps and your AC is still leaking, don’t hesitate to call a qualified HVAC technician. They can diagnose the issue and provide professional repairs.
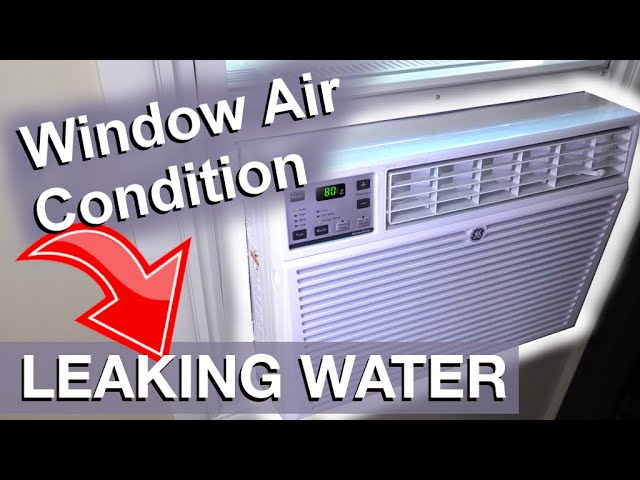
Youtube Video:
Quick Wiring Specifications & Terminal Guide
| Component / Circuit | Standard Wire Gauge | Recommended Protection |
|---|---|---|
| Control & Trigger Signals | 18 – 20 AWG | 5A – 7.5A Inline Fuse |
| Standard Auxiliary Load | 14 – 16 AWG | 15A – 20A Circuit Breaker |
| Main Power Feed / Supply | 10 – 12 AWG | 30A – 40A Heavy-Duty Relay |
