
Introduction
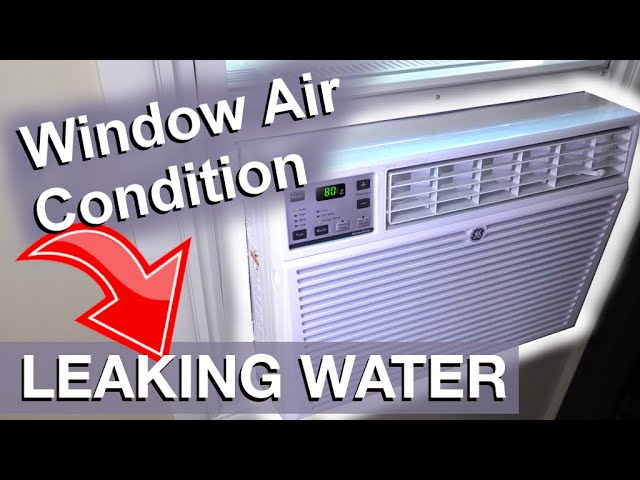
Is your window AC unit suddenly pouring water, either inside or outside your home? This is a common problem that can be alarming, and while it might seem serious, it’s often easily fixed. Excess water dripping or pouring from your AC unit happens when the condensation that’s naturally produced isn’t draining correctly. If left unchecked, this can lead to water damage to your walls, floors, or even promote mold growth. That’s why it’s important to address the issue promptly. Before calling a repair technician, let’s walk through some common causes and simple troubleshooting steps.
💡 Technical Key Takeaways:
- Core Focus: Diagnostic schematic and terminal connection layout for Window Ac Unit Pouring Water.
- Target Scope: Field technicians, automotive DIYers, and residential/commercial electricians.
- Safety Rule: Always disconnect the primary power source/battery terminal and verify zero voltage with a multimeter before touching wires.
Common Causes of window ac unit pouring water
Here are some of the most frequent reasons why your window AC unit might be pouring water:
- Clogged Drain Hole: This is the most common culprit. Dust, dirt, and debris can block the drain hole, preventing water from escaping properly.
- Dirty Air Filter: A dirty filter restricts airflow, causing the evaporator coils to freeze up. When the ice melts, it creates excessive water.
- Incorrect Installation Angle: Window AC units are designed to be slightly tilted outwards. If the unit is level or tilted inwards, water won’t drain correctly.
- Bent or Damaged Drain Pan: The drain pan collects condensation. If it’s cracked or damaged, it won’t hold the water effectively.
- Damaged Seals: Seals around the unit can degrade over time, allowing water to leak through.
- Freezing Coils: In addition to a dirty filter, low refrigerant levels or a faulty thermostat can cause the coils to freeze and then drip excessively when melting.
- High Humidity: Exceptionally humid weather can overwhelm the unit’s drainage capacity, leading to some overflow.
- Drain Pipe Blocked (If Applicable): Some units have a drain pipe. If this is blocked, water will back up.
Symptoms Checklist
Use this checklist to help pinpoint the exact nature of your problem:
- Water is dripping steadily from the back of the unit.
- Water is pooling on the floor near the AC unit.
- You hear gurgling or sloshing sounds coming from the unit.
- The air coming from the AC unit is not as cold as usual.
- There’s ice buildup on the coils inside the unit.
- You notice an unpleasant odor coming from the unit.
How to Fix window ac unit pouring water Step-by-Step Guide
Follow these steps to troubleshoot and fix the issue:
- Unplug the AC Unit: Safety first! Disconnect the power cord from the outlet before proceeding.
- Inspect the Air Filter: Remove the filter and check if it’s dirty. If it is, wash it with mild soap and water, or replace it with a new one.
- Check the Installation Angle: Ensure the unit is slightly tilted outwards, about 1/4 inch lower at the back than the front. Use shims or small pieces of wood to adjust the angle if needed.
- Locate the Drain Hole: Typically, it’s located at the back of the unit, either inside or outside. Refer to your AC unit’s manual if you’re unsure of the location.
- Clear the Drain Hole: Use a straightened paperclip, a small wire, or a pipe cleaner to gently poke into the drain hole and dislodge any blockage. Wiggle it around to ensure it’s clear.
- Flush the Drain Hole: Use a small amount of water (a cup or two) to flush out any remaining debris from the drain hole. Observe if the water drains freely.
- Inspect the Drain Pan: Carefully remove the outer casing of the unit (if you feel comfortable doing so) and inspect the drain pan for cracks or damage. If damaged, it may need professional repair.
- Clean the Coils (Optional): If you notice a lot of dust or debris on the coils, carefully vacuum them with a soft brush attachment.
- Check for Ice Buildup: If you see ice on the coils, let the unit sit unplugged for several hours to allow the ice to melt completely. This might indicate a more serious problem (like low refrigerant), but it’s worth trying.
- Inspect the Seals: Check the seals around the unit where it meets the window. If you see any gaps or damage, seal them with weather stripping or caulk.
- Reassemble the Unit: Carefully reassemble the AC unit if you disassembled it for cleaning or inspection.
- Plug the Unit Back In: Once you’ve completed all the steps, plug the AC unit back into the outlet.
- Monitor for Leaks: Turn the AC on and observe it for a while to see if the water is still pouring out.
Fix the Issue Without Buying Parts
Often, you can fix a window AC unit that’s pouring water without spending any money. Here are some things to try:. For more related activities, check out our Wall Air Conditioner Not Turning On.
- Reset the Unit: Unplug the unit for 30 minutes, then plug it back in. This can sometimes reset the internal controls and resolve minor issues.
- Regular Cleaning: Clean the air filter every month, or more often if you have pets or live in a dusty environment.
- Proper Angle Maintenance: Check the installation angle regularly to ensure it’s still correct.
- External Inspection: Check the outside of the unit for any obvious damage or blockages.
When Replacement Might Be Necessary
If you’ve tried all the troubleshooting steps and your AC unit is still pouring water, it might be time to consider a replacement. Specifically, if the drain pan is severely damaged or if the coils have a refrigerant leak that requires extensive repair (which is often more expensive than a new unit), replacement is the best option. The cost of a new window AC unit can range from $150 to $500+, depending on the size and features. Commonly failing parts that may necessitate replacement include the compressor, the fan motor, and the electronic control board.
Safety Warning
Keep these safety points in mind:
- Always unplug the AC unit before performing any maintenance or repairs.
- Be careful when working with electricity. If you’re not comfortable, call a qualified electrician.
- Avoid getting water on electrical components.
- Be mindful of wet floors to prevent slipping hazards.
Tools You May Need
Here are some helpful tools:
- Screwdriver (Phillips head)
- Paperclip or small wire
- Pipe cleaner
- Small container for water
- Vacuum with brush attachment
- Weather stripping or caulk (if needed)
- Shims (small pieces of wood)
FAQ
Here are some frequently asked questions:
- Q: Why is my AC leaking even after I cleaned the filter? A: There might be a blockage in the drain hole that needs clearing, or the unit could be freezing up due to low refrigerant.
- Q: How often should I clean my AC filter? A: At least once a month, or more often if you have pets or live in a dusty area.
- Q: Is it normal for my AC to drip a little water? A: A small amount of condensation is normal, but excessive pouring is not.
- Q: Can I use bleach to clean the drain hole? A: It’s not recommended. Bleach can damage the plastic components. Use water or a mild soap solution.
- Q: My AC is new, and it’s leaking. What should I do? A: Check the installation angle first. If that’s correct, contact the manufacturer or retailer for warranty assistance.
Conclusion
Don’t let a pouring window AC unit ruin your comfort. By following these simple troubleshooting steps, you can often resolve the issue yourself and save money on repair costs. Remember to prioritize safety and take your time. If you’ve exhausted all the DIY options and the problem persists, it’s best to call a qualified technician for professional assistance. Good luck!
Youtube Video:
Quick Wiring Specifications & Terminal Guide
| Component / Circuit | Standard Wire Gauge | Recommended Protection |
|---|---|---|
| Control & Trigger Signals | 18 – 20 AWG | 5A – 7.5A Inline Fuse |
| Standard Auxiliary Load | 14 – 16 AWG | 15A – 20A Circuit Breaker |
| Main Power Feed / Supply | 10 – 12 AWG | 30A – 40A Heavy-Duty Relay |
Images References
Looking for more diagnostic guides? Explore our complete Air Conditioner Troubleshooting 6 section for step-by-step troubleshooting solutions.
