Why Does My Rv Ac Keep Tripping The Breaker? Find Out The Solution!
Your RV AC may be tripping the breaker due to various reasons, such as: 1. Overload: The AC unit may be drawing too much power, causing the breaker to trip. 2. Faulty wiring: Poor or damaged wiring can lead to electrical issues and breaker tripping. 3. Insufficient power supply: If the RV’s electrical system does not have enough capacity to handle the AC’s power requirement, the breaker may trip. 4. Low refrigerant levels: This can cause the AC to overwork, leading to breaker tripping. 5. Malfunctioning AC unit: Issues with the AC itself, such as a faulty compressor or motor, can cause the breaker to trip. These are some potential causes, but it is essential to consult a professional technician to diagnose and resolve the specific problem with your RV AC.
Picture this: you’re cruising down the open road, wind in your hair, the thrill of adventure coursing through your veins. But suddenly, your blissful ride comes to a screeching halt as you feel the temperature inside your RV starting to rise.
Sweat drips down your forehead, and you frantically rush to the thermostat, only to find that your beloved RV AC has once again tripped the breaker. Frustration seeps in, as you ask yourself the burning question: why does my RV AC keep tripping the breaker? It’s a common issue that many RV owners and enthusiasts face, causing discomfort and potential damage to their AC unit.
But fear not, for in this article, we will unravel the mystery behind this persistent problem. We will dive deep into the intricacies of RV electrical systems, explore the common culprits behind breaker tripping, and equip you with the knowledge and solutions needed to keep your cool on your next adventure. So, fasten your seatbelts and get ready to discover the solution to this RV conundrum.
Let’s hit the road to breaker-free bliss!
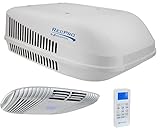
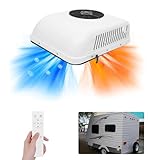
- Remote control with cooling, dehumidifying, dry, sleep, timing, and other functions (stored inside AC unit display for protection during shipping)
- Temperature control for rooms up to 835 square feet
- Best installed on a flat roof – less than 5 degrees inclination
- Does not work with other brand wall thermostats

- All-Weather Comfort: Whether you’re battling the heat or trying to stay warm in the winter, the TOSOT Go Cool series camper AC unit can not only cool your RV but also heat it. The high 15,000 BTU cooling capacity and powerful 12,000 BTU heating capacity cover larger spaces up to 600 sq ft. 15,000 BTU is suitable for RVs from 16 feet to 24 feet long.
- Flexible Operation: Say goodbye to manually adjusting the temperature settings on your air conditioner. With smart WiFi control, you can manage and monitor the AC unit using your smartphone by the free Gree+ app.
- Energy-Efficient Performance: This air conditioner boasts a high-efficiency EER 8.5 rating, which means it delivers optimal cooling and heating performance while consuming less energy. 15 or 20 amp time-delay fuse or circuit breaker is needed for AC power.
- Versatile Performance: No matter the climate you find yourself in during your RV adventures, this air conditioner is built to handle it all. This AC works flawlessly in outdoor temperature ranges from 23°F up to 115°F with an indoor temperature range of 61°F – 86°F to keep you comfortable while you travel.
- Easy Installation: Installing this air conditioner is a hassle-free due to non-ducted configuration makes it compatible with various RV models. Fits standard 14.25 in x 14.25-inch rooftop vent openings for easy rooftop installation. Please note that this is not compatible with RVs with ductwork. This is a ductless AC unit only.
- – Low Amp Draw – The RecPro RV Air Conditioner is designed to use less energy than other models, allowing you to run more appliances at one time. Its low amp draw lets you keep your AC running while still having power for other activities.
- – Dehumidifying Function – Say goodbye to muggy weather! This unit’s dehumidifying function reduces excess moisture in the air, keeping your RV comfortable and fresh all year round.
- – Quieter than Competitor’s – At only 59.7 decibels on high, the RecPro runs just as loud as a gentle rain! With its whisper-quiet operation, you’ll get all the comfort without any noise and disruption of sleep.
- – Superior Functionality – Comes with a easy-to-use remote control that features cooling, dehumidifying, dry, sleep, timing & more functions. It also has a touch screen LED display for easy monitoring & settings adjustments of the unit.
- – Durable Plastic Design – Crafted from tough plastic that’ll last for years, this air conditioner can handle whatever comes its way! Plus, its touch screen LED display allows for easy adjustment settings..

- Cool/Heat Capacity: 15,000
- Electric Heat Element Capacity: 5,600
- Electrical rating: 115 VAC, 60HZ
- 1/3 hp fan motor
- 320 CFM Airflow

- ►40% INCREASE IN AIRFLOW- Increased volume of airflow to the inside of your RV
- ►NOISE REDUCTION- Reduces noise by an average or 3 decibels
- ►COOLS RV FASTER- more cold air equals less cooling time
- ►IMPROVES EFFICIENCY- Leading to energy and cost savings
- ►BALANCES AIR FLOW THOUGHT THE RV- Distribute air equally left and right in the plenum

- FOGATTI RV Air Conditioner – RV air conditioner for most RV models. Easy to install, the package includes an adjustable air distribution box, ADB, and thermostat control kit and instructions. Main body dimensions: 29.5″ x 27.6″ x 14.2″. Standard opening size: 14″ x 14″
- High-Efficiency Refrigeration RV Air Conditioner – This unit is equipped with a professional-grade LG air compressor. the R410A refrigerant and 13500 BTU dual shaft motor work simultaneously to deliver cool air to the interior of the RV faster. the 13,500 BTU motor can cool a 36″ trailer in less than 10 minutes. (Note: This air conditioner does not have a heating function)
- Quiet RV Air Conditioner – 65 decibels low volume for a noiseless and energy-efficient cooling experience. This product runs more smoothly and with less vibration. At maximum power, it is only equivalent to the fan noise
- Durable RV air conditioning unit – The shell is made of ABS material with good resistance to deformation and with UV (deep ultraviolet) resistant material to prevent aging due to sunlight exposure. The internal air duct is wrapped with EPP foam to keep the heat in while preventing rain and dust from entering the air duct. ADB air duct design and adjustable air direction bring you the best user experience and meet all your needs for RV air conditioning!
- Provide quality service – This air conditioner operates at 115V(AC) and 15.5A, most RVs can provide this required power supply. We offer retail consumers an 18-month warranty against defects in materials and workmanship. Also, FOGATTI RV air conditioners are easier to install and wire!
- ⭐【Build to Last】: High-quality PP alloy and PU sponge foam can effectively prevent ultraviolet rays and provide high-strength compression and corrosion resistance, and can reasonably reduce noise and vibration, providing you with a comfortable environment. Through leakage testing and durability testing, it makes you feel more confident when using it.
- ⭐【High Efficiency】: The high-power(cooling power: 2000W, heating power: 800W) dual shaft all copper motor and dual wheel evaporation fan fully meet your comfortable cooling needs.
- ⭐【Convenient Use】: The two switch modes(touch screen and remote control), two functions for heating and cooling, and six adjustable air vents make it more convenient for you to use. No matter what climate you are in during your RV adventure, this air conditioner can handle it effortlessly.
- ⭐【Easy to Install】: The fully connected internal wiring and design without drilling or modification allow you to simply connect the panel plugins of the internal panel to the top-level reserved plugins. Equipped with all the materials, you can easily and quickly start the installation.
- ⭐【After sales service】: If the item unfortunately doesn’t work or doesn’t work well, we have our engineers to provide professional assistance. Otherwise, we have many convenient ways to return the item. Please pay attention to our return policy.

- Cuts down on noise produced by your RV air conditioner
- Made in the US
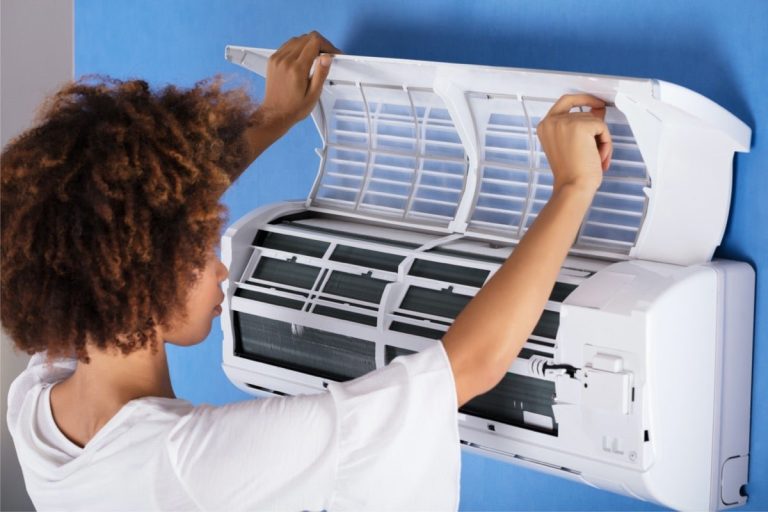
- Air is cleaned by an air filter
- Can be cleaned with a vacuum cleaner or removed and washed
- Made in USA

- All-Weather Comfort: Whether you’re battling the heat or trying to stay warm in the winter, the TOSOT GoCool series camper AC unit can not only cool your RV but also heat it. The high 15,000 BTU cooling capacity and powerful 12,000 BTU heating capacity cover larger spaces up to 600 sq ft. 15,000 BTU is suitable for RVs from 16 feet to 24 feet long.
- Flexible Operation: Say goodbye to manually adjusting the temperature settings on your air conditioner. With smart WiFi control, you can manage and monitor the AC unit using your smartphone by the free Gree+ app.
- Energy-Efficient Performance: This air conditioner boasts a high-efficiency EER 8.5 rating, which means it delivers optimal cooling and heating performance while consuming less energy. 15 or 20 amp time-delay fuse or circuit breaker is needed for AC power.
- Versatile Performance: No matter the climate you find yourself in during your RV adventures, this air conditioner is built to handle it all. This AC works flawlessly in outdoor temperature ranges from 23°F up to 115°F with an indoor temperature range of 61°F – 86°F to keep you comfortable while you travel.
- Easy Installation: Installing this air conditioner is a hassle-free due to non-ducted configuration makes it compatible with various RV models. Fits standard 14.25 in x 14.25-inch rooftop vent openings for easy rooftop installation. Please note that this is not compatible with RVs with ductwork. This is a ductless AC unit only.
I. Common Reasons for RV AC Breaker Tripping
A. Overloading the circuit
One of the most common reasons why your RV AC keeps tripping the breaker is because the circuit is overloaded. It’s essential to understand the electrical capacity of your RV and the appliances that consume a significant amount of power.
1. Understanding the electrical capacity of your RV
Before diving into the specifics, it’s important to have a basic understanding of your RV’s electrical capacity. Most RVs have a 30 amp or 50 amp electrical service. This information can usually be found on the power pedestal at your campsite or in your RV’s owner’s manual.
2. Identifying appliances that consume a significant amount of power
Several appliances in your RV consume a significant amount of power and can contribute to an overloaded circuit. Here are a few examples:
a. Air conditioner
The air conditioner is one of the most power-hungry appliances in an RV. It requires a substantial amount of energy to cool down the interior, especially during hot summer days.
b. Microwave
The microwave is another appliance that uses a significant amount of power. When in use, it can strain the electrical system and potentially trip the breaker.
c. Electric water heater
If your RV has an electric water heater, it can also contribute to an overloaded circuit. Heating water requires a substantial amount of energy, especially when the water heater is running continuously.
B. Faulty wiring or connections
Faulty wiring or connections can also cause your RV AC breaker to trip. It’s crucial to inspect and address any loose or damaged electrical connections.
1. Inspecting for loose or damaged electrical connections
Regularly inspecting your RV’s electrical connections is crucial in preventing breaker trips. Here are some areas to pay close attention to:
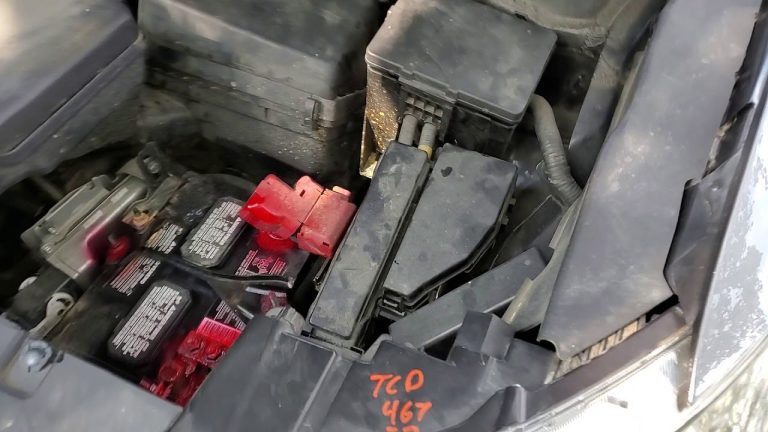
a. Power cord
Check the power cord for any signs of damage or wear, such as frayed wires or exposed insulation. A damaged power cord can cause fluctuations in the electrical current, leading to breaker trips.
b. Breaker panel
Inspect the breaker panel for loose connections or tripped breakers. Tighten any loose connections and reset any tripped breakers to ensure a secure electrical connection.
c. Outlet connections
Make sure the outlet connections are secure and free from any damage. Loose or damaged outlet connections can disrupt the flow of electricity and lead to breaker trips.
2. Evaluating the condition of the RV’s internal wiring
The internal wiring of your RV is responsible for distributing electricity to the various appliances and outlets. Inspect the internal wiring for any signs of wear, damage, or loose connections. If you notice any issues, it’s best to consult a professional electrician or RV technician for further evaluation and repair.
C. Electrical short circuits
Electrical short circuits can occur when a current takes an unintended path due to damaged or compromised wiring. Short circuits can cause the breaker to trip as a safety measure.
1. Identifying potential causes of short circuits
Several factors can contribute to electrical short circuits in an RV:
a. Damaged wiring insulation
If the insulation of the RV’s wiring becomes compromised, it can lead to short circuits. Exposure to moisture, rodents, or general wear and tear can cause the insulation to deteriorate.
b. Corroded or loose electrical connections
Corrosion or loose connections can create arcing or sparks, leading to short circuits. Regularly inspect and clean electrical connections to prevent this issue.
c. Water infiltration
Water infiltration is a common cause of electrical short circuits. Leaks, condensation, or exposure to moisture can result in a short circuit and subsequent breaker trips.
2. Detecting and resolving short circuits
Identifying and resolving short circuits in an RV is crucial to prevent further damage and ensure electrical safety. Here are a few steps you can take:
a. Visual inspection
Perform a thorough visual inspection of your RV’s wiring and electrical components. Look for signs of damage, exposed wires, or charred areas that indicate a short circuit. If you find any issues, address them promptly.
b. Using a multimeter for testing
A multimeter is a handy tool for testing electrical continuity and resistance. Use a multimeter to check for continuity between wires and connections, pinpointing areas of concern. If you’re not comfortable performing these tests yourself, consult a professional electrician or RV technician.
II. Troubleshooting Steps for RV AC Breaker Tripping
A. Resetting the breaker
Resetting the breaker is often the first troubleshooting step when your RV AC trips the breaker. Understanding the purpose of the breaker and how to reset it properly is essential.
1. Understanding the purpose of the breaker
The breaker serves as a safety mechanism to protect the electrical system from overloads and short circuits. When the current exceeds a certain limit, the breaker trips, cutting off power to prevent damage or fire hazards.
2. Properly resetting the breaker switch
To reset the breaker, follow these steps:
- Locate the breaker panel in your RV. It is typically found near the power cord connection or inside a designated cabinet.
- Identify the tripped breaker. The switch will be in the middle position between “on” and “off.”
- Turn the tripped breaker to the “off” position.
- Wait for a few seconds before flipping the switch back to the “on” position.
B. Checking for an overloaded circuit
To prevent future breaker trips, it’s important to monitor your power consumption and avoid overloading the circuit.
1. Monitoring power consumption
Be aware of the power requirements of your RV’s appliances and the total power available from your electrical service. Keep track of the power usage and avoid running multiple high-power appliances simultaneously.
2. Unplugging or reducing the usage of high-power appliances
If you notice that your RV AC trips the breaker frequently, consider unplugging or reducing the usage of other high-power appliances. This can help distribute the load and prevent overloading the circuit.
C. Inspecting the power cord and connections
Ensuring that the power cord is securely connected and free from any damage is crucial in preventing breaker trips.
1. Ensuring the power cord is securely connected
Check the connection between the RV’s power cord and the external power source. Ensure that it is tightly plugged in and free from any looseness or wiggle.
2. Examining the power cord for signs of damage or wear
Inspect the power cord for any signs of damage, such as frayed wires or exposed insulation. If you notice any issues, replace the power cord immediately to avoid potential safety hazards.
D. Assessing the RV’s internal wiring
Examining the internal wiring of your RV is crucial in identifying any loose or damaged connections that can contribute to breaker trips.
1. Examining the wiring inside the RV for loose or damaged connections
Carefully inspect the wiring inside your RV for any loose or damaged connections. Pay close attention to areas where wires come into contact with sharp edges or move around frequently.
2. Seeking professional assistance for complex wiring issues
If you encounter complex wiring issues or are unsure about how to address them, it’s best to seek the assistance of a professional electrician or RV technician. They have the expertise and knowledge to handle intricate wiring problems safely and effectively.
E. Testing for short circuits
Testing for short circuits is essential in identifying potential issues and preventing further breaker trips.
1. Performing a visual inspection for visible signs of damage
Visually inspect your RV’s wiring and electrical components for any visible signs of damage, such as exposed wires, scorch marks, or melted insulation. If you notice any abnormalities, address them promptly.
2. Using a multimeter to test for continuity and resistance
A multimeter can help you test for continuity and resistance in your RV’s electrical system. Use the multimeter to check for proper continuity between wires and connections, as well as resistance within the system. If you’re unfamiliar with how to use a multimeter, consult a professional electrician or RV technician.
III. Prevention and Maintenance
A. Proper electrical load management
Proper electrical load management is crucial in preventing breaker trips and ensuring the longevity of your RV’s electrical system.
1. Understanding the electrical capacity of the RV
As mentioned earlier, understanding the electrical capacity of your RV is essential. Be aware of the maximum power your RV can handle and distribute your power consumption accordingly.
2. Spreading out power consumption
Avoid running multiple high-power appliances simultaneously. Spread out your power consumption throughout the day to prevent overloading the circuit.
B. Regular inspection of wiring and connections
Regularly inspecting your RV’s wiring and connections is crucial in maintaining a safe and reliable electrical system.
1. Periodic checks for loose or damaged connections
Make it a habit to inspect electrical connections periodically. Check for any loose or damaged connections and address them promptly.
2. Ensuring wiring insulation is intact and secure
Inspect the insulation of your RV’s wiring to ensure it is intact and secure. Replace any damaged or compromised insulation to prevent potential short circuits or electrical hazards.
C. Weatherproofing and moisture control
Weatherproofing your RV and controlling moisture levels inside the vehicle can help prevent electrical issues, including breaker trips.
1. Sealing potential points of water infiltration
Inspect your RV for potential entry points for water, such as windows, doors, and roof vents. Seal any areas prone to water infiltration to prevent moisture-related electrical issues.
2. Utilizing dehumidifiers or moisture absorbers
Excessive moisture inside your RV can lead to corrosion and short circuits. Use dehumidifiers or moisture absorbers to maintain optimal humidity levels and prevent moisture-related electrical problems.
D. Professional electrical system evaluation
Periodic evaluation of your RV’s electrical system by a certified RV technician is crucial in maintaining its safety and performance.
1. Periodic inspection by a certified RV technician
Schedule regular inspections of your RV’s electrical system by a certified RV technician. They have the expertise and knowledge to identify potential electrical issues and perform necessary repairs.
2. Identifying and resolving potential electrical issues
A professional evaluation can help identify and resolve potential electrical issues before they escalate. Addressing these issues promptly can prevent future breaker trips and ensure the safety and functionality of your RV’s electrical system.
IV. Additional Tips and Tricks
A. Understanding the importance of proper grounding
Proper grounding is crucial in maintaining a safe and efficient electrical system. Ensure that your RV is properly grounded and that all electrical components are securely connected to the RV’s grounding system.
B. Using surge protectors to safeguard RV electronics
Investing in a surge protector can help protect your RV’s electronics from power surges and voltage spikes. Surge protectors act as a safeguard, preventing excessive voltage from reaching your RV’s electrical system.
C. Upgrading to more efficient appliances
If your RV’s appliances are old and energy-hungry, consider upgrading to more efficient models. Energy-efficient appliances can help reduce power consumption and minimize the risk of breaker trips.
D. Considering alternative power sources (solar, generator)
If you frequently experience breaker trips or require additional power for your RV, consider using alternative power sources such as solar panels or a generator. These can provide additional power and reduce the strain on your RV’s electrical system.
By following these troubleshooting steps, implementing preventive measures, and seeking professional assistance when needed, you can minimize the occurrence of RV AC breaker trips and enjoy a comfortable and hassle-free RV experience.
How To Replace or Change a Circuit Breaker in your Electrical Panel & Why it’s Tripping
Why does my RV AC keep tripping the breaker?
How can I prevent my RV AC from tripping the breaker?
Is it normal for an RV AC to trip the breaker occasionally?
Can a low voltage supply cause the RV AC to trip the breaker?
Should I attempt to fix the RV AC tripping the breaker issue myself?
Final Summary: Tips to Prevent RV AC Breaker Trips
In conclusion, if your RV AC keeps tripping the breaker, there are several common reasons and troubleshooting steps to consider. Overloading the circuit is a common cause, so understanding your RV’s electrical capacity and managing power consumption is important.
Faulty wiring or connections can also lead to breaker trips, so regular inspections and addressing any loose or damaged connections is crucial. Electrical short circuits can occur due to damaged wiring or water infiltration, so visual inspections and testing with a multimeter can help identify and resolve these issues.
To prevent future breaker trips, proper electrical load management, regular inspections of wiring and connections, weatherproofing and moisture control, and professional evaluations are recommended. Additional tips include ensuring proper grounding, using surge protectors, upgrading to more efficient appliances, and considering alternative power sources. By following these steps and implementing preventive measures, you can minimize breaker trips and ensure a safe and comfortable RV experience.