
Introduction
Discovering your Whirlpool washer is humming loudly but refusing to drain can be a real headache. Not only does it prevent you from doing your laundry, but the standing water can potentially damage your clothes and even lead to mold growth. This issue often arises after a regular wash cycle, leaving you with a tub full of water and a machine that just won’t cooperate. The urgency to fix this problem is clear you want your clothes clean, your washer working, and your home protected from water damage.
💡 Technical Key Takeaways:
- Core Focus: Diagnostic schematic and terminal connection layout for Whirlpool Washer Humming Not Draining.
- Target Scope: Field technicians, automotive DIYers, and residential/commercial electricians.
- Safety Rule: Always disconnect the primary power source/battery terminal and verify zero voltage with a multimeter before touching wires.
Common Causes of Whirlpool Washer Humming Not Draining
Here are some of the most common reasons why your Whirlpool washer might be humming but not draining:. For more related activities, check out our Washing Machine Leaking From Draw.
- Clogged Drain Hose: The drain hose is the tube that carries water away from the washer. If it’s blocked, the water can’t escape.
- Obstructed Drain Pump: The drain pump is responsible for pumping the water out. Small items like socks or coins can get stuck in the pump, preventing it from working.
- Kinked or Twisted Drain Hose: If the drain hose is bent or twisted, it restricts water flow.
- Blocked Drainpipe: The drainpipe where the drain hose connects could be clogged, preventing water from leaving the washer.
- Faulty Drain Pump Motor: The motor that powers the drain pump may have failed. A humming sound often indicates a struggling or failing motor.
- Air Lock in Drain System: Sometimes, air gets trapped in the drain system, preventing the pump from creating suction.
- Lid Switch Problem: Some washers require the lid to be fully closed for the drain cycle to activate. A faulty lid switch can prevent the drain cycle from starting.
- Control Board Malfunction: In rare cases, the control board that manages the washer’s functions may be malfunctioning, preventing the drain cycle from engaging.
Symptoms Checklist
Use this checklist to confirm you’re dealing with a ‘humming not draining’ issue:
- Washer tub is full of water after the wash cycle.
- You hear a humming or buzzing sound coming from the washer, usually from the bottom.
- Water isn’t draining, even after an extended period.
- The washer might display an error code related to draining.
- The drain hose is properly connected, but no water is coming out.
How to Fix Whirlpool Washer Humming Not Draining Step-by-Step Guide
Follow these steps to troubleshoot and fix your Whirlpool washer:
- Unplug the Washer: Before starting any repairs, disconnect the power cord from the outlet. This is crucial for your safety.
- Check the Drain Hose for Kinks: Make sure the drain hose isn’t bent, twisted, or pinched. Straighten it out if necessary.
- Inspect the Drain Hose Connection: Ensure the drain hose is securely connected to both the washer and the drainpipe.
- Check the Drainpipe for Clogs: Disconnect the drain hose from the drainpipe and check for any obstructions. You can use a plumber’s snake to clear the drainpipe.
- Access the Drain Pump: Locate the drain pump. It’s usually at the bottom of the washer, behind an access panel. Refer to your washer’s manual for the exact location.
- Drain Remaining Water: Before removing the drain pump, place a shallow pan or towels underneath to catch any remaining water.
- Remove the Drain Pump: Disconnect the hoses and electrical connections from the drain pump. Then, remove the pump from the washer.
- Inspect the Drain Pump for Obstructions: Check the pump impeller (the spinning part) for any debris, such as coins, lint, or small clothing items. Remove any obstructions carefully.
- Test the Drain Pump (If Possible): Some drain pumps can be tested by connecting them to a power source. If the pump doesn’t spin or makes unusual noises, it might be faulty (though you can’t always tell without proper testing equipment).
- Reassemble the Drain Pump: Reconnect the hoses and electrical connections to the drain pump.
- Reinstall the Drain Pump: Put the drain pump back into its original location and secure it.
- Close the Access Panel: Replace the access panel that covers the drain pump.
- Plug in the Washer: Reconnect the power cord to the outlet.
- Run a Test Cycle: Start a short wash cycle to see if the washer drains properly.
Fix the Issue Without Buying Parts
Before considering replacements, try these free methods:
- Reset the Washer: Unplug the washer for 1-2 minutes. Plug it back in and see if it resets and starts draining.
- Clean the Drain Pump Filter: Many washers have a drain pump filter designed to catch debris. Locate and clean this filter regularly.
- Check for Air Locks: Try tilting the washer slightly to dislodge any trapped air in the drain system.
- Run a Calibration Cycle: Some washers have a calibration cycle that can help reset the system and resolve minor issues. Check your owner’s manual for instructions.
When Replacement Might Be Necessary
If you’ve tried all the troubleshooting steps and the washer still isn’t draining, the drain pump motor may be failing. Replacing the drain pump typically costs between $50 and $150 for the part, and another $50 to $200 for professional installation if you choose not to do it yourself. Other parts that can fail, although less common, include the lid switch (approx. $20-$50) and the control board (which can be expensive, ranging from $100 to $400).
Safety Warning
- Always unplug the washer before performing any repairs.
- Be careful when handling water near electrical components.
- If you’re uncomfortable with any of these steps, consult a qualified appliance repair technician.
- Wipe up any spills immediately to prevent slips.
Tools You May Need
Here’s a list of simple tools that may be helpful for this repair:
- Screwdrivers (Phillips and flathead)
- Pliers
- Shallow pan or towels
- Plumber’s snake (for clearing drainpipes)
- Work gloves
FAQ
Here are some frequently asked questions:
- Q: Why is my washer humming even after I cleaned the drain pump? A: There might still be a partial blockage further down the drain line or the pump motor itself could be failing.
- Q: How do I know if my drain pump is bad? A: If it hums loudly but doesn’t pump water, or if it shows signs of physical damage like cracks, it’s likely bad.
- Q: Can I use a coat hanger to clear a drain hose clog? A: It’s possible, but be very careful not to puncture the hose. A plumber’s snake is a safer option.
- Q: My washer is displaying an error code related to draining. What does it mean? A: Check your owner’s manual for a list of error codes and their meanings. This will help you pinpoint the exact problem.
Conclusion
Troubleshooting a Whirlpool washer that’s humming but not draining can seem daunting, but with these steps, you have a solid starting point. By carefully following the instructions and taking your time, you might be able to resolve the issue yourself and save money on repair costs. If you’ve exhausted these steps and are still having problems, don’t hesitate to call a qualified appliance repair technician for professional assistance. Good luck!
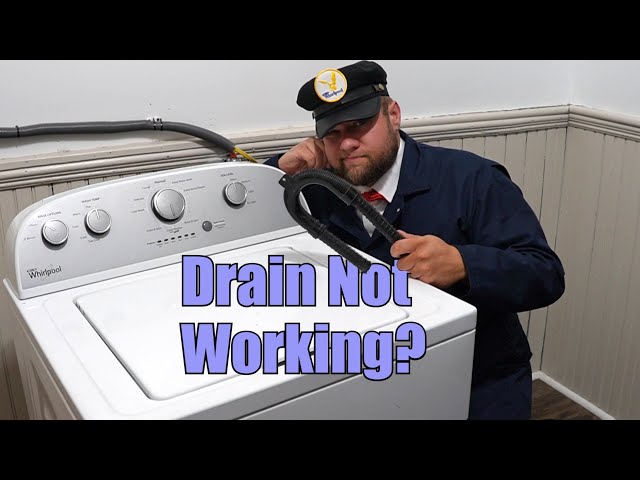
Youtube Video:
Quick Wiring Specifications & Terminal Guide
| Component / Circuit | Standard Wire Gauge | Recommended Protection |
|---|---|---|
| Control & Trigger Signals | 18 – 20 AWG | 5A – 7.5A Inline Fuse |
| Standard Auxiliary Load | 14 – 16 AWG | 15A – 20A Circuit Breaker |
| Main Power Feed / Supply | 10 – 12 AWG | 30A – 40A Heavy-Duty Relay |
Images References
Looking for more diagnostic guides? Explore our complete Washing Machine Problems 6 section for step-by-step troubleshooting solutions.
