
Introduction
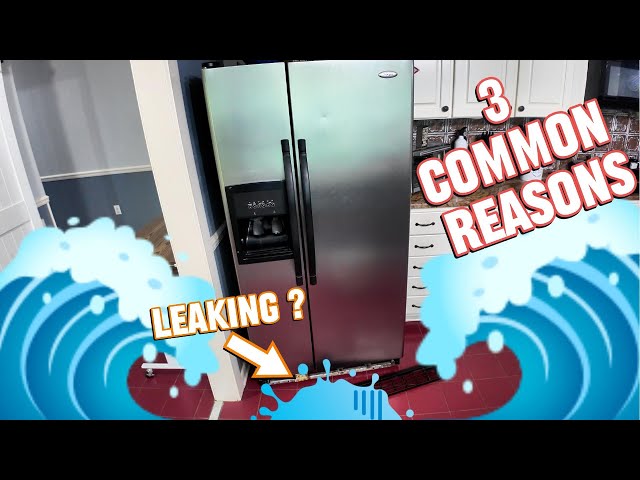
A leaking water line in your Whirlpool refrigerator is a common problem that can lead to water damage, increased water bills, and potential mold growth. It usually happens when the plastic or rubber tubing carrying water to the ice maker or water dispenser becomes damaged or disconnected. It’s important to address this issue quickly to prevent further damage to your home and appliance. Don’t worry, often you can fix it yourself!. Explore more in our Refrigerator Problems 1 collection.
💡 Technical Key Takeaways:
- Core Focus: Diagnostic schematic and terminal connection layout for Whirlpool Refrigerator Water Line Leaking.
- Target Scope: Field technicians, automotive DIYers, and residential/commercial electricians.
- Safety Rule: Always disconnect the primary power source/battery terminal and verify zero voltage with a multimeter before touching wires.
Common Causes of Whirlpool Refrigerator Water Line Leaking
Here are some common reasons why your Whirlpool refrigerator water line might be leaking:
- Loose Connections: The fittings where the water line connects to the refrigerator and the water supply can loosen over time.
- Damaged Water Line: The plastic tubing itself can become cracked, kinked, or brittle, especially if it’s exposed to heat or sunlight.
- High Water Pressure: Excessive water pressure can stress the water lines and cause them to leak at the connections.
- Faulty Water Filter: A clogged or incorrectly installed water filter can put pressure on the lines, leading to leaks.
- Icemaker Issues: Problems within the icemaker itself, such as a cracked housing or faulty valve, can cause water to leak back along the line.
- Valve Problems: The water inlet valve that controls the flow of water into the refrigerator can develop leaks over time.
- Old Age: Like any part, water lines deteriorate with age and become more prone to leaks.
- Kinked or pinched line: Make sure the water line has no kinks or pinched spots behind the refrigerator.
Symptoms Checklist
Here are some signs to help you confirm you have a water line leak:
- Puddles of water on the floor near the refrigerator.
- Water stains or dampness behind the refrigerator.
- Reduced water flow to the water dispenser or ice maker.
- Ice maker not producing ice or producing small/odd shaped ice.
- A hissing or dripping sound coming from behind the refrigerator.
How to Fix Whirlpool Refrigerator Water Line Leaking Step-by-Step Guide
- Turn off the Water Supply: Locate the shut-off valve for the refrigerator’s water supply (usually under the sink or in the basement) and turn it off. This is crucial to prevent further water damage.
- Unplug the Refrigerator: Disconnect the refrigerator from the power outlet for safety.
- Locate the Leak: Carefully inspect the water line and its connections at the back of the refrigerator. Look for visible signs of water, cracks, or loose fittings. Use a flashlight if necessary.
- Tighten the Connections: If the leak appears to be coming from a loose connection, gently tighten the fitting with a wrench. Be careful not to overtighten, as this could damage the fitting or the water line.
- Inspect the Water Line: Examine the entire length of the water line for any cracks, kinks, or damage. If you find any damage, proceed to the next step.
- Check the Water Filter: Remove and inspect the water filter. If it’s old or clogged, replace it with a new one. Make sure it’s properly installed according to the manufacturer’s instructions.
- Examine the Icemaker: If the leak seems to be originating from the icemaker area, inspect the icemaker housing and water inlet valve for any cracks or damage.
- Dry the Area: Use a towel to thoroughly dry the area around the water line and connections. This will make it easier to spot any new leaks when you turn the water back on.
- Turn on the Water Supply (Partially): Slowly turn the water supply valve back on just a little bit. Check for leaks at the connection points and along the water line.
- Adjust and Observe: If you still see a leak, slightly tighten the connections, double-check the water filter installation, and look closely at the water line for any cracks that might not have been visible at first.
- Turn on the Refrigerator: After verifying no leaks with the water supply on, plug the refrigerator back into the power outlet.
- Monitor for Leaks: Continue to monitor the area around the water line for any new leaks over the next few hours.
Fix the Issue Without Buying Parts
Before resorting to replacement parts, try these free methods:
- Reset the Refrigerator: Unplug the refrigerator for 5 minutes, then plug it back in. This can sometimes resolve minor issues.
- Clean the Water Line: If you suspect mineral buildup is contributing to the leak, flush the water line with vinegar. Disconnect the line, pour vinegar through it, let it sit for 30 minutes, and then flush with clean water.
- Inspect for Kinks: Ensure the water line isn’t kinked or pinched behind the refrigerator, restricting water flow and potentially causing leaks.
- Maintenance Basics: Replace the water filter every 6 months, even if it doesn’t seem clogged, to prevent pressure buildup.
When Replacement Might Be Necessary
If tightening connections and other troubleshooting steps don’t solve the problem, you might need to replace some parts. Here are some common failing parts and estimated cost ranges (USD):
- Water Line: $10 – $30
- Water Filter Housing: $20 – $50
- Water Inlet Valve: $30 – $70
Replacement is often necessary if the existing parts are cracked or severely damaged. Consider calling a qualified appliance technician if you are uncomfortable with replacing these parts yourself. Discover more free resources across our collection library.
Safety Warning
- Always unplug the refrigerator before working on any electrical or water components.
- Turn off the water supply to the refrigerator before disconnecting any water lines.
- Be careful when working with tools to avoid injury.
- Clean up any spills immediately to prevent slips and falls.
- If you are not comfortable working with electrical or plumbing components, contact a qualified technician.
Tools You May Need
- Adjustable wrench
- Screwdriver (Phillips and flathead)
- Flashlight
- Towels or rags
- Bucket
- Replacement water filter (if needed)
FAQ
Q: Why is my water line leaking even after I replaced the filter?
A: Make sure the new filter is the correct type for your refrigerator and is properly installed. Also, check for any cracks in the filter housing.
Q: How do I know if my water pressure is too high?
A: You can purchase a water pressure gauge at most hardware stores and attach it to an outdoor faucet to measure your home’s water pressure. The ideal pressure for most refrigerators is between 30 and 100 PSI.
Q: Can I use a universal water line instead of a Whirlpool specific one?
A: Yes, as long as the universal water line is the correct diameter and has compatible fittings for your refrigerator and water supply.
Q: How often should I replace my refrigerator water line?
A: It’s generally recommended to replace the water line every 5-7 years, or sooner if you notice any signs of wear and tear.
Conclusion
Troubleshooting a Whirlpool refrigerator water line leak can often be accomplished with a few simple steps. By carefully inspecting the connections, water line, and filter, you can often identify and resolve the issue yourself. Remember safety first, turn off the water and unplug the fridge. If you’ve tried these steps and the leak persists, don’t hesitate to contact a qualified appliance technician for assistance.
Youtube Video:
Quick Wiring Specifications & Terminal Guide
| Component / Circuit | Standard Wire Gauge | Recommended Protection |
|---|---|---|
| Control & Trigger Signals | 18 – 20 AWG | 5A – 7.5A Inline Fuse |
| Standard Auxiliary Load | 14 – 16 AWG | 15A – 20A Circuit Breaker |
| Main Power Feed / Supply | 10 – 12 AWG | 30A – 40A Heavy-Duty Relay |
