Introduction
A water leak in front of your Whirlpool refrigerator is a common problem that can be caused by several issues. Not only is it a nuisance, but it can also damage your flooring and potentially lead to mold growth. Addressing this issue promptly is crucial to prevent further damage and ensure your refrigerator operates efficiently. If you notice a puddle of water appearing regularly in front of your fridge, it’s time to investigate. This guide will help you troubleshoot and fix the problem, step-by-step.
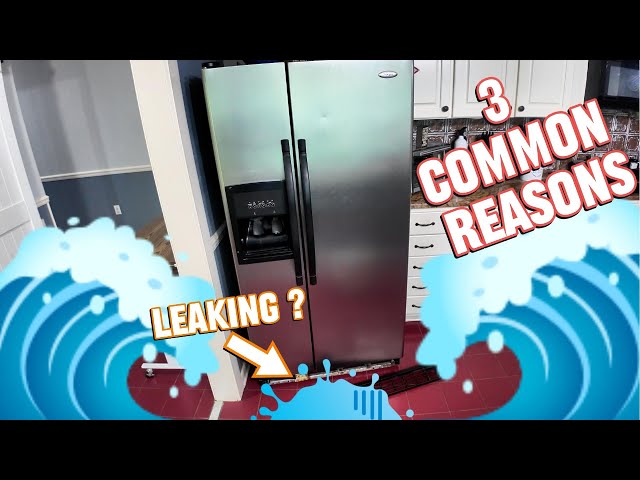
Common Causes of Whirlpool Refrigerator Leaking Water in Front
Here are some common reasons why your Whirlpool refrigerator might be leaking:
- Clogged Defrost Drain: This is the most frequent culprit. Ice buildup can block the drain, causing water to overflow and leak.
- Frozen Water Line: If your refrigerator has an ice maker or water dispenser, a frozen water line can cause water to back up and leak.
- Faulty Water Inlet Valve: This valve controls the water flow to the ice maker and dispenser. If it’s cracked or malfunctioning, it can leak.
- Loose Water Line Connections: Check all the connections to the water lines, both at the refrigerator and the water supply, for looseness.
- Cracked Drain Pan: The drain pan, located at the bottom of the refrigerator, collects water from the defrost cycle. If it’s cracked, it will leak.
- Door Seal Issues: A damaged or dirty door seal can allow warm air to enter, causing excessive condensation that leads to leaks.
- Overfilled Ice Maker: Sometimes, the ice maker can overfill, leading to water spills and leaks.
- High Humidity: Excessively humid environments can cause condensation on the refrigerator surfaces, which may drip and form a puddle.
Symptoms Checklist
Here’s a list of things to check to confirm the source of the leak:
- Water pooling directly in front of the refrigerator.
- Water dripping from underneath the refrigerator.
- Ice buildup in the freezer section.
- Water stains on the floor near the refrigerator.
- Visible cracks or damage to the drain pan.
- Dampness or mold growth around the base of the refrigerator.
- Unusual noises from the refrigerator, like dripping or gurgling.
How to Fix Whirlpool Refrigerator Leaking Water in Front Step-by-Step Guide
Follow these steps to troubleshoot and fix the leak:
- Unplug the Refrigerator: Safety first! Disconnect the refrigerator from the power outlet.
- Locate the Defrost Drain: This is usually located on the back wall inside the freezer compartment, often behind a panel.
- Clear the Defrost Drain: Use a long, flexible object like a pipe cleaner, a turkey baster, or a thin wire to carefully clear any blockage. A blast of warm water from a turkey baster can help.
- Check the Drain Pan: Locate the drain pan (usually at the bottom of the refrigerator). Inspect it for cracks or damage. Empty any water present.
- Inspect Water Lines: If your refrigerator has an ice maker or water dispenser, inspect the water lines and connections for leaks or looseness. Tighten any loose connections.
- Check the Water Inlet Valve: Locate the water inlet valve (usually at the back of the refrigerator). Inspect it for cracks or leaks.
- Inspect Door Seals: Check the refrigerator and freezer door seals for damage, tears, or dirt. Clean the seals with warm, soapy water.
- Level the Refrigerator: An unlevel refrigerator can cause water to flow incorrectly. Use a level to check and adjust the leveling feet.
- Defrost the Refrigerator: If ice buildup is suspected, manually defrost the refrigerator to melt any accumulated ice.
- Clean Condenser Coils: Dirty condenser coils can reduce efficiency and increase condensation. Clean the coils located at the back or bottom of the refrigerator with a vacuum cleaner brush attachment.
- Reassemble the Refrigerator: Once you’ve inspected and addressed the potential causes, reassemble any panels or components you removed.
- Plug in the Refrigerator: Plug the refrigerator back into the power outlet.
- Monitor for Leaks: Observe the refrigerator for a few days to see if the leak has stopped.
- Check Ice Maker Function: If you have an ice maker, check its operation to ensure it’s not overfilling or leaking.
Fix the Issue Without Buying Parts
Before considering replacement parts, try these cost-free solutions:
- Reset the Refrigerator: Unplug the refrigerator for 10 minutes, then plug it back in. This can sometimes reset the defrost cycle.
- Deep Cleaning: Thoroughly clean the interior of the refrigerator to remove any food particles that could contribute to clogs or odors.
- Inspect and Adjust: Carefully examine all connections and components for tightness. Sometimes, a simple adjustment is all that’s needed.
- Regular Maintenance: Schedule regular cleaning of the condenser coils and defrost drain to prevent future problems.
When Replacement Might Be Necessary
If the leak persists after trying all troubleshooting steps, certain parts might need replacing. A cracked drain pan, a faulty water inlet valve, or a severely damaged water line might require replacement. Estimated costs are as follows:
- Drain Pan: $20 – $50
- Water Inlet Valve: $30 – $75
- Water Line: $15 – $40
Consider calling a qualified technician for assistance if you are uncomfortable with replacing parts yourself.
Safety Warning
- Always unplug the refrigerator before performing any maintenance or repairs.
- Avoid contact with water and electrical components to prevent electric shock.
- Use caution when working with sharp tools or objects.
- Clean up any spills immediately to prevent slips and falls.
- If you are unsure about any step, consult a qualified appliance repair technician.
Tools You May Need
- Screwdrivers (Phillips and flathead)
- Pliers
- Adjustable wrench
- Pipe cleaner or flexible wire
- Turkey baster
- Warm water
- Level
- Vacuum cleaner with brush attachment
- Flashlight
FAQ
Here are some frequently asked questions about refrigerator leaks:
- Q: Why is my refrigerator leaking after I cleaned it? A: Cleaning might have dislodged debris in the defrost drain, causing a temporary blockage. Try clearing the drain again.
- Q: How often should I clean the defrost drain? A: It’s recommended to clean the defrost drain every 6 months to prevent blockages.
- Q: Can a dirty door seal cause a leak? A: Yes, a dirty or damaged door seal can allow warm air to enter, leading to condensation and leaks.
- Q: What if the drain pan is cracked? A: A cracked drain pan needs to be replaced to prevent further leaks.
Conclusion
Don’t let a leaking Whirlpool refrigerator disrupt your home. By following these troubleshooting steps, you can often identify and fix the problem yourself. Remember to prioritize safety and take your time. If you’ve exhausted these steps and the leak persists, it’s best to consult a qualified appliance repair technician for professional assistance. Taking a DIY approach can save you money and give you a sense of accomplishment!
Youtube Video:
Looking for more useful options?
Check out recommended resources that others find helpful.