
Introduction
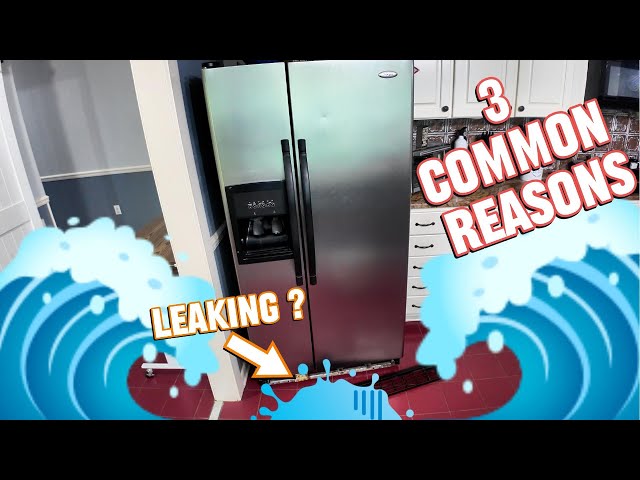
Finding water leaking from the back of your Whirlpool refrigerator can be frustrating and even a little alarming. It’s a common issue, often noticed when you find a puddle on the floor behind the fridge, or perhaps dampness along the back panel. This leak isn’t just a nuisance; if left unaddressed, it can damage your flooring and even encourage mold growth. Acting quickly to identify and resolve the problem can save you from more costly repairs down the line. Let’s get to the bottom of it!
💡 Technical Key Takeaways:
- Core Focus: Diagnostic schematic and terminal connection layout for Whirlpool Refrigerator Leaking Water From Back.
- Target Scope: Field technicians, automotive DIYers, and residential/commercial electricians.
- Safety Rule: Always disconnect the primary power source/battery terminal and verify zero voltage with a multimeter before touching wires.
Common Causes of Whirlpool Refrigerator Leaking Water From Back
Here are some of the most frequent reasons why your Whirlpool refrigerator might be leaking water from the back:. For more related activities, check out our Samsung Ice Maker Not Releasing Ice.
- Clogged Defrost Drain: This is the most common culprit. The drain allows melted frost to flow into a pan for evaporation. When it gets clogged with debris, water backs up and leaks.
- Frozen Defrost Drain: Similar to a clog, ice can form in the drain tube, blocking water flow.
- Damaged or Disconnected Water Line: If your refrigerator has an ice maker or water dispenser, a damaged or poorly connected water line can leak.
- Cracked Drain Pan: The drain pan, located near the compressor, catches defrost water. If it’s cracked, water will leak.
- Loose Water Filter Housing: A loose or improperly installed water filter housing can cause leaks, especially when the water dispenser is used.
- High Humidity: In humid environments, condensation can form on the refrigerator’s exterior and drip down the back.
- Overfilled Drain Pan: While rare, a drain pan that evaporates water slowly can eventually overflow.
- Faulty Water Inlet Valve: The water inlet valve controls the water supply to the ice maker and dispenser. A faulty valve can leak even when not in use.
Symptoms Checklist
Use this checklist to help pinpoint the source of the leak:
- Puddle of water behind the refrigerator.
- Dampness or moisture on the floor behind the refrigerator.
- Ice buildup inside the freezer.
- Water dripping from the back of the refrigerator when the defrost cycle runs (listen for a hissing sound).
- The water dispenser or ice maker isn’t working correctly.
- Visible cracks or damage to the drain pan.
How to Fix Whirlpool Refrigerator Leaking Water From Back Step-by-Step Guide
Follow these steps to troubleshoot and fix the leak:
- Unplug the Refrigerator: Always disconnect the power before working on your refrigerator for safety.
- Locate the Defrost Drain: It’s usually located on the back wall inside the freezer compartment, often behind a panel.
- Thaw Any Ice Buildup: If the drain is frozen, use a hairdryer (on low setting) to carefully melt the ice. Be careful not to melt any plastic parts.
- Clear the Defrost Drain: Use a thin, flexible object like a pipe cleaner, a straightened coat hanger, or a turkey baster to push through the drain and clear any clogs. Hot water can also help flush out the debris.
- Flush the Drain: Use a turkey baster or syringe to flush the drain with hot water. Check if the water drains properly.
- Inspect the Drain Pan: Locate the drain pan at the bottom rear of the refrigerator, near the compressor. Check for cracks or damage. If it’s cracked, it will need to be replaced (although this guide focuses on fixes without parts).
- Check Water Lines (If Applicable): If your refrigerator has an ice maker or water dispenser, inspect the water lines for leaks or loose connections. Tighten any loose connections.
- Inspect the Water Filter Housing (If Applicable): Check the water filter housing for cracks or a loose seal. Ensure the filter is properly installed.
- Level the Refrigerator: An uneven refrigerator can cause water to flow improperly. Use a level to check and adjust the refrigerator’s feet.
- Clean the Condenser Coils: Dust buildup on the condenser coils (usually on the back) can reduce efficiency and potentially contribute to condensation. Vacuum the coils.
- Monitor for Leaks: Plug the refrigerator back in and monitor for leaks over the next 24-48 hours.
- Check Door Seals: Make sure the door seals are clean and creating a tight seal. A poor seal can lead to excessive condensation.
- Adjust Temperature Settings: If the refrigerator is set too cold, it can lead to excessive frost buildup and more water during the defrost cycle.
Fix the Issue Without Buying Parts
Before considering replacement parts, try these free methods:
- Refrigerator Reset: Unplug the refrigerator for 30 minutes to reset the system.
- Thorough Cleaning: Regularly clean the inside of your refrigerator to prevent food debris from clogging the drain.
- Temperature Recalibration: Ensure the temperature settings are correct for your climate and usage.
- Routine Inspection: Periodically check for ice buildup or water leaks to catch problems early.
- Proper Maintenance: Follow the manufacturer’s recommendations for cleaning and maintenance.
When Replacement Might Be Necessary
If you’ve tried all the troubleshooting steps and the leak persists, a failing part might be the issue. The drain pan (typically $20-$50 USD) or a faulty water inlet valve ($30-$70 USD) are common culprits. However, consider the age and overall condition of your refrigerator. If it’s older than 10 years and other problems are surfacing, a new refrigerator might be a more cost-effective solution in the long run. New refrigerators range from $500-$2000+ USD, depending on the features.
Safety Warning
- Always unplug the refrigerator before performing any maintenance or repairs.
- Avoid touching electrical components with wet hands.
- Be careful when using sharp tools to avoid injury.
- Wipe up any spilled water immediately to prevent slips and falls.
Tools You May Need
- Screwdriver (Phillips and flathead)
- Pipe cleaner or straightened coat hanger
- Turkey baster or syringe
- Hairdryer
- Vacuum cleaner
- Level
- Flashlight
FAQ
Q: Why is my refrigerator leaking only sometimes?
A: The leak might be occurring during the defrost cycle, which happens periodically. A partially clogged drain can cause leaks only when the system is actively defrosting.
Q: How often should I clean the condenser coils?
A: Ideally, clean the condenser coils every 6 months. Dust buildup reduces efficiency and can contribute to condensation.
Q: What can I use if I don’t have a pipe cleaner?
A: A straightened coat hanger or even a long zip tie can work to clear the defrost drain.
Q: Why does my refrigerator smell moldy?
A: Mold can grow in the drain pan or around the defrost drain if water is constantly present. Clean these areas thoroughly with a bleach solution (diluted). Make sure to wear gloves and ventilate the area well.
Conclusion
Fixing a leaking refrigerator can seem daunting, but by following these steps, you can often identify and resolve the problem yourself. Addressing the leak promptly can prevent further damage and save you money. If you’ve tried these steps and the leak persists, don’t hesitate to contact a qualified appliance repair technician. However, with a little effort, you may be able to get your Whirlpool refrigerator back in top shape!
Youtube Video:
Quick Wiring Specifications & Terminal Guide
| Component / Circuit | Standard Wire Gauge | Recommended Protection |
|---|---|---|
| Control & Trigger Signals | 18 – 20 AWG | 5A – 7.5A Inline Fuse |
| Standard Auxiliary Load | 14 – 16 AWG | 15A – 20A Circuit Breaker |
| Main Power Feed / Supply | 10 – 12 AWG | 30A – 40A Heavy-Duty Relay |
Images References
Looking for more diagnostic guides? Explore our complete Refrigerator Problems 5 section for step-by-step troubleshooting solutions.
