Introduction
Discovering a puddle beneath your Whirlpool Cabrio washer can be alarming. Water leaks not only damage your flooring but can also lead to mold growth and potentially higher water bills. Its a common issue that often happens during or after a wash cycle. Acting quickly can prevent further damage and potentially save you money on costly repairs. This guide will walk you through common causes and how to troubleshoot them, step-by-step.
Common Causes of Whirlpool Cabrio Washer Leaking Underneath
Many things can cause your Whirlpool Cabrio to leak. Here are some common culprits:
- Loose Hoses: The hoses that connect the washer to the water supply or drain can loosen over time.
- Damaged Hoses: Cracks, kinks, or holes in the hoses can cause leaks.
- Drain Pump Issues: The drain pump can leak if it’s cracked or the seals are worn.
- Tub Seal Failure: The seal between the inner and outer tubs can degrade, leading to leaks, especially during the spin cycle.
- Water Inlet Valve Problems: A faulty valve can leak even when the washer is off.
- Over-Sudsing: Using too much detergent can create excessive suds that overflow.
- Clogged Drain: A blocked drain line can cause backflow and leaks.
- Door Seal Issues: While less common on top-load Cabrio washers, the rubber boot surrounding the lid (if present) can become damaged or dislodged, leaking water.
- Loose Drain Hose Connection: The connection between the drain hose and the drain pipe can come loose.
Symptoms Checklist
These indicators can help you confirm that the problem is indeed a leak from your washer:
- Water pooling underneath the washer, especially after a wash cycle.
- Dampness or wet spots around the washer.
- Reduced water pressure or flow during the wash cycle.
- Musty or moldy odor near the washer.
- Visible cracks or damage on hoses or seals.
How to Fix Whirlpool Cabrio Washer Leaking Underneath Step-by-Step Guide
Follow these steps to troubleshoot and fix the leak:
- Safety First: Unplug the washer from the power outlet before you start. This prevents electrical shock.
- Inspect the Water Supply Hoses: Check both the hot and cold water hoses for any signs of cracks, kinks, or leaks. Tighten the connections at both the water valve and the faucet.
- Check the Drain Hose: Ensure the drain hose is securely connected to the drainpipe and the washer. Look for any clogs or damage.
- Inspect the Drain Pump Area: Carefully examine the area around the drain pump for any signs of leaks. You may need to remove the lower access panel (if applicable) to get a better view.
- Run a Test Cycle: After checking the hoses and connections, run a short wash cycle and observe where the water is leaking from.
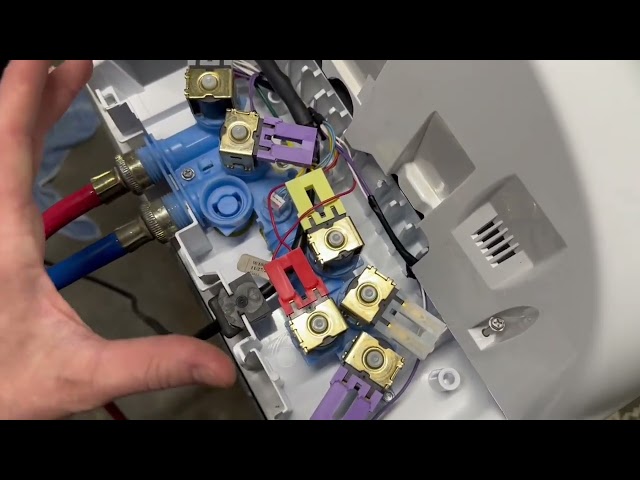
- Check the Water Inlet Valve: Locate the water inlet valve (usually at the back of the washer). Look for any signs of leaks or dripping, especially when the washer is filling.
- Examine the Tub Seal (If Possible): While harder to inspect on a Cabrio, if you can safely access the area where the inner and outer tubs meet, look for signs of water damage or seal deterioration.
- Reduce Detergent Use: Ensure you’re using the correct amount of HE (High-Efficiency) detergent. Over-sudsing can cause leaks.
- Check for Clogs in the Drain: A partially blocked drain can cause backflow and leaks. Try clearing the drain with a drain snake or by flushing it with hot water.
- Level the Washer: An unlevel washer can vibrate excessively and cause connections to loosen. Use a level to ensure the washer is sitting evenly on the floor. Adjust the legs if necessary.
- Inspect the Lid Seal/Boot (If Applicable): Examine the rubber seal around the washer lid for any tears or damage.
- Tighten Hose Connections: Double-check all hose connections, both at the washer and at the water supply/drain. Use pliers to tighten them gently, but avoid over-tightening, which can damage the fittings.
- Wipe Down the Area: After each step, wipe down the area with a dry cloth to help you identify the source of the leak more easily.
- Run Another Test Cycle: After making adjustments or repairs, run another short wash cycle to see if the leak has been resolved.
- Repeat as Needed: If the leak persists, repeat the troubleshooting steps until you find the source of the problem.
Fix the Issue Without Buying Parts
Before resorting to replacing parts, try these free or low-cost methods:
- Reset the Washer: Unplug the washer for a few minutes to reset the electronic controls.
- Clean the Drain Filter: Locate and clean the drain filter (consult your owner’s manual for location). A clogged filter can restrict water flow.
- Recalibrate the Washer (If Possible): Some models have a recalibration cycle. Refer to your owner’s manual for instructions.
- Inspect Hoses Regularly: Make it a habit to periodically inspect the hoses for wear and tear.
- Avoid Overloading: Overloading the washer can strain the components and contribute to leaks.
- Maintenance Basics: Run a washer cleaning cycle regularly with a washer cleaner to prevent buildup and maintain optimal performance.
When Replacement Might Be Necessary
If the leak persists after trying all troubleshooting steps, a faulty part may need replacing. Estimated cost ranges (USD) for common failing parts:
- Water Inlet Valve: $30 – $70
- Drain Pump: $40 – $90
- Hoses: $10 – $30
- Tub Seal: $50 – $150 (This repair is often more complex and may require professional assistance)
Safety Warning
- Always unplug the washer before performing any repairs.
- Be careful when working with water and electricity.
- Wear gloves to protect your hands from chemicals and sharp edges.
- Wipe up any spills immediately to prevent slips and falls.
- If you are not comfortable performing the repairs yourself, contact a qualified appliance repair technician.
Tools You May Need
- Pliers
- Screwdrivers (Phillips and flathead)
- Adjustable wrench
- Level
- Towels or rags
- Bucket
- Flashlight
FAQ
- Q: Why is my washer leaking only during the spin cycle? A: This often indicates a problem with the tub seal or the drain pump.
- Q: Can I still use my washer if it’s leaking a little? A: No, it’s best to address the leak immediately to prevent further damage.
- Q: How do I know if it’s the water inlet valve that’s leaking? A: Check the valve area when the washer is filling. If you see water dripping from the valve, it’s likely the source of the leak.
- Q: My washer is leaking from the bottom. What could it be? A: This could be due to a leak from the drain pump, tub seal, or a loose hose connection.
- Q: Should I call a plumber or an appliance repair technician? A: For washer repairs, it’s best to call an appliance repair technician. Plumbers typically handle plumbing issues, not appliance-specific problems.
- Q: How can I prevent future leaks? A: Regularly inspect your hoses, use the correct amount of detergent, avoid overloading the washer, and perform regular maintenance.
Conclusion
Troubleshooting a leaking Whirlpool Cabrio washer can seem daunting, but by following these steps, you can often identify and fix the problem yourself. Don’t be afraid to get your hands dirty and try these solutions before calling a technician. Addressing the leak promptly will save you money and prevent further damage to your home. If the problem persists or you’re uncomfortable with any of the steps, contacting a qualified appliance repair technician is always the best option.
Youtube Video:
Looking for more useful options?
Check out recommended resources that others find helpful.