
Introduction
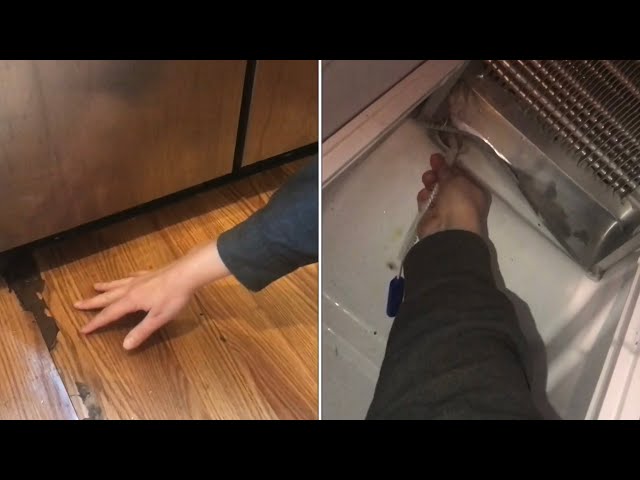
Discovering a puddle of water under your refrigerator can be alarming. Its not just a nuisance; it can also damage your flooring and create a potential slip hazard. This guide will walk you through the common causes of “water under my refrigerator,” helping you diagnose the problem and find a solution. Acting quickly can prevent further damage and save you money on costly repairs. Often, the fix is simpler than you might think!
💡 Technical Key Takeaways:
- Core Focus: Diagnostic schematic and terminal connection layout for Water Under My Refrigerator.
- Target Scope: Field technicians, automotive DIYers, and residential/commercial electricians.
- Safety Rule: Always disconnect the primary power source/battery terminal and verify zero voltage with a multimeter before touching wires.
Common Causes of Water Under My Refrigerator
Here are some of the most frequent reasons why you might find water accumulating under your refrigerator:
- Defrost Drain Clog: This is the most common culprit. The defrost cycle melts frost buildup, and the water drains through a tube. If this tube is clogged, the water overflows.
- Water Line Leak: If your refrigerator has an ice maker or water dispenser, it’s connected to a water line. A loose connection or a crack in the line can cause leaks.
- Ice Maker Issues: Problems within the ice maker itself, such as a leaky valve or malfunctioning dispenser, can lead to water leaks.
- Water Filter Problems: A poorly installed, damaged, or incorrect water filter can leak water. Also, sometimes the filter housing cracks.
- Condensation: In humid environments, condensation can form on the outside of the refrigerator and drip onto the floor.
- Drip Pan Overflow: The drip pan, located at the bottom of the refrigerator, collects condensation. If it’s full or cracked, water can spill out.
- Loose Water Line Connections: Where the water line connects to your refrigerator or the water supply, it can loosen over time and start to leak.
- Door Seal Issues: If the door seal is damaged or dirty, warm air can enter the refrigerator, causing excessive condensation and eventual leaks.
Symptoms Checklist
Use this checklist to help pinpoint the source of the leak:
- Standing water directly under the refrigerator.
- Water stains on the floor around the refrigerator.
- Dripping sounds coming from the back or bottom of the refrigerator.
- Reduced ice production or problems with the water dispenser.
- Excessive frost buildup inside the freezer.
- Visible leaks from the water line connections.
- Dampness or moldy smells near the refrigerator.
How to Fix Water Under My Refrigerator Step-by-Step Guide
Follow these steps to troubleshoot and fix the leak:
- Safety First: Unplug the refrigerator from the power outlet. This is crucial to prevent electric shock.
- Locate the Water Source: Carefully examine the area under and around the refrigerator to pinpoint where the water is coming from.
- Check the Defrost Drain: This is usually located at the back of the freezer compartment. You might need to remove the back panel inside the freezer. Use a long, flexible object like a pipe cleaner or a turkey baster filled with hot water to clear any clogs.
- Inspect the Water Line: Look for any cracks, kinks, or loose connections in the water line running to the refrigerator. Tighten any loose connections with a wrench.
- Examine the Water Filter: Make sure the water filter is properly installed and not damaged. Try removing and re-installing it according to the manufacturer’s instructions.
- Check the Ice Maker: Observe the ice maker during its cycle to see if you can identify any leaks. Look for water dripping from the ice maker assembly.
- Empty and Clean the Drip Pan: Locate the drip pan (usually at the bottom of the refrigerator). Remove it, empty the water, and clean it thoroughly. Check for cracks or damage.
- Inspect the Door Seals: Clean the door seals with a damp cloth to remove any dirt or debris. Check for tears or damage. You can test the seal by closing the door on a dollar bill if you can easily pull it out, the seal may need to be replaced.
- Check the Water Inlet Valve: This valve controls the water flow to the ice maker and water dispenser. It’s typically located at the back of the refrigerator. Look for signs of leaks around the valve.
- Level the Refrigerator: An uneven refrigerator can cause water to not drain properly. Use a level to ensure your refrigerator is sitting level. Adjust the feet at the bottom if needed.
- Dry the Area: Thoroughly dry the area under the refrigerator and the surrounding floor to prevent mold growth.
- Monitor: Plug the refrigerator back in and monitor the area for a few days to see if the leak returns.
Fix the Issue Without Buying Parts
Before you consider replacing parts, try these free solutions:
- Reset the Refrigerator: Unplug the refrigerator for 10 minutes and then plug it back in. This can sometimes reset the system and resolve minor issues.
- Thorough Cleaning: Clean all accessible parts, including the defrost drain, drip pan, and door seals.
- Ensure Proper Ventilation: Make sure there’s adequate space around the refrigerator for proper ventilation. Overcrowding can lead to condensation.
- Monitor Humidity: In humid climates, consider using a dehumidifier in the kitchen to reduce condensation.
When Replacement Might Be Necessary
If the leak persists after trying the above steps, you might need to replace a part. Here are some common culprits and estimated costs (USD):. For more related activities, check out our Samsung Ice Maker Not Releasing Ice.
- Water Filter: $20-$50
- Water Line: $15-$30
- Defrost Drain Tube: $10-$20
- Water Inlet Valve: $30-$70
- Drip Pan: $20-$40
If replacing these parts doesn’t solve the issue, the problem might be more complex and require professional repair. Consider calling a qualified appliance technician.
Safety Warning
- Always unplug the refrigerator before performing any repairs.
- Be careful when working with water and electricity. Avoid touching electrical components with wet hands.
- Clean up any water spills immediately to prevent slips and falls.
- If you’re not comfortable performing any of these repairs, consult a qualified appliance technician.
Tools You May Need
Here’s a list of simple tools that can be helpful for troubleshooting:
- Screwdrivers (Phillips and flathead)
- Adjustable wrench
- Pliers
- Pipe cleaner or turkey baster
- Bucket or towels
- Flashlight
- Level
FAQ
Here are some frequently asked questions about water under refrigerators:
-
Q: How often should I clean the drip pan?
A: At least twice a year, or more often if you notice a buildup of water. -
Q: How do I know if my defrost drain is clogged?
A: You’ll likely see ice buildup in the freezer and water on the floor. -
Q: Can a bad door seal cause water leaks?
A: Yes, a damaged door seal can lead to excessive condensation and water leaks. -
Q: Is it safe to drink the water from my refrigerator’s water dispenser if there’s a leak?
A: If you suspect a leak, it’s best to avoid drinking the water until you’ve resolved the issue and cleaned the system.
Conclusion
Finding water under your refrigerator can be frustrating, but with a little patience and this guide, you can often diagnose and fix the problem yourself. Start with the simplest solutions, like cleaning the defrost drain and checking the water line. Remember to always prioritize safety by unplugging the appliance. If you’ve tried these steps and the leak persists, don’t hesitate to call a qualified appliance technician for professional assistance. Good luck!
Youtube Video:
Quick Wiring Specifications & Terminal Guide
| Component / Circuit | Standard Wire Gauge | Recommended Protection |
|---|---|---|
| Control & Trigger Signals | 18 – 20 AWG | 5A – 7.5A Inline Fuse |
| Standard Auxiliary Load | 14 – 16 AWG | 15A – 20A Circuit Breaker |
| Main Power Feed / Supply | 10 – 12 AWG | 30A – 40A Heavy-Duty Relay |
Images References
Looking for more diagnostic guides? Explore our complete Refrigerator Problems 5 section for step-by-step troubleshooting solutions.
