Introduction
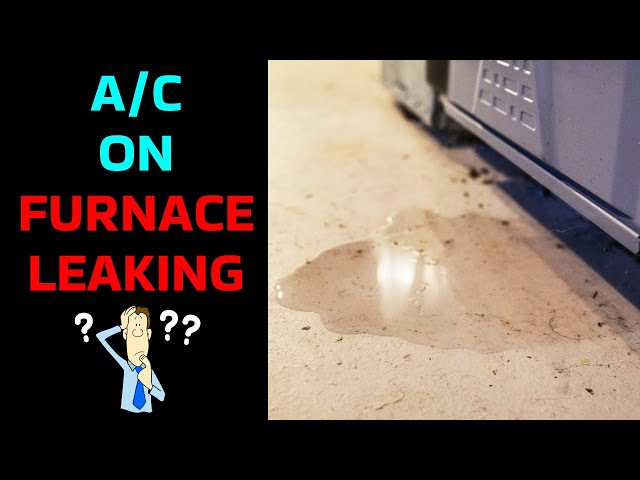
Finding water on top of your air conditioner, especially the outdoor unit, can be alarming. It’s a sign that something isn’t working correctly, and ignoring it could lead to bigger problems, including rust, damage to your unit, and even water damage to your home’s foundation. This issue commonly occurs during periods of high humidity and AC usage. While a small amount of condensation is normal, significant pooling of water is not. Addressing this promptly can prevent costly repairs and extend the life of your air conditioner. Lets get started!
Common Causes of Water on Top of Air Conditioner
Several factors can lead to water accumulation on your AC unit. Here are some of the most common:
- Clogged Drain Line: The most frequent culprit. The drain line removes condensation, and clogs prevent water from escaping.
- Dirty Air Filter: A dirty filter restricts airflow, causing the evaporator coil to freeze. When it melts, excessive water drips.
- Low Refrigerant Levels: Similar to a dirty filter, low refrigerant can cause the coil to freeze and later drip excessively.
- Damaged Drain Pan: The drain pan collects condensation. Cracks or rust can prevent proper drainage.
- Improper Installation: If the AC unit isn’t level, water can pool instead of draining.
- High Humidity: Exceptionally humid days can produce more condensation than the system can handle, though this is usually temporary.
- Kinked or Blocked Condensate Drain Hose: Any bends or blockage to your hose that drains water away from the unit.
- Faulty Condensate Pump: If your system uses a pump to remove condensate, it might be malfunctioning.
Symptoms Checklist
These signs can help you pinpoint the problem:
- Visible water pooling on top of the outdoor AC unit.
- Water leaking from the indoor AC unit.
- Musty odor coming from the AC vents.
- Reduced cooling efficiency (the AC isn’t cooling as well).
- Ice forming on the refrigerant lines or the outdoor unit.
- Water stains on the ceiling near the indoor unit.
How to Fix Water on Top of Air Conditioner Step-by-Step Guide
Here’s a step-by-step approach to troubleshooting the water issue:
- Turn off the AC: For safety, switch off the air conditioner at the thermostat and the breaker.
- Inspect the Air Filter: Remove and inspect the air filter. If it’s dirty, replace it with a new one. A clean filter improves airflow and can prevent coil freeze-up.
- Locate the Drain Line: The drain line is usually a PVC pipe exiting the indoor unit. It may lead outside or to a drain.
- Check for Clogs: Look for visible clogs or obstructions in the drain line opening.
- Clear the Drain Line (Vacuum Method): Use a wet/dry vacuum to suck out any clogs. Place the vacuum hose over the drain line opening, creating a tight seal. Turn on the vacuum for a few minutes to remove any debris.
- Clear the Drain Line (Vinegar Method): If vacuuming doesn’t work, pour a cup of distilled white vinegar into the drain line. Vinegar can dissolve minor clogs. Wait 30 minutes, then flush with water.
- Locate the Condensate Drain Pan: This is typically located under the indoor AC unit.
- Inspect the Drain Pan: Look for cracks, rust, or standing water. If the pan is damaged, it may need to be replaced. (This might be a job for a professional.)
- Check the Unit’s Level: Use a level to ensure the outdoor unit is sitting evenly. If it’s not, use shims to level it.
- Check the Condensate Pump (If Applicable): If your system uses a condensate pump, check if it’s working correctly. Listen for its motor running. If it’s not running, it may need to be serviced or replaced.
- Flush the Drain Line with Water: After cleaning, flush the drain line with water to ensure it’s clear. Observe if the water flows freely.
- Turn the AC Back On: After completing these steps, turn the air conditioner back on and monitor it for a few hours to see if the problem is resolved.
- Continue to Monitor for Water: Keep a close watch in the days following the cleaning.
Fix the Issue Without Buying Parts
Many times, you can resolve the water issue without needing to purchase new parts:
- Regular Filter Cleaning/Replacement: Preventative maintenance is key. Replace your air filter every 1-3 months.
- Drain Line Flushing: Periodically flush the drain line with vinegar or water to prevent clogs from forming.
- Visual Inspections: Regularly inspect the AC unit for any signs of damage or leaks.
- Ensure Proper Airflow: Make sure furniture or other objects are not blocking vents or the AC unit.
When Replacement Might Be Necessary
In some cases, a replacement might be unavoidable:
- Cracked Drain Pan: If the drain pan is severely cracked or rusted, it will need to be replaced. Cost: $50 – $200 (plus labor if you hire a technician).
- Faulty Condensate Pump: If the condensate pump is beyond repair, replacement is necessary. Cost: $80 – $300 (plus labor).
- Major Refrigerant Leak: Addressing a major refrigerant leak is complex and costly. In older units, replacement of the entire system may be more economical.
Safety Warning
Take these precautions while troubleshooting:
- Always turn off the power to the AC unit at the breaker before performing any maintenance.
- Avoid working with electrical components if you’re not comfortable. Call a professional instead.
- Wear gloves to protect your hands from dirt and chemicals.
- Be careful when working with water to avoid slips and falls.
Tools You May Need
Here’s a list of helpful tools:
- Wet/Dry Vacuum
- Distilled White Vinegar
- Screwdriver
- Level
- Gloves
- Flashlight
FAQ
Here are some frequently asked questions:
- Q: How often should I change my AC filter? A: Every 1-3 months, depending on usage and air quality.
- Q: Why is my AC freezing up? A: Often caused by restricted airflow due to a dirty filter or low refrigerant levels.
- Q: Can I use bleach to clean the drain line? A: While bleach can be effective, it can also damage some components. Vinegar is a safer alternative.
- Q: When should I call a professional? A: If you’re uncomfortable performing any of these steps, or if the problem persists after troubleshooting, it’s best to call a qualified HVAC technician.
- Q: Is some condensation normal? A: Yes, a small amount of condensation is normal, especially in humid conditions. However, excessive pooling or leaks are not.
- Q: Will a dirty coil cause water? A: Yes, a dirty evaporator coil can freeze, and then melt and drip.
Conclusion
Don’t let water on top of your air conditioner stress you out! By following these simple steps, you can often diagnose and fix the problem yourself. Remember to prioritize safety and preventative maintenance. If you’re ever unsure or uncomfortable, don’t hesitate to call a qualified HVAC technician. Happy troubleshooting!
Youtube Video:
Looking for more useful options?
Check out recommended resources that others find helpful.