Introduction
Discovering water on your AC filter can be alarming. It’s a sign that something isn’t working correctly within your air conditioning system. This moisture can lead to mold growth, reduced air quality, and even damage to your HVAC unit and home. It often occurs during periods of high humidity or when the AC is running constantly. Addressing this issue promptly is crucial to prevent further damage and ensure a healthy indoor environment.
Common Causes of Water on AC Filter
Several factors can contribute to water accumulation on your AC filter:
- Clogged Air Filter: A dirty filter restricts airflow, causing the evaporator coil to freeze and then melt, resulting in water.
- Frozen Evaporator Coil: This is a primary cause, often due to restricted airflow or low refrigerant.
- Low Refrigerant Levels: Insufficient refrigerant reduces the coil’s temperature, leading to freezing.
- Blocked Drain Line: Condensation that should drain away backs up into the unit.
- Dirty Evaporator Coil: Dirt buildup insulates the coil, causing it to freeze.
- High Humidity: Extremely humid conditions can overwhelm the system’s ability to remove moisture.
- Improper Installation: Incorrectly installed components can lead to poor drainage.
- Leaking Ductwork: Air leaks can cause uneven cooling and condensation.
Symptoms Checklist
If you suspect water on your AC filter, check for these signs:
- Visible water or moisture on the AC filter.
- Musty or moldy odors coming from vents.
- Reduced airflow from vents.
- The AC unit runs constantly but doesn’t cool effectively.
- Water stains or puddles around the indoor unit.
- Ice formation on the copper lines or evaporator coil.
How to Fix Water on AC Filter Step-by-Step Guide
Follow these steps to troubleshoot the issue:
- Turn Off the AC: Immediately switch off your AC unit to prevent further damage.
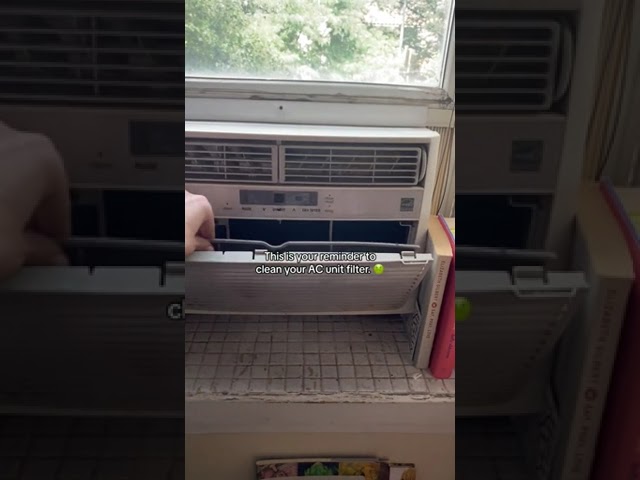
- Inspect the Air Filter: Remove the filter and check for dirt and debris. A clogged filter is a common culprit.
- Replace the Air Filter: Even if it looks slightly dirty, replace the filter with a new one. Use the correct size and type recommended for your unit.
- Check the Drain Line: Locate the condensate drain line (usually a PVC pipe near the indoor unit). Make sure it’s not clogged.
- Clear the Drain Line: Use a wet/dry vacuum to suck out any clogs in the drain line. You can also try using a stiff wire or pipe cleaner.
- Inspect the Evaporator Coil (If Accessible): Carefully remove the access panel to view the evaporator coil. Look for ice buildup or excessive dirt. (Caution: Turn off power to the unit before removing any panels)
- Melt Any Ice: If the coil is frozen, allow it to thaw completely by leaving the AC off for several hours or using a fan to speed up the process.
- Clean the Evaporator Coil (If Accessible): Use a fin comb to straighten bent fins. You can also use a specialized coil cleaner.
- Check for Leaks: Inspect the area around the indoor unit and ductwork for any signs of water leaks.
- Run the AC on Fan Only: After thawing and cleaning, run the AC on the “fan only” setting to help dry out the system.
- Monitor the AC: Turn the AC back on and monitor it closely for any recurrence of the problem.
- Check the Outdoor Unit: Ensure the outdoor unit is free from debris and that the fan is working properly.
Fix the Issue Without Buying Parts
Before resorting to replacements, try these free methods:
- Reset the AC: Turn off the breaker to the AC unit for 30 minutes, then turn it back on.
- Regular Filter Cleaning/Replacement: Clean or replace your air filter every 1-3 months, depending on usage and air quality.
- Inspect Ductwork: Look for visible tears or disconnections in your ductwork and seal them with duct tape.
- Adjust Thermostat Settings: Avoid setting the thermostat too low, as this can overwork the system.
When Replacement Might Be Necessary
If the problem persists after troubleshooting, a component might need replacement:
- Refrigerant Leak Repair: A professional will need to locate and repair the leak, then recharge the system. Cost: $200 – $800.
- Evaporator Coil Replacement: If the coil is severely damaged, replacement may be necessary. Cost: $500 – $2000.
- Condensate Pump Replacement: If your unit uses a condensate pump and it’s failing, replacement is needed. Cost: $100 – $300.
Safety Warning
Take these precautions when working with your AC unit:
- Always turn off the power to the AC unit at the breaker before performing any maintenance.
- Avoid touching electrical components with wet hands.
- Be careful when working with sharp tools.
- If you are uncomfortable with any of these steps, consult a qualified HVAC technician.
Tools You May Need
Here’s a list of tools that can be helpful:
- Screwdriver (Phillips and flathead)
- Wet/dry vacuum
- Fin comb
- Coil cleaner
- Flashlight
- New air filter
- Duct tape
FAQ
Here are some frequently asked questions:
-
Q: How often should I change my AC filter?
A: Every 1-3 months, depending on usage and air quality. -
Q: Why is my AC unit freezing up?
A: Common causes include a clogged filter, low refrigerant, or a blocked drain line. -
Q: Can I clean the evaporator coil myself?
A: Yes, but be very careful and use a specialized coil cleaner. -
Q: How do I know if my AC unit has a refrigerant leak?
A: Signs include reduced cooling performance and ice buildup on the copper lines. A professional can confirm and repair the leak.
Conclusion
Finding water on your AC filter is a common issue that can often be resolved with some simple troubleshooting steps. By following this guide, you can identify the cause of the problem and take steps to fix it yourself. However, if the issue persists or if you are uncomfortable performing any of these tasks, don’t hesitate to call a qualified HVAC technician. Addressing the problem early can save you money and prevent more serious damage to your AC system.
Youtube Video:
Looking for more useful options?
Check out recommended resources that others find helpful.