
Introduction
A high-pitched noise coming from your new refrigerator can be frustrating and concerning. This sound often indicates that a component is working harder than it should or is vibrating in an unusual way. While it’s tempting to ignore it, addressing the problem early can prevent more significant issues down the line. Many times, the source is simple to resolve, saving you the cost and hassle of a service call. Let’s get your fridge running quietly!. Explore more in our Refrigerator Problems 4 collection.
💡 Technical Key Takeaways:
- Core Focus: Diagnostic schematic and terminal connection layout for New Fridge Making High Pitched Noise.
- Target Scope: Field technicians, automotive DIYers, and residential/commercial electricians.
- Safety Rule: Always disconnect the primary power source/battery terminal and verify zero voltage with a multimeter before touching wires.
Common Causes of New Fridge Making High Pitched Noise
Here are some potential reasons why your new refrigerator might be emitting a high-pitched noise:
- The Compressor: The compressor is the heart of the refrigerator, and it can produce a high-pitched whine when struggling to maintain the correct temperature.
- The Condenser Fan Motor: This fan helps cool the compressor. If the motor bearings are wearing out or obstructed by dust, it can create a high-pitched sound.
- The Evaporator Fan Motor: Located inside the freezer, this fan circulates cold air. Similar to the condenser fan, a failing motor can cause noise.
- Ice Maker Components: If your fridge has an ice maker, certain valves or motors involved in the ice-making process might be the source of the sound.
- Loose Components: Shipping or slight manufacturing imperfections can cause panels or other components to vibrate against each other, producing a high-pitched noise.
- Refrigerant Flow: In some cases, the sound might be caused by the refrigerant flowing through the coils. This is more common in newer, high-efficiency refrigerators.
- Water Inlet Valve: For refrigerators with ice makers or water dispensers, a malfunctioning water inlet valve can sometimes produce a high-pitched squeal or hum.
- Defrost Timer: If your refrigerator is an older model with a mechanical defrost timer, the timer motor itself might be the source of the noise.
Symptoms Checklist
Use this checklist to help identify the problem:
- Is the noise constant, or does it come and go?
- Does the noise seem to be coming from the back, bottom, or inside the refrigerator?
- Does the noise change when the refrigerator door is opened or closed?
- Is the refrigerator cooling properly?
- Do you have an ice maker or water dispenser? If so, is the noise more frequent when these are in use?
How to Fix New Fridge Making High Pitched Noise Step-by-Step Guide
- Unplug the Refrigerator: Before you start, always unplug the refrigerator from the power outlet for safety.
- Locate the Source of the Noise: Carefully listen to the refrigerator to pinpoint where the sound is coming from. This will help you narrow down the problem area.
- Check the Condenser Fan: Locate the condenser fan at the back of the refrigerator (usually at the bottom). Clean any dust or debris from the fan blades and motor. Spin the fan blade manually to see if it spins freely. If it’s stiff, the motor might be failing.
- Check the Evaporator Fan: Open the freezer door and locate the evaporator fan (usually behind a panel). Ensure that nothing is obstructing the fan. Like the condenser fan, spin it manually to check for resistance.
- Inspect the Compressor: The compressor is a black, oval-shaped component at the back of the refrigerator. Listen closely to it while the refrigerator is running (plug it in briefly). If the noise seems to be coming directly from the compressor, it might be the source of the problem.
- Examine the Water Inlet Valve: If you have an ice maker or water dispenser, locate the water inlet valve (usually at the back of the refrigerator). Listen for any high-pitched noises when the ice maker is cycling or the water dispenser is used.
- Check for Loose Components: Carefully inspect the refrigerator for any loose panels, screws, or components that might be vibrating. Tighten any loose screws or use foam tape to dampen vibrations.
- Defrost the Refrigerator: If ice buildup is suspected, manually defrost the refrigerator by unplugging it and leaving the doors open for several hours. This can sometimes resolve noise issues related to ice blockage.
- Check the Refrigerator Level: Ensure the refrigerator is level. Use a level to check both the top and sides. Adjust the leveling feet at the bottom of the refrigerator until it’s level.
- Inspect Ice Maker: If you have an ice maker, turn it off and observe if the high-pitched noise disappears. If it does, the ice maker mechanism could be faulty.
- Clean the Coils: Dust and debris on the condenser coils can cause the refrigerator to work harder and potentially create noise. Clean the coils with a vacuum cleaner and brush attachment.
Fix the Issue Without Buying Parts
Before considering replacing parts, try these free methods:
- Reset the Refrigerator: Unplug the refrigerator for 5-10 minutes and then plug it back in. This can sometimes reset the system and resolve minor issues.
- Thorough Cleaning: Clean all accessible areas of the refrigerator, including fans, coils, and drip pans, to remove dust and debris.
- Recalibration (If Applicable): Some refrigerators have a calibration feature. Refer to your owner’s manual for instructions.
- Inspect and Adjust: Carefully inspect all components for looseness or obstructions and make necessary adjustments.
- Regular Maintenance: Clean the condenser coils every 6 months to prevent dust buildup.
When Replacement Might Be Necessary
If the noise persists after trying the above steps, a component might be failing and require replacement. The following parts are commonly replaced due to noise issues:. For more related activities, check out our Lg Refrigerator Water And Ice Dispenser Not Working.
- Condenser Fan Motor: $50 – $150
- Evaporator Fan Motor: $50 – $150
- Compressor: $200 – $500 (plus labor)
- Water Inlet Valve: $30 – $80
Consider contacting a qualified appliance repair technician for diagnosis and replacement if you are not comfortable performing the repair yourself. Discover more free resources across our collection library.
Safety Warning
- Always unplug the refrigerator from the power outlet before performing any troubleshooting or repairs.
- Avoid working on the refrigerator with wet hands or on wet floors.
- If you are not comfortable working with electrical components, contact a qualified appliance repair technician.
Tools You May Need
- Screwdrivers (Phillips and flathead)
- Vacuum cleaner with brush attachment
- Level
- Foam tape (for vibration damping)
- Wrench set
FAQ
Q: Why is my brand new fridge making this noise?
A: New refrigerators can sometimes make noises as parts settle and break-in. But it can also indicate a minor issue which requires investigation.
Q: How do I know if it’s the compressor making the noise?
A: The compressor is usually a black oval component at the back. The high-pitched noise is loudest when you place your ear near it.
Q: Can I ignore the high-pitched noise?
A: While it might not immediately cause a problem, ignoring it could lead to further damage or a more expensive repair down the line. It’s best to investigate.
Q: When should I call a professional?
A: If you are unable to identify the source of the noise or are uncomfortable performing the repairs yourself, it’s best to call a qualified appliance repair technician.
Conclusion
Troubleshooting a high-pitched noise in your new refrigerator can seem daunting, but with a systematic approach and this guide, you can often identify and resolve the issue yourself. Remember to always prioritize safety and take your time. Don’t hesitate to reach out to a professional if you’re unsure, but with a little effort, you might be able to silence that annoying sound and keep your fridge running smoothly!
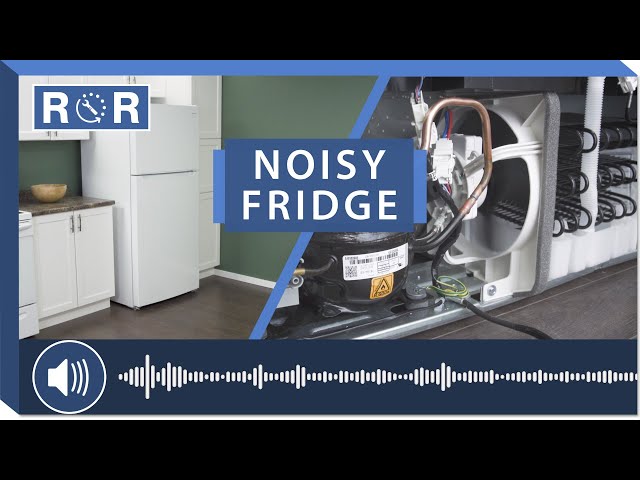
Youtube Video:
Quick Wiring Specifications & Terminal Guide
| Component / Circuit | Standard Wire Gauge | Recommended Protection |
|---|---|---|
| Control & Trigger Signals | 18 – 20 AWG | 5A – 7.5A Inline Fuse |
| Standard Auxiliary Load | 14 – 16 AWG | 15A – 20A Circuit Breaker |
| Main Power Feed / Supply | 10 – 12 AWG | 30A – 40A Heavy-Duty Relay |
