
Introduction
Is your Nest thermostat displaying a temperature, but your heat isn’t kicking on? This is a frustrating problem, especially when it’s cold outside! A non-functioning heating system can lead to discomfort, frozen pipes, and potentially higher energy bills in the long run if the issue isn’t addressed. This guide will walk you through common causes and provide step-by-step instructions to troubleshoot the problem, saving you potentially expensive service calls.
💡 Technical Key Takeaways:
- Core Focus: Diagnostic schematic and terminal connection layout for Nest Thermostat Heat Won T Turn On.
- Target Scope: Field technicians, automotive DIYers, and residential/commercial electricians.
- Safety Rule: Always disconnect the primary power source/battery terminal and verify zero voltage with a multimeter before touching wires.
Common Causes of Nest Thermostat Heat Won’t Turn On
Here are some common reasons why your Nest thermostat might not be turning on your heat:
- Low Battery: A Nest thermostat needs sufficient power to operate. A low battery can prevent it from signaling the furnace.
- Wiring Issues: Loose or incorrect wiring connections between the thermostat and your heating system are a frequent cause.
- Incorrect Configuration: Improper settings within the Nest thermostat’s software can prevent it from activating the heat.
- HVAC System Problems: The issue may not be the thermostat itself, but a problem with your furnace, boiler, or heat pump.
- Power Outage: A power outage can cause temporary problems for the thermostat.
- Connectivity Issues: Nest thermostats rely on Wi-Fi. If it is disconnect, it may not function correctly.
- Tripped Breaker: The circuit breaker for your HVAC system may have tripped.
- Filter Clog: A very dirty air filter can cause the HVAC system to shut down as a safety precaution.
- Nest Software Glitch: Occasionally, a software glitch can prevent the thermostat from operating properly.
Symptoms Checklist
Check these indicators to accurately identify the issue:
- Thermostat screen is blank or shows a low battery icon.
- Thermostat displays the current temperature, but the heat doesn’t turn on.
- Error messages appear on the thermostat screen related to wiring or system faults.
- You hear a clicking sound from the thermostat, but the heat remains off.
- The furnace fan runs, but no warm air comes out.
- The thermostat shows it’s calling for heat, but nothing happens.
How to Fix Nest Thermostat Heat Won’t Turn On Step-by-Step Guide
Follow these steps to troubleshoot your Nest thermostat:
- Charge the Thermostat: Remove the thermostat from the wall and charge it using a USB cable for at least 30 minutes. Reinstall and see if the heat turns on.
- Check the Wiring: Turn off the power to your HVAC system at the breaker. Carefully remove the Nest thermostat from the wall plate. Inspect the wires for any looseness or corrosion. Ensure they are securely connected. Consult the Nest wiring diagram if necessary.
- Restart the Thermostat: On the thermostat, go to Settings > Reset > Restart. This can resolve minor software glitches.
- Check the HVAC Breaker: Go to your electrical panel and make sure the breaker for your HVAC system is switched on. If it’s tripped, reset it.
- Inspect the Air Filter: Check your furnace’s air filter. If it’s dirty, replace it with a new one. A clogged filter can cause the system to overheat and shut down.
- Verify Nest Configuration: Go to Settings > Equipment on your thermostat. Ensure the heating system is correctly configured (e.g., forced air, heat pump).
- Check the System Mode: Make sure the thermostat is set to “Heat” mode and the setpoint temperature is higher than the current room temperature.
- Test the Furnace: Turn off the thermostat. Go to the furnace and find the power switch (usually on the side of the furnace) and turn it off for 30 seconds and then back on. Turn the thermostat back on and see if this resolves the issue.
- Check for Error Codes: If your furnace has a display, check for error codes. Consult your furnace’s manual to understand the error and possible solutions.
- Review Nest App Settings: Open the Nest app on your smartphone or tablet. Check for any schedule conflicts or settings that might be preventing the heat from turning on.
- Check the Common Wire (C-Wire): Some Nest thermostats require a C-wire for consistent power. If you don’t have one, consider having a professional install one or using a Nest Power Connector.
- Look for Blocked Vents Ensure vents are open and unblocked throughout the home.
Fix the Issue Without Buying Parts
Here are several free methods to try before considering replacements:
- Reset to Factory Settings: As a last resort before calling a pro, try resetting your Nest thermostat to its factory defaults by going to Settings > Reset > All Settings. This will erase your preferences, but it can resolve persistent software problems.
- Clean the Thermostat: Gently clean the thermostat screen and surrounding area with a soft, dry cloth. Dust and debris can sometimes interfere with its sensors.
- Verify Internet Connection: Ensure your Wi-Fi network is working properly and that the Nest thermostat is connected. Restart your router if necessary.
- Regular Maintenance: Change air filters every 1-3 months to prevent HVAC system problems.
When Replacement Might Be Necessary
If you’ve tried all the troubleshooting steps and your heat still isn’t working, you might need to replace a component. A failing furnace control board, a faulty igniter, or a damaged thermostat are all possibilities. Replacing the Nest thermostat itself should be considered after you’ve exhausted all other options and verified that it’s truly the source of the problem. Expect to pay between $200 and $500 for a new Nest thermostat (depending on the model) plus professional installation if needed.
Safety Warning
- Always turn off the power to your HVAC system at the breaker before working on any wiring connections.
- If you’re uncomfortable working with electrical components, call a qualified HVAC technician.
- Avoid touching any exposed wires or terminals.
- If you smell gas, immediately leave the area and call your gas company or fire department.
Tools You May Need
- Screwdrivers (Phillips and flathead)
- Pliers
- Wire strippers
- Multimeter (optional, for testing voltage)
- Flashlight
- USB charging cable
FAQ
Here are some common questions and answers:
-
Q: My Nest thermostat says “Delayed” for the heat. What does that mean?
A: This is a built-in safety feature to protect your HVAC system. The delay prevents rapid cycling, which can damage your equipment. The delay typically lasts a few minutes. -
Q: How do I know if my furnace is the problem and not the thermostat?
A: If you manually turn the furnace on (usually by switching the power switch at the furnace itself to “on” or similar), and it still doesn’t produce heat, the problem is likely with the furnace. -
Q: My Nest thermostat is showing an “E73” error code. What does this mean?
A: The “E73” error code usually indicates a wiring problem. Double-check all the wiring connections at both the thermostat and the furnace. Make sure the wires are securely connected to the correct terminals. -
Q: How often should I change my air filter?
A: Air filters should be changed every 1-3 months, depending on the type of filter and how often your HVAC system runs.
Conclusion
Troubleshooting a “nest thermostat heat won’t turn on” issue can be frustrating, but with patience and this guide, you can often resolve the problem yourself. Start with the simplest solutions, like checking the battery and wiring, and work your way through the more complex steps. If you’ve exhausted all the troubleshooting steps and your heat is still not working, it’s time to call a qualified HVAC technician for professional assistance. By following these steps, you can potentially save money and keep your home warm and comfortable.
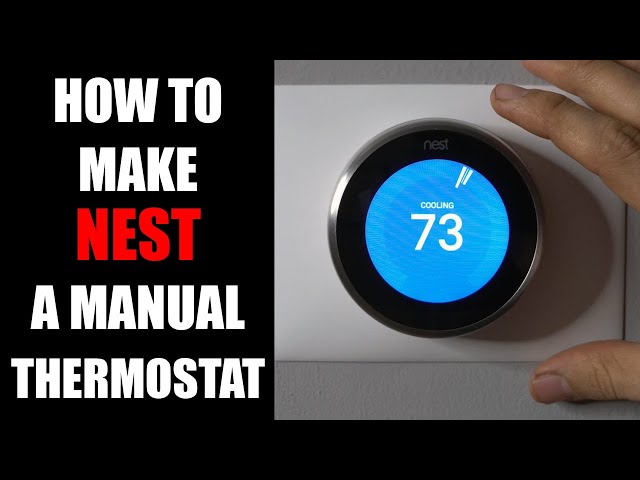
Youtube Video:
Quick Wiring Specifications & Terminal Guide
| Component / Circuit | Standard Wire Gauge | Recommended Protection |
|---|---|---|
| Control & Trigger Signals | 18 – 20 AWG | 5A – 7.5A Inline Fuse |
| Standard Auxiliary Load | 14 – 16 AWG | 15A – 20A Circuit Breaker |
| Main Power Feed / Supply | 10 – 12 AWG | 30A – 40A Heavy-Duty Relay |
Images References
Looking for more diagnostic guides? Explore our complete Air Conditioner Troubleshooting 5 section for step-by-step troubleshooting solutions.
