Introduction
Discovering a pool of water near your KitchenAid side-by-side refrigerator can be frustrating and concerning. It indicates a leak, which, if left unattended, can lead to floor damage, mold growth, and even affect the refrigerator’s performance. It’s common to find water leaks after defrosting, after large grocery shops, or simply when the refrigerator is getting old. Addressing the leak promptly is essential to prevent further problems and ensure your refrigerator continues to function efficiently. This guide will walk you through the most common causes and how to resolve them, without immediately resorting to expensive repairs.
Common Causes of KitchenAid Side by Side Refrigerator Leaking Water
Here are several reasons why your KitchenAid refrigerator might be leaking:
- Clogged Defrost Drain: This is the most frequent culprit. Ice buildup can block the drain, causing water to overflow and leak.
- Frozen Water Line: If your refrigerator has an ice maker or water dispenser, the water line can freeze, causing a leak when it thaws.
- Loose Water Line Connection: A connection to the water line behind the fridge may be loose or damaged.
- Cracked or Damaged Water Filter Housing: A cracked filter housing will leak water.
- Defective Water Inlet Valve: This valve controls the water flow to the ice maker and dispenser. If it’s faulty, it may leak.
- Damaged Door Seals: Worn-out door seals can cause condensation, which can accumulate and leak.
- Overfilled Ice Maker: An ice maker producing too much ice can cause water to spill.
- Leaky Drain Pan: The drain pan under the refrigerator collects water from the defrost cycle. If it’s cracked or overflowing, it will leak.
Symptoms Checklist
Check if you’re experiencing any of these symptoms to help pinpoint the cause:
- Water pooling at the base of the refrigerator.
- Ice buildup in the freezer.
- Water dripping from the ceiling of the refrigerator compartment.
- Water under the crisper drawers.
- Reduced ice production or no ice at all.
- Water leaking from the ice dispenser.
How to Fix KitchenAid Side by Side Refrigerator Leaking Water Step-by-Step Guide
Follow these steps to troubleshoot and fix your leaking refrigerator:
- Unplug the Refrigerator: For safety, always disconnect the power before starting any repairs.
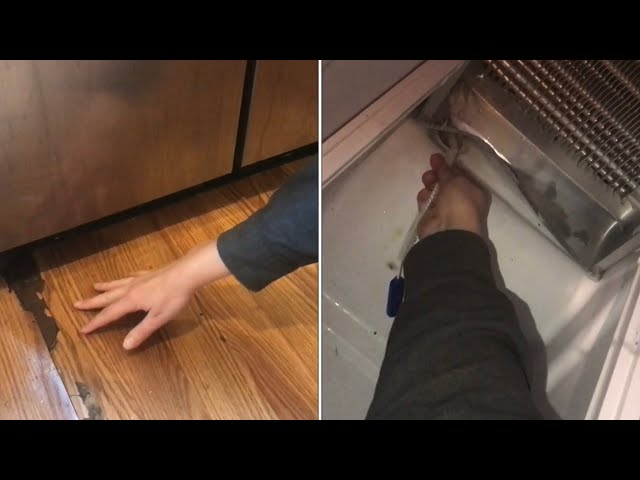
- Locate the Defrost Drain: It’s usually at the back of the freezer compartment, near the bottom. It might be behind a panel.
- Melt Ice Buildup: Use a hairdryer (on a low setting) or carefully pour warm (not hot) water down the drain to melt any ice.
- Clear the Drain: Use a long, flexible object like a pipe cleaner, a turkey baster, or a thin wire to clear any blockage in the drain. Be gentle.
- Flush the Drain: Pour a cup of warm water down the drain to ensure its clear.
- Check the Water Line: Inspect the water line (if you have an ice maker or dispenser) for kinks, cracks, or loose connections.
- Tighten Connections: If you find loose connections, gently tighten them with a wrench. Be careful not to overtighten.
- Inspect the Water Filter: Remove the water filter and check for any cracks or damage to the housing. Replace the filter if necessary.
- Examine the Door Seals: Check the door seals for tears, cracks, or gaps. Clean them with a damp cloth to remove any debris.
- Clean the Drain Pan: Locate the drain pan under the refrigerator (usually in the front). Carefully remove it and empty any water. Clean the pan with soap and water.
- Level the Refrigerator: An uneven refrigerator can cause water to leak. Use a level to ensure the refrigerator is properly leveled. Adjust the feet if necessary.
- Monitor the Refrigerator: Plug the refrigerator back in and monitor it for a few days to see if the leak has stopped.
- Check Ice Maker Function: If the leak was related to the ice maker, observe its operation to confirm it’s functioning correctly and not overfilling.
Fix the Issue Without Buying Parts
Before you consider replacing any parts, try these free methods:
- Reset the Refrigerator: Unplug the refrigerator for 10 minutes to reset its system.
- Clean Regularly: Clean the interior and exterior of the refrigerator regularly to prevent debris buildup.
- Inspect Regularly: Periodically check the drain pan, water lines, and door seals for any signs of damage.
- Ensure Proper Ventilation: Make sure the refrigerator has enough space around it for proper ventilation.
When Replacement Might Be Necessary
If you’ve tried all the troubleshooting steps and the leak persists, a part may need replacing. Common parts that fail include the water inlet valve (estimated cost $50-$100), the water filter housing ($30-$70), or the defrost heater ($40-$80). If you’re not comfortable replacing these parts yourself, it’s best to call a qualified appliance repair technician.
Safety Warning
- Always unplug the refrigerator before starting any repairs.
- Avoid standing in water while working on the refrigerator to prevent electric shock.
- Be careful when using tools to avoid injury.
- If you’re not comfortable with electrical repairs, consult a qualified technician.
Tools You May Need
- Screwdriver (Phillips and Flathead)
- Wrench
- Pipe Cleaner or Flexible Wire
- Hair Dryer
- Warm Water
- Level
- Towels
FAQ
Here are some frequently asked questions about leaking refrigerators:
- Q: Why is my refrigerator leaking after defrosting? A: The defrost drain is likely clogged. Follow the steps above to clear it.
- Q: How often should I clean the defrost drain? A: Ideally, you should clean it every 6 months.
- Q: Can a dirty condenser coil cause a leak? A: While it won’t directly cause a leak, a dirty coil can reduce efficiency and contribute to condensation.
- Q: Is it safe to use bleach to clean the defrost drain? A: It’s generally not recommended. Use warm water and a mild detergent if needed.
Conclusion
A leaking KitchenAid side-by-side refrigerator can be a nuisance, but with a little patience and these troubleshooting steps, you can often resolve the issue yourself. Remember to prioritize safety and follow the instructions carefully. Before calling a technician, make sure you’ve explored all the DIY solutions. Good luck!
Youtube Video:
Looking for more useful options?
Check out recommended resources that others find helpful.