
Introduction
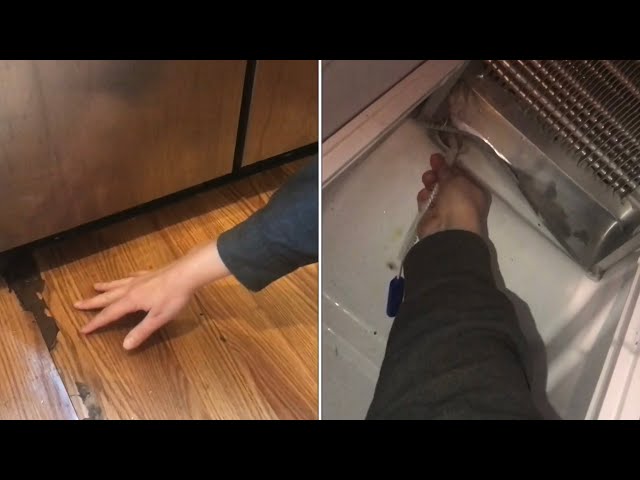
Discovering a puddle of water near your KitchenAid freezer can be alarming. A leaking freezer isn’t just a nuisance; it can damage your flooring, create a slipping hazard, and potentially lead to mold growth. More importantly, it indicates that your freezer isn’t working efficiently, which can impact food preservation and increase your energy bill. Addressing this problem promptly can save you from bigger headaches down the line. This guide is designed for homeowners with little to no technical experience, walking you through the troubleshooting process with easy-to-understand steps. Explore more in our Refrigerator Problems 4 collection.
💡 Technical Key Takeaways:
- Core Focus: Diagnostic schematic and terminal connection layout for Kitchenaid Freezer Leaking.
- Target Scope: Field technicians, automotive DIYers, and residential/commercial electricians.
- Safety Rule: Always disconnect the primary power source/battery terminal and verify zero voltage with a multimeter before touching wires.
Common Causes of KitchenAid Freezer Leaking
Here are some of the most frequent reasons why your KitchenAid freezer might be leaking:
- Defrost Drain Clog: This is the most common culprit. Ice and debris can block the drain, causing water to overflow inside the freezer and eventually leak out.
- Icemaker Issues: A faulty icemaker or a loose water line connection can lead to water leaking from the icemaker area.
- Door Seal Problems: A damaged or dirty door seal won’t create a tight closure, allowing warm air to enter and causing excessive condensation that turns into water.
- Freezer Overload: Packing too much food into your freezer can restrict airflow and lead to uneven temperatures, causing condensation and potential leaks.
- Temperature Setting Too Warm: Setting the freezer temperature too high can cause ice to melt faster than the defrost cycle can handle.
- Water Inlet Valve Malfunction: A faulty water inlet valve can continuously drip water into the icemaker or water dispenser (if equipped), resulting in a leak.
- Damaged Water Line: If your freezer has a water dispenser or icemaker, the water line connecting it to the water supply could be cracked or damaged.
- Condenser Coils Dirty: Dirty condenser coils reduce the freezer’s ability to cool effectively, leading to more condensation.
Symptoms Checklist
Look for these indicators to confirm a potential leak and help identify the source:
- Water pooling at the base of the freezer (inside or outside).
- Ice buildup inside the freezer, especially near the bottom or back.
- Excessive condensation on the freezer walls or door.
- A damp or moldy smell coming from the freezer area.
- The icemaker overflowing or producing irregularly shaped ice.
- Visible signs of water damage on the floor around the freezer.
How to Fix KitchenAid Freezer Leaking Step-by-Step Guide
Follow these steps to troubleshoot and resolve the leaking issue:
- Safety First: Unplug the freezer from the power outlet before starting any inspection or repair.
- Empty the Freezer: Remove all food items from the freezer and place them in a cooler to keep them frozen while you work.
- Locate the Defrost Drain: The defrost drain is usually located at the back wall of the freezer, near the bottom. It might be hidden behind a panel. Consult your freezer’s manual for the exact location.
- Check for Ice Buildup: Look for a large block of ice covering the drain. If present, use a hairdryer on a low setting to carefully melt the ice. Avoid using sharp objects, as they can damage the drain.
- Clear the Defrost Drain: Once the ice is melted, use a turkey baster, a long, flexible tube, or a straightened wire hanger to gently clear any debris or clogs from the drain.
- Flush the Drain: Pour a cup of warm water into the drain to flush out any remaining particles. You can also use a mixture of warm water and baking soda.
- Inspect the Door Seal: Examine the door seal for cracks, tears, or debris. Clean the seal with warm, soapy water and a soft cloth.
- Test the Door Seal: Close the freezer door and check if you can easily slide a piece of paper between the seal and the freezer frame. If you can, the seal might need to be replaced (though cleaning can sometimes improve the seal).
- Check the Icemaker Water Line: If your freezer has an icemaker, inspect the water line connection for leaks. Tighten the connection if necessary.
- Inspect the Water Inlet Valve: Locate the water inlet valve (usually at the back of the freezer) and check for any signs of leaks or damage.
- Clean the Condenser Coils: Locate the condenser coils (usually at the back or bottom of the freezer) and clean them with a vacuum cleaner brush attachment.
- Adjust the Temperature: Ensure the freezer temperature is set correctly (typically between 0F and 5F).
- Reposition Food Items: Make sure that food items are not blocking the vents inside the freezer.
- Plug the Freezer Back In: After completing the above steps, plug the freezer back into the power outlet.
- Monitor for Leaks: Keep an eye on the freezer for the next few days to see if the leaking has stopped.
Fix the Issue Without Buying Parts
Often, you can resolve the leaking issue without needing to replace any parts:
- Reset the Freezer: Unplug the freezer for 30 minutes and then plug it back in. This can sometimes reset the defrost cycle.
- Thorough Cleaning: Clean the entire interior of the freezer, paying special attention to the drain area.
- Inspect for Airflow Blockage: Ensure proper airflow inside the freezer by rearranging food items that might be blocking vents.
- Regular Maintenance: Clean the condenser coils regularly (every 6 months) to maintain optimal cooling efficiency.
When Replacement Might Be Necessary
In some cases, replacement of a part might be unavoidable. Here’s when it might be necessary and what to expect in terms of cost (USD):. For more related activities, check out our Lg Fridge Making Vibrating Noise.
- Defrost Thermostat: If the defrost thermostat is faulty, the freezer might not defrost properly, leading to ice buildup and leaks. Estimated cost: $20-$50.
- Water Inlet Valve: If the water inlet valve is constantly leaking, it needs to be replaced. Estimated cost: $30-$70.
- Door Seal: A severely damaged door seal won’t create a tight seal and needs replacement. Estimated cost: $20-$60.
- Drain Pan: Though rare, a cracked drain pan will cause leaking. Estimated cost: $15-$40.
Safety Warning
- Always unplug the freezer before performing any maintenance or repairs.
- Be careful when working with electrical components.
- Avoid standing in water while working on the freezer to prevent electric shock.
- Use caution when handling tools to avoid injury.
- If you are not comfortable performing any of these steps, consult a qualified appliance repair technician.
Tools You May Need
- Screwdrivers (Phillips and flathead)
- Adjustable wrench
- Pliers
- Vacuum cleaner with brush attachment
- Turkey baster or flexible tube
- Warm water
- Soft cloth
FAQ
- Q: How often should I clean my freezer’s defrost drain? A: Ideally, you should clean it every 6 months to prevent clogs.
- Q: Why is my icemaker overflowing? A: This could be due to a faulty water inlet valve, low water pressure, or a frozen water line.
- Q: Can a dirty condenser coil cause my freezer to leak? A: Yes, dirty coils reduce cooling efficiency, leading to excessive condensation and potential leaks.
- Q: How do I know if my door seal is bad? A: If you can easily slide a piece of paper between the seal and the freezer frame, the seal is likely compromised.
Conclusion
Troubleshooting a leaking KitchenAid freezer might seem daunting at first, but by following these steps, you can often identify and fix the problem yourself. Remember to prioritize safety and take your time. If you’ve tried these steps and the leaking persists, or if you’re uncomfortable performing any of the repairs, it’s best to call a qualified appliance repair technician for assistance. Addressing the issue promptly will prevent further damage and keep your freezer running efficiently. Discover more free resources across our collection library.
Youtube Video:
Quick Wiring Specifications & Terminal Guide
| Component / Circuit | Standard Wire Gauge | Recommended Protection |
|---|---|---|
| Control & Trigger Signals | 18 – 20 AWG | 5A – 7.5A Inline Fuse |
| Standard Auxiliary Load | 14 – 16 AWG | 15A – 20A Circuit Breaker |
| Main Power Feed / Supply | 10 – 12 AWG | 30A – 40A Heavy-Duty Relay |
