Introduction
Discovering your Kenmore Elite dishwasher isn’t draining properly after a wash cycle can be frustrating. Standing water not only prevents you from unloading clean dishes but can also lead to unpleasant odors and potential water damage to your kitchen floor. This is a common issue, often happening when food particles or debris clog the drain system. Addressing this promptly is important to prevent further complications and ensure your dishwasher operates efficiently.
Common Causes of Kenmore Elite Not Draining
Several factors can cause your Kenmore Elite dishwasher to refuse to drain:
- Clogged Drain Filter: Food particles often accumulate in the filter, obstructing water flow.
- Blocked Drain Hose: The hose connecting the dishwasher to the drain can become kinked or clogged.
- Air Gap Issues: If your sink has an air gap, it might be blocked, preventing proper drainage.
- Garbage Disposal Blockage: If your dishwasher drains into the garbage disposal, a blockage there can affect drainage.
- Faulty Drain Pump: The drain pump might be malfunctioning, unable to effectively pump out the water.
- Obstructed Impeller: Debris can jam the impeller within the drain pump, hindering its function.
- Kinked or Damaged Drain Hose: A bent or damaged drain hose can restrict water flow.
- High Loop Issues: The drain hose ‘high loop’ must be correctly positioned to prevent backflow and ensure proper drainage.
Symptoms Checklist
Check for these symptoms to confirm a drainage problem:
- Standing water in the dishwasher after a complete wash cycle.
- Unusual gurgling sounds during the drain cycle.
- Error codes displayed on the dishwasher control panel related to drainage.
- Slow draining of water compared to normal.
- Foul odor emanating from the dishwasher.
How to Fix Kenmore Elite Not Draining Step-by-Step Guide
Follow these steps to troubleshoot and fix the draining issue:
- Safety First: Turn off the dishwasher and unplug it from the power outlet.
- Remove Standing Water: Use a cup or small container to carefully remove any standing water from the bottom of the dishwasher.
- Locate and Clean the Drain Filter: The drain filter is usually at the bottom of the dishwasher. Remove it, rinse it thoroughly under running water, and remove any debris.
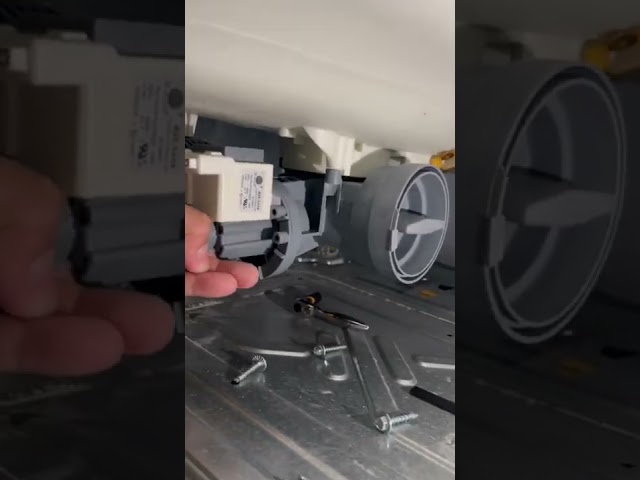
- Check the Drain Impeller: With the filter removed, inspect the drain impeller (small spinning blade). Remove any obstructions.
- Inspect the Drain Hose: Locate the drain hose (usually under the sink). Check for kinks, bends, or any visible damage. Straighten out any kinks.
- Disconnect and Flush the Drain Hose: Carefully disconnect the drain hose from the dishwasher and the drain connection (usually the garbage disposal or sink drain). Flush the hose with hot water to dislodge any clogs.
- Check the Air Gap (if applicable): If you have an air gap, remove the cover and clean out any debris.
- Run the Garbage Disposal: If your dishwasher drains into the garbage disposal, run the disposal for a minute or two to clear any potential blockages.
- Reassemble the Drain Hose: Reconnect the drain hose securely to the dishwasher and the drain connection.
- Check the High Loop: Ensure the drain hose has a high loop positioned higher than the dishwasher’s drain connection to prevent backflow.
- Run a Test Cycle: Plug the dishwasher back in, turn it on, and run a short wash cycle to test if it’s draining properly.
- Listen for Unusual Noises: While the dishwasher is running, listen for any unusual noises coming from the drain pump. This could indicate a problem with the pump itself.
- Check for Leaks: After the test cycle, inspect around the drain hose connections for any leaks.
- Repeat if Necessary: If the dishwasher still isn’t draining, repeat the steps above or consider calling a professional.
Fix the Issue Without Buying Parts
Before considering replacing parts, try these free methods:
- Reset the Dishwasher: Some Kenmore Elite models have a reset function. Consult your owner’s manual.
- Clean the Spray Arms: Mineral buildup can affect water pressure and drainage. Remove and clean the spray arms.
- Regular Maintenance: Run a dishwasher cleaner through the machine monthly to prevent buildup.
- Inspect for Foreign Objects: Regularly check the bottom of the dishwasher for silverware, small items, or broken glass.
When Replacement Might Be Necessary
If you’ve tried all the troubleshooting steps and your Kenmore Elite still isn’t draining, a faulty drain pump is the most likely culprit. Replacing the drain pump typically costs between $75 and $200, including the part and potential labor if you hire a technician. Other less common parts that might fail include the drain solenoid or the control board.
Safety Warning
- Always unplug the dishwasher from the power outlet before attempting any repairs.
- Be cautious when handling sharp objects or tools.
- Avoid working on the dishwasher while standing in water to prevent electric shock.
- If you are uncomfortable performing any of these steps, consult a qualified appliance repair technician.
Tools You May Need
- Screwdrivers (Phillips head and flat head)
- Pliers
- Adjustable wrench
- Bucket or container to collect water
- Towels
- Gloves
- Flashlight
FAQ
Here are some frequently asked questions:
- Q: Why is my dishwasher draining slowly? A: A partially clogged drain filter or drain hose is likely the cause. Clean both thoroughly.
- Q: What does error code “drain” or similar mean? A: It indicates a drainage issue. Refer to your owner’s manual for the specific meaning and troubleshooting steps.
- Q: How often should I clean my dishwasher filter? A: Ideally, clean the filter after every few uses or at least once a month.
- Q: Can I use vinegar to clean my dishwasher? A: Yes, running a cycle with a cup of vinegar in the top rack can help remove mineral buildup.
Conclusion
Troubleshooting a Kenmore Elite dishwasher that’s not draining can seem daunting, but by following these steps, you can often resolve the issue yourself. Remember to prioritize safety and take your time. If you’ve exhausted all troubleshooting options and the problem persists, don’t hesitate to contact a qualified appliance repair technician for professional assistance.
Youtube Video:
Looking for more useful options?
Check out recommended resources that others find helpful.