Introduction
Discovering water dripping from your HVAC system can be alarming. Not only can it damage your floors, walls, and ceilings, but it also indicates a problem within the unit that could lead to more significant issues down the line. This guide is designed to help you, the homeowner, diagnose and address the most common causes of a dripping HVAC system, preventing further damage and potentially saving you from costly repairs. Acting quickly is crucial, as prolonged leaks can lead to mold growth and structural damage.
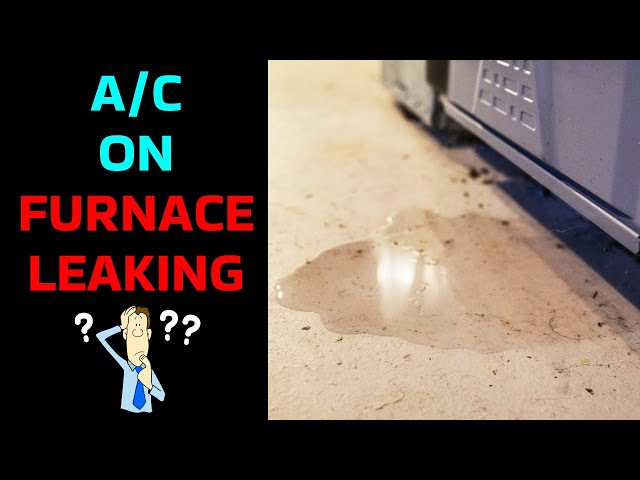
Common Causes of HVAC is Dripping Water
Here are some of the most frequent reasons why your HVAC system might be dripping water:
- Clogged Condensate Drain Line: This is the most common culprit. The drain line carries away water produced during the cooling process. If it’s blocked, water backs up and overflows.
- Dirty Air Filter: A dirty filter restricts airflow, causing the evaporator coil to freeze. As it melts, the excess water overwhelms the drain pan.
- Low Refrigerant: Low refrigerant can also cause the evaporator coil to freeze, resulting in the same melting-related overflow.
- Cracked or Rusted Drain Pan: The drain pan catches the water produced by the system. If it’s cracked or rusted, it will leak.
- Improper Installation: An improperly installed unit might not be level, causing water to overflow the drain pan.
- Broken Condensate Pump: Some systems, especially those in basements or attics, use a pump to move the condensate water uphill. If the pump fails, water backs up.
- Kinked or Disconnected Drain Line: A kink or disconnection in the drain line will prevent water from flowing properly, leading to leaks.
- Damaged Evaporator Coil: Although less common, a damaged evaporator coil can lead to excessive condensation and dripping.
Symptoms Checklist
Check for these symptoms to help pinpoint the problem:
- Water dripping from the indoor unit (furnace or air handler).
- Water stains on the ceiling near the indoor unit.
- Puddles of water around the indoor unit.
- Musty or moldy smell near the unit.
- Ice forming on the refrigerant lines or evaporator coil.
- Unit is running but not cooling effectively.
- The condensate pump is making unusual noises or not running at all.
How to Fix HVAC is Dripping Water Step-by-Step Guide
Follow these steps to troubleshoot and fix the dripping water issue:
- Turn off the HVAC system: For safety, turn off the power to your HVAC unit at the breaker box.
- Locate the Condensate Drain Line: This is usually a PVC pipe coming out of the indoor unit. It often leads to a floor drain, outside, or a condensate pump.
- Check for Clogs in the Drain Line: Disconnect the drain line near the unit (have a bucket ready to catch any water). Inspect the opening for any visible debris like algae or sediment.
- Flush the Drain Line: Use a wet/dry vacuum to suck out any blockage from the drain line. Alternatively, you can use a garden hose to gently flush the line with water. Be careful not to use excessive pressure.
- Clean the Condensate Drain Pan: Locate the drain pan under the evaporator coil. Remove any standing water with a wet/dry vacuum. Clean the pan with a mild bleach solution (1 part bleach to 10 parts water) to kill any algae or mold.
- Check the Air Filter: Remove and inspect the air filter. If it’s dirty, replace it with a new one. A clean filter ensures proper airflow.
- Inspect the Condensate Pump (if applicable): Ensure the pump is plugged in and working. Check the pump’s reservoir for any debris or blockage. Clean the pump according to the manufacturer’s instructions.
- Check for Ice Formation: If you see ice on the evaporator coil, the unit may be freezing up. Try thawing it by turning off the system and running only the fan for a few hours.
- Reassemble and Test: Reconnect the drain line, replace the air filter (if needed), and turn the power back on to the HVAC system. Observe the unit for any leaks.
- Monitor the Unit: Keep an eye on the unit for the next few days to ensure the dripping has stopped and the system is functioning correctly.
- Check for Proper Leveling: Use a level to ensure the indoor unit is properly leveled. If not, shim it until it’s level to ensure water drains correctly into the drain pan.
Fix the Issue Without Buying Parts
Often, you can resolve the dripping water issue without purchasing any new parts:
- Regular Cleaning: Schedule regular cleaning of the drain line and pan to prevent clogs.
- Air Filter Maintenance: Replace the air filter every 1-3 months, depending on usage and the filter type.
- System Reset: Sometimes, a simple reset can resolve minor issues. Turn off the power to the unit for 30 minutes, then turn it back on.
- Visual Inspection: Regularly inspect the unit for any signs of leaks or damage.
When Replacement Might Be Necessary
If the dripping persists after troubleshooting, replacement of certain parts might be necessary:
- Condensate Pump: If the pump is faulty, replacing it is often the best solution. Expect to pay between $50 and $200 for a new pump.
- Drain Pan: If the drain pan is cracked or severely rusted, it needs to be replaced. Cost ranges from $100 to $300 depending on the unit type.
- Major System Components: In very rare cases, extensive damage from water may warrant full system replacement. This should be evaluated by a professional.
Safety Warning
Follow these safety precautions when troubleshooting your HVAC system:
- Always turn off the power to the unit at the breaker box before starting any work.
- Be careful when working with water and electricity. Avoid standing in water while working on the unit.
- If you are uncomfortable performing any of these steps, consult a qualified HVAC technician.
- Use appropriate personal protective equipment, such as gloves and eye protection, when cleaning the drain pan with bleach solution.
Tools You May Need
Here’s a list of tools that can be helpful for troubleshooting:
- Wet/dry vacuum
- Bucket
- Garden hose
- Screwdriver
- Level
- Mild bleach solution
- Gloves
- Eye protection
FAQ
Here are some frequently asked questions about HVAC dripping water:
- Q: How often should I clean my condensate drain line? A: At least once a year, or more frequently if you notice signs of clogging.
- Q: Can a dirty air filter cause my HVAC to leak? A: Yes, a dirty air filter can cause the evaporator coil to freeze, leading to dripping water.
- Q: Is it safe to use bleach to clean the drain pan? A: Yes, but use a diluted solution (1 part bleach to 10 parts water) and wear appropriate protective gear.
- Q: What should I do if I can’t find the condensate drain line? A: Consult your HVAC system’s manual or contact a qualified technician for assistance.
Conclusion
Troubleshooting a dripping HVAC system can seem daunting, but by following these steps, you can often identify and resolve the problem yourself. Remember to prioritize safety and don’t hesitate to consult a professional if you’re uncomfortable with any part of the process. Addressing the issue promptly will prevent further damage and ensure your HVAC system operates efficiently for years to come.
Youtube Video:
Looking for more useful options?
Check out recommended resources that others find helpful.