Introduction
Seeing your HVAC system dripping water outside can be concerning, especially during hot summer months. This isn’t always a sign of a major problem, but it’s important to understand why it’s happening. A little dripping is normal condensation, but excessive water could indicate a blockage or other issue that can damage your system or even cause water damage inside your home. Let’s explore common causes and how to tackle them quickly to prevent more serious problems.
Common Causes of hvac dripping water outside
Several things can cause excessive dripping:
- Normal Condensation: HVAC systems remove humidity, resulting in condensation. A small amount of dripping is expected, especially on humid days.
- Clogged Condensate Drain Line: This is the most frequent cause. Debris, algae, or mold can block the drain, forcing water to overflow.
- Dirty Air Filter: A clogged filter restricts airflow, causing the evaporator coil to freeze. When the ice melts, it can overwhelm the drain pan.
- Low Refrigerant: Low refrigerant can also cause the evaporator coil to freeze, leading to excessive melting and dripping.
- Damaged Drain Pan: The drain pan under the indoor unit can crack or rust, leading to leaks.
- Improper Installation: If the HVAC system wasn’t installed correctly, the drain line might be improperly sloped or connected.
- Leaky Ductwork: If ductwork has gaps, it can cause coil freezing due to temperature differences.
- High Humidity Levels: Extremely humid conditions can overwhelm the system’s ability to drain condensation properly.
Symptoms Checklist
Use this checklist to better understand your dripping issue:
- Excessive water pooling around the outdoor unit.
- Water stains on ceilings or walls near the indoor unit.
- Musty odor coming from vents.
- HVAC system running constantly but not cooling effectively.
- Ice forming on the refrigerant lines or indoor evaporator coil.
- Water dripping even when the system is turned off.
How to Fix hvac dripping water outside Step-by-Step Guide
Follow these steps to troubleshoot the issue:
- Turn Off the System: Before you start, turn off your HVAC system at the thermostat and breaker to avoid electrical hazards.
- Inspect the Outdoor Unit: Check for obvious signs of damage or blockage around the unit.
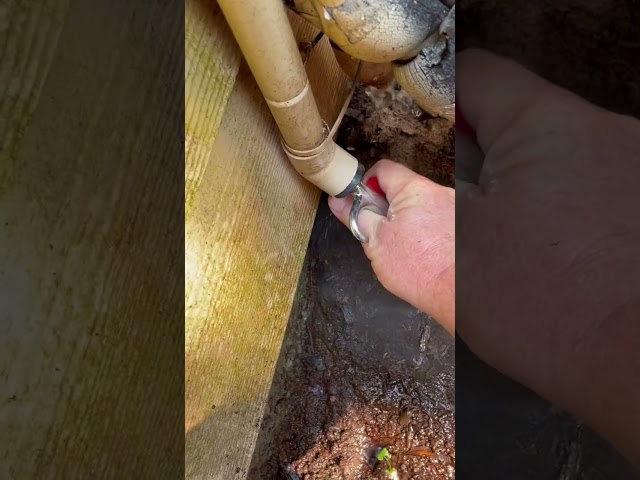
- Locate the Condensate Drain Line: This is usually a PVC pipe near the outdoor unit or coming from the indoor unit to the outside.
- Check for Clogs: Look for standing water or blockage near the drain line opening.
- Flush the Drain Line: Use a wet/dry vacuum to suck out any clogs. Place the vacuum hose over the drain line opening and turn it on. You can also use a garden hose (with low pressure) to flush the line.
- Pour Vinegar Down the Drain: Pour a cup of white vinegar down the drain line to kill algae and prevent future clogs. Let it sit for about 30 minutes before flushing again.
- Check the Air Filter: Remove and inspect the air filter. If it’s dirty, replace it with a new one.
- Inspect the Indoor Unit (if accessible): If you can safely access your indoor unit (usually in the attic or basement), check the drain pan for cracks or standing water.
- Clean the Drain Pan (if accessible): If there’s standing water in the pan, use a wet/dry vacuum to remove it. Clean the pan with a mixture of bleach and water (wear gloves).
- Check for Ice on the Evaporator Coil: If you can see the evaporator coil (usually inside the indoor unit), check for ice buildup. If there’s ice, the issue might be low refrigerant or restricted airflow.
- Ensure Proper Slope: Make sure the drain line is sloped downwards consistently to allow for proper drainage.
- Run the System and Monitor: Turn the HVAC system back on and monitor for dripping. It might take some time for the system to normalize.
- Repeat Flushing if Needed: If the dripping persists, repeat the drain line flushing process.
Fix the Issue Without Buying Parts
Before considering parts replacement, try these free methods:
- HVAC Reset: Turn off the system at the breaker for 30 minutes, then turn it back on. This can sometimes resolve minor issues.
- Air Filter Cleaning/Replacement: Regularly clean or replace your air filter to maintain proper airflow.
- Drain Line Maintenance: Flush the drain line with vinegar every few months to prevent clogs.
- Visual Inspection: Regularly inspect the outdoor unit for debris and ensure proper airflow around it.
When Replacement Might Be Necessary
If the dripping persists after troubleshooting, you might need to consider replacement:
- Damaged Drain Pan: A cracked or severely rusted drain pan ($50 – $200 for the part) might need replacement.
- Refrigerant Leak: If low refrigerant is the issue, a professional HVAC technician is required to locate and repair the leak (repair costs can range from $200 to $1000+ depending on the location and severity of the leak, plus the cost of refrigerant).
- Faulty Condensate Pump: If your system uses a condensate pump, it could fail. Replacing the pump ($50-$300) is a straightforward repair.
Safety Warning
Take these precautions:
- Always turn off the power to the HVAC system before performing any maintenance.
- Avoid touching electrical components when the system is powered on.
- Be careful when working with water, especially near electrical equipment.
- Wear gloves when handling bleach or other cleaning solutions.
Tools You May Need
Here are some tools that could be handy:
- Wet/dry vacuum
- Garden hose
- Screwdriver set
- Gloves
- Safety glasses
- White vinegar
FAQ
Here are some frequently asked questions:
- Why is my HVAC dripping even when it’s not hot? Condensation can still occur due to humidity, even if it’s not extremely hot.
- How often should I flush my drain line? Ideally, flush it every 3-6 months to prevent clogs.
- Can I use bleach instead of vinegar? Yes, but use it sparingly and dilute it with water to avoid damaging the drain line.
- Is it normal for the outdoor unit to drip a little? Yes, a small amount of dripping is normal condensation.
Conclusion
Dealing with a dripping HVAC system can seem daunting, but often the issue is simple to resolve. By following these steps, you can troubleshoot common causes like clogs and dirty filters. If, after trying these solutions, the problem persists, it’s best to call a qualified HVAC technician to diagnose and repair the issue. Remember, preventative maintenance is key to keeping your system running smoothly and preventing costly repairs down the road!
Youtube Video:
Looking for more useful options?
Check out recommended resources that others find helpful.