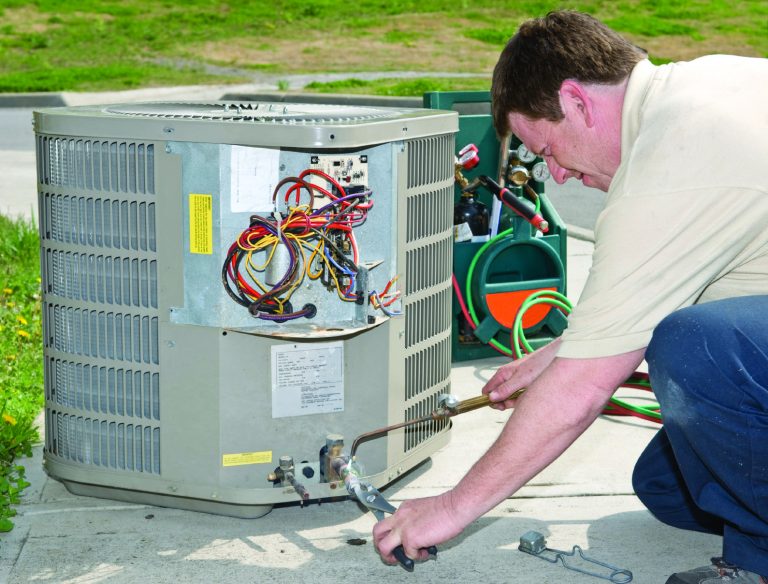
How To Turn On Air Conditioner: A Step-By-Step Guide
To turn on an air conditioner, follow these steps:
1. Locate the power button or switch on the air conditioner.
2. Press or switch on the power button to turn on the unit.
3. Adjust the temperature settings using the thermostat or control panel.
4. Set the fan speed to your preference.
5. Close all windows and doors to ensure efficient cooling.
6. Wait for the air conditioner to cool the room.
Are you tired of sweating through the scorching summer months? Do you find yourself fumbling with the controls of your air conditioner, unsure of how to harness its cooling power? If you’re nodding your head in agreement, then this article is for you. The target audience for our topic, “how to turn on an air conditioner,” includes individuals who are new to using air conditioners or are not familiar with the process.
Whether you’re a first-time AC owner or simply looking to brush up on your knowledge, we’ve got you covered. We understand that staying comfortable in hot weather and maintaining a cool indoor environment is of utmost importance.
That’s why we’ve put together a comprehensive guide to help you master the art of turning on your air conditioner. From troubleshooting common issues to understanding the different settings and controls, we’ll walk you through everything you need to know. So, get ready to say goodbye to sweaty discomfort and hello to a cool, refreshing oasis.
Stick with us as we dive into the world of air conditioning and unlock the secrets to a comfortable, blissful summer. Let’s get started!

- 【Suitable for 5.9 Inch Extension Hose】:Our air conditioner exhaust hose connector is suitable for 5.9 inch diameter portable air conditioner hose. Please check your ac unit before put the order.
- 【Check the Shape of your AC Outlet】:This exhaust hose adapter is designed for air conditioners with square vents, please check the shape of your air conditioner vent.Fits both Clockwise and counterclockwise hoses.
- 【Easy Installation】: No tools and drilling required, the first step connects to the exhaust hose, the second step can be easily installed at the back exhaust port of the portable air conditioner. Practical and convenient, simple operate.
- 【Quality Material】: made of high quality ABS material, strong, good corrosion resistance, good flexibility, high temperature resistance,this adapter saves you money in the long run due to its long-lasting quality.
- 【Improved Sealing】: This re-engineered Air Conditioner Vent Kit offers a superior sealing performance with zero gaps, effectively trapping indoor chilled air while blocking the return flow of outdoor heat. It also prevents the intrusion of rain, mosquitoes, and bugs.

- ❄️【Strengthen sealing】:This window kit keeps your room cool for longer and save electricity charges. It effectively diffuse the hot air out of the window, preventing warm air circulating in your room meanwhile.
- ❄️【Reusable】:This Window seal kit is made of high-quality PVC, which anti-extrusion, anti-aging, and can be used year after year. Removed and stored space-saving when not in use.
- ❄️【Easy to install and disassemble】:Our window slide kit plate for portable air conditioner adopted novel design, no additional tools needed, very easy to set up and detach to restore, Besides, the installation video is attached, no worry about installation.
- ❄️【Adjustable lenth】:It is suitable for most vertical and horizontal sliding windows and can be freely stretched and adjusted in length. Maximum adjustable length:160cm/63″
- ❄️【Package Include】:2x43cm/17″ Fixing Plate, 2x43cm/17″ Adjustable Plate, 1x 5.9”coupler filter,1 x Exhaust Hose Adaptor(15cm/5.9″),1 x 5.9″ Exhaust Hose – 59 Inch Length Exhaust Hose, 1x 10 FT Sealing Tape, 3x Screws.Please Check Your Window Size Before Buying.
- UNIVERSAL DESIGN – Adapts to most window units (check description below for window requirements).
- INDOOR INSTALLATION – Easy breezy install, without exterior work, just drilling into window sill.
- RELIEVES STRESS ON THE WINDOW – Transfers the stress and weight from the window sill and sash to the support and window frame for safety.
- FITS WALL THICKNESS from 2″ to 11″, exclusive built-in bubble level to correct mounting slope position.
- ALL NECESSARY HARDWARE INCLUDED and all weather construction. Patent No. US D989611

- What you receive: you will receive a square portable air conditioner exhaust hose coupler, suitable for square air conditioner outlet to 5.9 inch diameter exhaust pipe, and the hose connector is designed for the ac unit with square shape outlet and will no compatible with the round outlet, please choose the right connector according to your air conditioner style and exhaust pipe.
- Premium quality: the air conditioner tube connector is made of quality ABS material, thick and sturdy, good heat resistance and sealing, lightweight and long lasting, not easy to break and deform, it can provide a stable connection between the exhaust hose and the air conditioner at both ends, and suitable for long-term use.
- Practical design: the ac exhaust hose window adapter can firmly connect the air conditioner exhaust hose to the air conditioner and quickly exhaust hot air; the practical design can effectively improve the comfort of portable air conditioning home use, and it can well meet your exhaust hose connection and replacement fittings needs.
- Improved sealing: the exhaust hose coupler has an excellent sealing effect, it can securely connect the air conditioner hose to the air conditioner and keep external items from entering your room, helping your air conditioning to run more efficiently, which brings you lasting performance and reliable support.
- Easy to install: the ac hose extension connector features a practical universal thread design at one end, easy to use and no need to use additional tools for installation. The connection between the exhaust hose and the connector can be completed by tightening clockwise or anti-clockwise with the left or right. An essential accessory for 5.9 inch air conditioning vents.

- 【Air Conditioner Parts & Accessories】 The air hose coupler can firmly connect the air conditioner hose to the air conditioner, quickly exhaust hot air, and keep external mosquitoes from entering your room. The hose coupler allows your air conditioner to run more efficiently, cooling your room quickly.
- 【Easy to Use】 The window adapter is easy to install and can be installed without any other tools, you only need to install the air conditioner exhaust hose coupler on the hose, then use the connector to connect the exhaust pipe to the exhaust port of the air conditioner. The operation is simple and convenient, saving time and effort.
- 【Suitable For】 The diameter of the air conditioner tube connector is 15cm/5.9in, which is suitable for most air conditioners with a diameter of 5.9in, and both clockwise and counterclockwise exhaust pipes are suitable. Warm Tips: Please check your exhaust hose size carefully before purchasing.
- 【High Quality Material】 The air hose connector is made of high-quality and reliable ABS material, which is tough and light, not easy to break and deform, and suitable for long-term use.
- 【What You Will Get】 You will receive an air conditioner accessory to connect your exhaust to your air conditioner, easy to install and tight connection. If you find any problems with our portable air conditioner exhaust hose connector, please get in touch with us in time, and we will provide you with a reasonable solution.

- User-friendly design:universal model, suitable for all portable air conditioners with 5.9″ diameter hose.
- Innovative ways:PVC clamping rail can be installed on all types of sliding windows both vertically and horizontally and can therefore be used variably.
- Flexible use:6.3 “Width telescoping sealing rails, the seal size of the rail can be variably adjusted between 18” and 52 “
- Quality Assurance: durable PVC material, low weight can be easily attached and removed and stored space-saving when not in use.
- Energy saving and reliable: The window seal for mobile air conditioning systems with exhaust air hose prevents the ingress of hot air and thus increases the efficiency of the device.

- Upgraded Rain Guard 27% Airflow Boost: Portable air conditioner window kit is a true universal coupler. Suitable for all air conditioner hoses with a diameter of 5.1 inches and 5.9 inches. 5.9” air conditioner hose is compatible with many portable AC units.The air conditioning window kit is specially designed with a rain cover for outdoor use, 27% higher airflow than previous models.which prevents rain and leaves from entering the room.
- Strengthern Sealing: Compared with old portable AC window kit that requires tape to seal, We have improved the issue of gaps on both sides, which ensures this air conditioner window seal kit fit seamlessly into the window track to achieve a good sealing effect and keep your room always cool.
- Premium Durable Material: Window vent kit is made of high-quality PVC , which is anti-extrusion, and anti-aging, and can be used year after year. AC window kit adopts one-piece bird guard coupler, no need to install additional guard, preventing foreign matter from entering your house through the exhaust hose. 5.9” exhaust hose is made of flexible and heat-resistant polypropylene that will not bend or deform at high temperatures, ensuring repeatable use for years.
- For Slidng Windows: Portable air conditioner window vent kit is compatible with vertical and horizontal sliding windows ranging from 17 to 56 inches in size. (Not suitable for 17-25 inches windows). You can create different combinations based on the size of your window: use a 2-board, or 3-board combination as needed. Be satisfied with the needs of different window heights.
- Easy Installation: Portable AC window vent kit has a novel slide rail design, easy to slide the sealing plate, no need for additional tools, and easy to install and disassemble. The AC window seal kit comes with 4 plates, a universal one-piece guard coupler, a 6 inch iline fan with speed controller, a dual connector, a outdoor rain cover, a manual, and screw accessories.
- Use for 5″ Air Conditioner Hose: YoleShy window vent kit includes 4 plates, 5 diameter coupler, sealing tape, and screw accessories. Suitable for some models of L G, whether, Haier, not for all. Please measure the size before purchasing
- Sliding Track: YoleShy ac vent kit has a humanized rail design, which is easy to slide the seal plates, and fast lock. No tools required, length adjustment can be completed in 5 seconds. Please check the use length range in the picture
- Vertical & Horizontal Use: It is suitable for most vertical and horizontal sliding windows. You can use a 2-plates combination, 3-plates combination, or 4-plates combination according to the size of the window. It is convenient to use in any place
- Good Sealing: Embed the plates into the window track and clamp them to achieve a good sealing effect, which can keep your room cool at all times, without air-conditioning leakage, preventing hot air from entering, and saving power
- Easy to Install and Disassemble: YoleShy window seal kit is made of high-quality PVC, which anti-extrusion, anti-aging, and can be used year after year. Simple and stable fixing method for install and disassemble easily. Easy to store, and save space

- Forestchill Portable Air Conditioner Window Seal Plates Kit Spare Accessories, Plastic Mesh Guard
- Plastic Guard Using it to hold the pipe and seal the connection. Besides, it effectively helps your exhaust hose isolation from birds and other unexpected visitors.
- Reminder, this plastic mesh guard only compatible with Forestchill portable air conditioner window kit of 5 inches diameter.

- Portable Air Conditioner Hose Coupler: AC hose coupler connector fits on the back air outlet of many portable Air conditioner units. The square end is attached to the air conditioning exhaust port, the round end is connected the 5.9″ exhaust hose. The round exhaust hose end is featured with universal thread design, fits both clockwise and counterclockwise exhaust pipes. A great portable air conditioner parts
- Enhances Cooling Efficiency: This air conditioner exhaust hose connector adapter offers a superior sealing performance. When the air conditioner unit is turned on, the portable AC exhaust hose there will be no leakage, quickly discharge hot air, cool the room quicker. Boosting air conditioning system cooling efficiency, save electricity
- Easy To Install:The portable air conditioner exhaust hose coupler adopts a considerate and practical swivel universal thread design, easy to install. Just screw ac hose to the air conditioner through the hose coupler. The exhaust hose adapter is designed for air conditioners with square vents, please check the shape of your air conditioner vent
- High Quality AC Hose Coupler: The AC exhaust adapter is made of premium ABS material, sturdy and durable. Heat resistance hose connector can provide good support. Portable air conditioner window vent upgrade accessories
- After Sales Support: If you have any questions or concerns about our 5.9 inch portable air conditioner exhaust hose coupler, square air vent to round air hose connector adapter, please feel free to contact us at any time. We will make every effort to provide you with a satisfactory shopping experience
Understanding the Basics
Why is it Important to Know How to Turn On an Air Conditioner?
Before we delve into the nitty-gritty of turning on an air conditioner, let’s first understand why it’s crucial to have this knowledge.
During the sweltering summer months, an air conditioner becomes an essential appliance for creating a comfortable indoor environment. Knowing how to properly turn on and operate your AC unit ensures you can beat the heat and enjoy a cool, refreshing oasis at home or in the office.
Without this knowledge, you may struggle to operate your air conditioner efficiently and effectively. You might find yourself fumbling with the controls, unsure of the right settings, or even inadvertently causing damage to your AC unit. By mastering the process of turning on an air conditioner, you can enhance your comfort, prolong the lifespan of your appliance, and even save on energy costs.
The Components of an Air Conditioner
Before we dive into the step-by-step process, let’s familiarize ourselves with the key components that make up an air conditioner. Understanding these components will help demystify the process of turning on your AC unit.
1. Thermostat
The thermostat is the control panel of your air conditioner. It allows you to set the desired temperature and control various settings of the AC unit. Depending on the model, the thermostat can be a simple dial, buttons, or a digital display.
2. Power Button
Most air conditioners have a power button located on the control panel. This button is used to turn the AC unit on and off. It is usually marked with a symbol resembling a power symbol or the letter “P”.
3. Mode Selection
The mode selection allows you to choose the operating mode of your air conditioner. Common modes include cooling, heating, fan-only, and dehumidification. Some AC units also offer additional modes like sleep mode or energy-saving mode.
4. Temperature Control
The temperature control feature enables you to set the desired temperature for your indoor space. You can adjust the temperature according to your comfort level, ensuring the air conditioner maintains the desired coolness.
5. Fan Speed
The fan speed control allows you to adjust the speed at which the AC unit’s fan operates. Most air conditioners offer multiple fan speed options, such as low, medium, and high. Choosing the appropriate fan speed can help circulate the cooled air effectively.
6. Air Direction
Many air conditioners have a feature that allows you to control the direction of the airflow. This feature is especially useful if you want to direct the cool air towards a specific area or avoid direct airflow.
7. Timer
Some advanced air conditioners come equipped with a timer function. This feature allows you to set a specific time for the AC unit to turn on or off automatically. It can be helpful for energy-saving purposes or ensuring your desired temperature is maintained while you’re away.
Gather the Required Information
Before you proceed with turning on your air conditioner, there are a few pieces of information you should gather:
1. AC Unit Manual
Locate the manual that came with your air conditioner. This comprehensive guide provides specific instructions for your particular model and can be a valuable resource when learning how to operate your AC unit.
2. Model and Serial Number
Take note of the model and serial number of your air conditioner. This information can be found on the AC unit itself or in the user manual. Knowing these details can be helpful if you need to troubleshoot any issues or seek technical support.
3. Electricity Source
Ensure that your air conditioner is connected to a reliable electricity source. Check that the power supply is stable, and the AC unit is plugged in properly. If your air conditioner requires batteries for the remote control or other features, make sure they are working and properly installed.
Step-by-Step Guide to Turning On Your Air Conditioner
Step 1: Prepare the Environment
Before you turn on your air conditioner, it’s important to prepare the environment for optimal cooling:
- Close all doors and windows to prevent warm air from entering the room.
- Ensure that the curtains or blinds are closed to block out direct sunlight, which can raise the temperature.
- Remove any obstacles or obstructions around the air conditioning vents to allow proper airflow.
Step 2: Locate the Power Button
Look for the power button on the control panel of your air conditioner. It is typically marked with a power symbol or the letter “P”.
Step 3: Turn On the Air Conditioner
Press the power button to turn on the air conditioner. You should hear a beep or see the display activate, indicating that the AC unit is powered on.
Step 4: Set the Desired Temperature
Use the temperature control feature on the thermostat to set the desired temperature for your indoor space. Turning the control clockwise usually lowers the temperature, while turning it counterclockwise raises the temperature.
Step 5: Select the Operating Mode
Choose the operating mode that suits your needs. If you want to cool the room, select the cooling mode. If you only want to circulate air without cooling, choose the fan-only mode. Refer to your AC unit’s manual for specific instructions on selecting the mode.
Step 6: Adjust the Fan Speed and Air Direction
If desired, adjust the fan speed to your preference. Most air conditioners offer multiple fan speed options, allowing you to customize the airflow. Additionally, you can control the direction of the airflow using the air direction feature.
Step 7: Monitor the Air Conditioner
Once you have set the desired temperature and adjusted the necessary settings, closely monitor the air conditioner for any unusual noises or malfunctions. If you notice any issues, consult the troubleshooting section in your AC unit’s manual or seek professional assistance if needed.
Step 8: Turn Off the Air Conditioner
When you no longer need to use the air conditioner, simply press the power button again to turn it off. This helps conserve energy and prolong the lifespan of your AC unit.
Troubleshooting Common Issues
No Power
If your air conditioner does not turn on, check the power supply. Make sure the AC unit is properly plugged in and that the outlet is functioning correctly. If you are using a remote control, ensure that the batteries are not dead and are correctly installed.
No Cool Air
If your air conditioner is running but not producing cool air, several factors could be at play. Check the thermostat settings to ensure that the desired temperature is set correctly. Additionally, inspect the air filters and vents to make sure they are clean and free from any blockages. If these troubleshooting steps do not resolve the issue, it may be necessary to consult a professional technician.
Unusual Noises
If you hear unusual noises coming from your air conditioner, such as rattling, buzzing, or grinding, it may indicate a mechanical issue. In such cases, it is advisable to turn off the AC unit and seek professional assistance. Continuing to operate the air conditioner with unusual noises could potentially cause further damage.
Mastering the process of turning on an air conditioner is essential for creating a comfortable indoor environment during the hot summer months. By understanding the components of your AC unit, gathering the necessary information, and following a step-by-step guide, you can confidently operate your air conditioner and enjoy a cool, refreshing oasis. Remember to troubleshoot common issues and seek professional assistance when needed. Stay cool and beat the heat with your newfound knowledge of turning on an air conditioner!
How to make air conditioner at home using Plastic Bottle – Easy life hacks
Frequently Asked Questions (FAQ)
How do I turn on my air conditioner?
Why is my air conditioner not turning on?
How can I troubleshoot my air conditioner if it’s not working?
Can I turn on my air conditioner remotely?
How do I turn off my air conditioner?
Final Words: Mastering the Art of Operating Your Air Conditioner
In conclusion, knowing how to turn on an air conditioner is crucial for creating a comfortable indoor environment during hot summer months. By understanding the components of your AC unit and following a step-by-step guide, you can confidently operate your air conditioner and enjoy a cool, refreshing oasis.
The key components of an air conditioner include the thermostat, power button, mode selection, temperature control, fan speed, air direction, and timer. Gathering the required information, such as the AC unit manual, model and serial number, and ensuring a reliable power source, is important before starting the process.
The step-by-step guide to turning on an air conditioner begins with preparing the environment by closing doors and windows, closing curtains or blinds, and removing any obstacles around the vents. Then, locate and press the power button to turn on the air conditioner. Set the desired temperature, select the operating mode, adjust the fan speed and air direction if desired, and closely monitor the AC unit for any issues.
Finally, when you no longer need to use the air conditioner, press the power button to turn it off. Common issues that may arise include no power, no cool air, and unusual noises. Troubleshooting these issues involves checking the power supply, thermostat settings, air filters, and vents.