How To Run Refrigerant Lines Through Walls: Step-By-Step Guide
Running refrigerant lines through walls is a crucial skill for HVAC technicians and professionals in the field of air conditioning and refrigeration. Here is a step-by-step guide on how to do it: 1. Plan the route: Determine the best path for the refrigerant lines through the walls, considering factors such as proximity to the air conditioning unit and potential obstructions. 2. Drill holes: Use a drill to create holes in the walls where the refrigerant lines will pass through. Ensure the holes are the right size to accommodate the lines. 3. Protect the lines: Install conduit or sleeves in the holes to protect the refrigerant lines from damage and provide insulation. 4. Thread the lines: Carefully thread the refrigerant lines through the conduit or sleeves, making sure they are properly secured and aligned. 5. Seal the holes: Use caulk or sealant to seal the holes around the refrigerant lines to prevent air leakage and improve energy efficiency. 6. Test for leaks: Once the lines are in place, test the system for any refrigerant leaks to ensure proper functioning. 7. Insulate the lines: Wrap the refrigerant lines with insulation to prevent condensation and maintain optimal efficiency. By following these steps, you can successfully run refrigerant lines through walls and ensure efficient cooling and system performance.
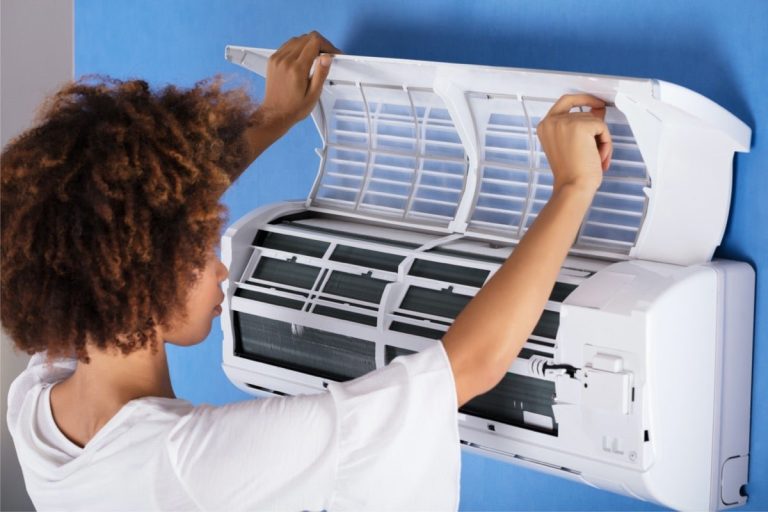
Imagine a hot summer day, and the air conditioning in your home suddenly stops working. Frustrated, you call an HVAC technician to fix the issue.
As they arrive, you watch in awe as they effortlessly navigate through walls, connecting refrigerant lines and restoring your cooling comfort. Have you ever wondered how they do it? Running refrigerant lines through walls is a crucial skill for HVAC technicians and professionals in the field of air conditioning and refrigeration.
It ensures efficient cooling and proper system performance while complying with industry regulations. In this step-by-step guide, we will delve into the intricacies of running refrigerant lines through walls, equipping you with the knowledge to tackle this task with confidence. Join us as we explore the necessary techniques, tools, and precautions to ensure a successful installation.
Get ready to embark on a journey that will empower you to master the art of running refrigerant lines through walls and become a seasoned professional in the world of HVAC systems.

- Package content: 3 packs BPV-31 piercing tap valve kits (each kit contains 1 piercing valve, 1 hex key and 2 adapters), including R134a U-charge hose with gauge and can tap, universal retrofit valve with a dust cap, 5 packs in total, bring you more convenient for replacement; All our replacement kits are made of corrosion-resistant metal that won’t wear out or rust over time, with anti-leaking design that will be safer for you
- Easy to install: our BPV-31 piercing tap valve kits come in compact design that only requires a 2-inch clearance area for installation and use, and you only need 1 hex key wrench (included) to install the kit; If you want to attach the gauge with BPV piercing tap valve, you need a retrofit valve (included)
- R134a Charging hose: 19 inch hose with R-134a can to R-12/R-22 service port connection, 1/2 inch end fits R12, 22, 502 fittings; And the gauge has scale readings for R134, R12, and 22. 90-degree push and lock coupler with auto shut off
- Replace model of BPV-31 piercing tap valve: AP4502525, BPV31D, GPV14, GPV31, GPV38, GPV56, MPV31; Compatible with 1/4 inch, 5/16 inch, 3/8 inch outside diameter pipes
- Universal retrofit valve: the retrofit valve converts from R-12 to R-134a air conditioning system and suit for 7/16 inch low side port; Suit for vehicles pre-1994, comes with R-134a refill fittings

- The refrigerant charging hose is a necessary tools for adding refrigerant into air conditioning system during installation and maintenance. Also, it is suitable for many kinds of refrigerant. Whether it is a automotive air conditioner or a room air conditioner, the refrigerant charging hose can work with a good performance.
- High quality charging hose for all common refrigerants with 1/4″ SAE fittings. All hoses are equipped with neoprene seals.
- The special rubber compound is extremely durable due to its high pressure resistance and low embrittlement. The lifetime of PTFE-gasket compared to ordinary rubber is at least 10 times longer.
- The brass connector is corrosion-resistant, durable to use and the other brass connector has a 45 degree angle, which make it easier to connect to the air conditioning system. The knurl on the surface of connector can provide a fast and easy connection.
- Strong six-sided crimp provides a secure, reliable connection between the hose and barb – even at maximum pressure.
- ❄ WIDE APPLICATION —- Low loss refrigerant hoses fits for R410A and most other refrigerants like R22 R134A R12 R502.
- ❄ PREMIUM QUALITY —- Hose for HVAC 410A is made of high quality brass alloy and rubber, last long; easy to operate and install, strong sealing for durability and safety.
- ❄ HIGH WORKING PRESSURE —- HVAC charging hoses anti blowback with rated working pressure: 4000 psi burst / 800 psi Max. working pressure.
- ❄ WELL-DESIGN —- This HVAC hoses with low loss fittings, features with 45 degrees angle on the service port site for easier access, thread size 1/4’’ SAE male and female flare.
- ❄ 1 YEAR WARRANTY —- Order 5ft AC refrigerant charging hose from Aupoko, we can provide 12 moths free-worry warranty, if you have any questions about our product, please contact our customer service and will reply in 24 hours.
- AC U Charge Hose: Refrigerant charging hose uses rubber nylon resin material hoses, featured with anti-corrosion, low fluid resistance, high bearing pressure, ensure durability and good air sealing. Max working pressure is 500PSI and burst pressure is upto 2500PSI. The total length is 42 inch, with one side 1/4 inch female fittings connected with R134a can tap, and the other side 1/4 inch female fittings for R134A quick coupler or connect AC service port directly
- Refrigerant Charging Gauge: AC low pressure gauge with scale range -30inHg~250PSI, is equipped with metal 2-3/4 inch big dial, color coded scale to indicate pressure index for R134A, Celsius unit, for monitoring the air conditioning low pressure side pressure easily. Built in calibration screw and no-flutter pointer insure a accurate refrigerant recharge. (NOTE: Use valve core tool to unscrew the valve core thimble a little bit if the hose angled connector would not depress the Schrader valve)
- Brass Quick Coupler: Premium brass and aluminum, quick interface design with accurate snap lock and anti-slip knurled grip ring, easy to connect and disconnect, compatible with all models with standard R134A low pressure side suction service port. Aim at R134A suction service port, push to connect and lock. Pull up the knurled grip ring to loose and lift to disconnect. There is also a 1/4 inch male to 1/2 inch female adapter included.
- Can Tap: Brass self-piercing can tap with 1/2 inch female thread interface, can screw to fix on 1/2 inch male thread of refrigerant bottle opening. T type knobs, easy to operate by fingertips. Internal pin with sharp tip help to pierce refrigerant bottle easily and quickly. Equipped with 1/4 inch male flare on the side, to hook directly to 1/4 inch female fittings of AC refrigerant charging hose
- Measure Pressure and Recharge R134A: Start the car, open AC to MAX. Clockwise twist T handle to close can tap, connect the quick coupler and car AC suction service port to measure the pressure. The reading is right only when AC compressor is working. If need to charge the refrigerant, please compare to the manufacturer’s recommended readings, choose the appropriate amount refrigerant can, to ensure there is no leftover in the can.

- [Size] – Total Length: 0.9M / 2.95Ft; Thread Size: 1/4 SAE; Working Pressure: 500PSI; Burst Pressure: 2500PSI; Fit for Refrigerant: 22, 12, 134a
- [Refrigerant Hose Material] – Rubber hose and iron connector with copper plating offer flexibility and abrasion resistance ensuring long life and dependability.
- [Reliable Connection] – Strong six-sided crimp provides a secure, reliable connection between the hose and barb – even at maximum pressure(Notice:Please also note that our 1/4SAE Thread only fits for the 7/16-20UNF thread.)
- [Easy to Install] – 45 degrees bend on the end for convenient access to the adapter on the system. Deep knurling on the Coupler nuts provides a positive grip and enables quick finger-tightening
- [Application] – This HVAC hose is good for testing or repairing, such as home or HVAC air conditioner, ductless mini-split AC systems, refrigerator, refrigeration charging, vacuum pump, Pressure gauge, and so on.

- 60 inch long,1/4 inch yellow,blue,and red hoses feature a 600 PSI working pressure and 3000 PSI burst pressure – ideal for standard refrigerants
- Easy to operate and install,strong sealing for durability and safety.Necessary tools for HVAC,car air condition maintenance and coolant or Freon adding.
- Refrigerant charging hose with compact ball valve deigned to meet 1/4″ SAE requirement for refrigerant permutation, fit most refrigerants like R134A, R22, R12, R502,R404.Standard 1/4 inch female flare fittings with a valve core depressor and 45°bend on one end for convenient access to the system
- Refrigerant anti blowback fittings refrigeration charging hoses valve discharge conditioning refrigerant charging refrigerant discharge recharge yellow jacket interdynamics conditioning recharge bundle refrigerant liquid hose
- Satisfactory service, if you have any questions, please feel free to contact us by email!We will solve it for you in the first time!

- [WIDE APPLICATION] The ac hose with low loss fittings good for R410a and most other refrigerants like R22, R134a, R12, R502.
- [HIGH WORKING PRESSURE] The working pressure of R410 Refrigerant Charging hoses can get 800PSI, burst pressure 4000 PSI.
- [WELL DESIGN] HVAC Hose designed to features with 45 degrees angle on the service port site for easier access, thread size 1/4’’ SAE male and female flare. Meet 1/4″ SAE Requirement for Refrigerant Permutation.
- [PREMIUM QUALITY] The ac charging hose made of brass and rubber, premium refrigerant charging hoses last long; easy to operate and install, strong sealing for durability and safety.
- [PACKAGE INCLUDE] 1Pc x R410 AC Charging Hose. If you have any problem or concerns, feel free to contact us.

- Ball Valve Refrigerant Hose Set (3) – 1/4 inch (5′ Black w/Tags)
- Open valve hose set (3-pack)
- Hose Length: 5 Ft (1.5m)
- Fitting size: 1/4? x 1/4?
- A2L Compatible

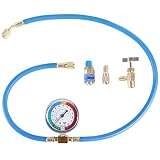
- AC U Charge Hose: Refrigerant charging hose uses rubber nylon resin material hoses, featured with anti-corrosion, low fluid resistance, high bearing pressure, ensure durability and good air sealing. Max working pressure is 500PSI and burst pressure is upto 2500PSI. The total length is 42 inch, with one side 1/4 inch female fittings connected with R134a can tap, and the other side 1/4 inch female fittings for R134A quick coupler or connect AC service port directly
- Refrigerant Charging Gauge: AC low pressure gauge with scale range -30inHg~250PSI, is equipped with metal 2-3/4 inch big dial, color coded scale to indicate pressure index for R134A, Celsius unit, for monitoring the air conditioning low pressure side pressure easily. Built in calibration screw and no-flutter pointer insure a accurate refrigerant recharge. (NOTE: Use valve core tool to unscrew the valve core thimble a little bit if the hose angled connector would not depress the Schrader valve)
- Brass Quick Coupler: Premium brass and aluminum, quick interface design with accurate snap lock and anti-slip knurled grip ring, easy to connect and disconnect, compatible with all models with standard R134A low pressure side suction service port. Aim at R134A suction service port, push to connect and lock. Pull up the knurled grip ring to loose and lift to disconnect.
- Can Tap: Brass can tap with 1/2 inch female thread interface, can screw to fix on 1/2 inch male thread of refrigerant bottle opening. T type knobs, easy to operate by fingertips. Internal pin with sharp tip help to pierce refrigerant bottle easily and quickly. Equipped with 1/4 inch male flare on the side, to hook directly to 1/4 inch female fittings of AC refrigerant charging hose
- Measure Pressure and Recharge R134A: Start the car, open AC to MAX. Clockwise twist T handle to close can tap, connect the quick coupler and car AC suction service port to measure the pressure. The reading is right only when AC compressor is working. If need to charge the refrigerant, please compare to the manufacturer’s recommended readings, choose the appropriate amount refrigerant can, to ensure there is no leftover in the can.

- You will receive: 3 pieces angled ball valves and 4 pieces useful adapters, totally 7 pieces can meet your needs
- Angled ball valve: 45 degree angle manual shut-off valve with 1/4 inch male and female fitting; The couplers nuts are deeply knurled for quick finger-tightening, 800 psi (55 bar) maximum working pressure and 4000 psi (276 bar) minimum burst pressure
- Adapter for mini split system: converts the 5/16 inch charging vacuum ports (R410a style) to accept 1/4 inch gauge hose set, 1/4 inch male x 5/16 inch female adapter; This connector has a thimble, it will not open the air conditioning core tube while operating, good to solve the problem of leakage
- Quality sets: made by quality brass alloy, last long; Easy to operate and install, strong sealing for durability and safety; Built in quality rubber gasket, features with anti-leakage
- Wide application: can be added to hoses for charging and recovery, suitable for refrigerants R134a, R410A, R22 and R12 charging hoses or manifold; Necessary tools for HVAC, car air condition maintenance; Tip: Just tighten it during installation and use, and there is no need to use too much force to cause damage to the sealing device and leakage
I. Overview of Running Refrigerant Lines Through Walls
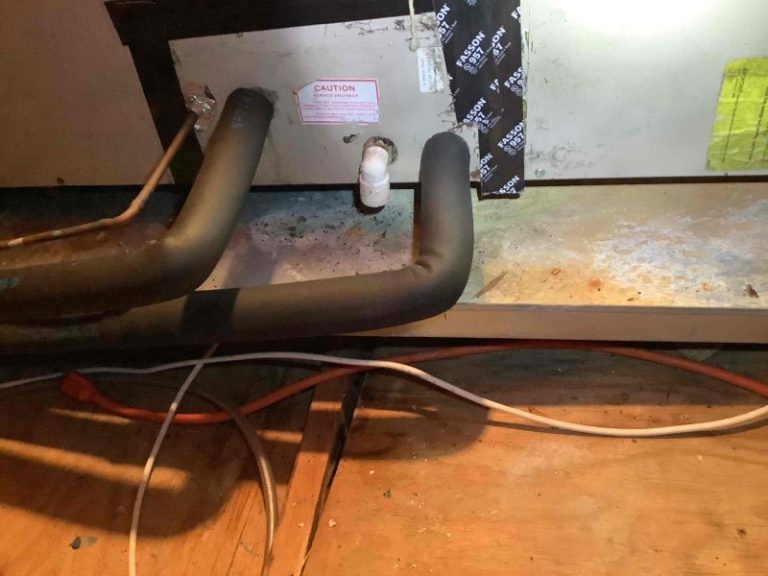
Running refrigerant lines through walls is a critical aspect of HVAC installations and repairs. These lines carry the refrigerant, allowing it to flow between the condenser unit and the evaporator unit, ultimately facilitating the cooling or heating process in your home. Proper installation of these lines is vital for the efficient and effective operation of your air conditioning system. In this guide, we will provide a step-by-step overview of how to run refrigerant lines through walls.
II. Preparing for the Installation
A. Assessing the Wall Structure
Before beginning the installation process, it is crucial to assess the structure of the walls where you plan to run the refrigerant lines. This assessment will help you determine the necessary steps and precautions to take during the installation.
1. Identifying Load-Bearing Walls
If you are running the lines through external walls, it is important to identify any load-bearing walls. These walls play a significant role in supporting the weight of the structure. Drilling into load-bearing walls without proper reinforcements can compromise the stability of the building. Consult with a structural engineer or a professional contractor to identify load-bearing walls and determine the appropriate course of action.
2. Determining the Wall Composition
Understanding the composition of the walls is essential for planning the installation. Different wall materials, such as drywall, plaster, or brick, require specific tools and techniques for drilling holes and securing the refrigerant lines.
B. Checking Local Codes and Regulations
Before starting any HVAC installation or modification, it is crucial to check local codes and regulations. Compliance with these guidelines ensures the safety and efficiency of your system and avoids potential legal issues in the future.
1. Permit Requirements
In some areas, permits may be required for running refrigerant lines through walls. Check with your local building department to determine whether you need a permit for your specific project. Obtaining the necessary permits helps ensure that the installation meets safety standards and code requirements.
2. Insulation Requirements
Local codes may also dictate insulation requirements for refrigerant lines. Proper insulation helps prevent condensation and energy loss. Familiarize yourself with the insulation specifications and select appropriate insulation materials for your installation.
III. Selecting the Right Tools and Materials
A. Choosing the Appropriate Refrigerant Line
Selecting the correct refrigerant line is crucial for the performance and efficiency of your air conditioning system. Consider the following factors when choosing a refrigerant line:
1. Sizing the Refrigerant Line
The size of the refrigerant line depends on the capacity of your air conditioning system. Consult the manufacturer’s specifications or seek guidance from an HVAC professional to determine the appropriate size for your system.
2. Selecting the Correct Type of Refrigerant Line
Refrigerant lines come in different types, such as copper, aluminum, or flexible tubing. Each type has its advantages and considerations. Copper is commonly used for its durability and longevity, while aluminum offers excellent heat transfer properties. Flexible tubing provides flexibility during installation but may have limitations in certain applications. Choose the type that best suits your needs and system requirements.
B. Gathering Necessary Tools
Before starting the installation, gather the required tools to ensure a smooth and efficient process. The tools you may need include:
1. Pipe Cutter
A pipe cutter is essential for cutting the refrigerant lines to the desired length. It provides clean and precise cuts, ensuring the proper fit of the lines.
2. Flaring Tool
A flaring tool is necessary for creating flared ends on the refrigerant lines. This process ensures a secure connection between the lines and the fittings.
3. Wrenches
Wrenches are used for tightening fittings and connections. Different sizes may be required depending on the specific components of your system.
4. Hole Saw
If drilling holes through walls, a hole saw is necessary for creating clean and precise openings. Choose a hole saw size that matches the diameter of the refrigerant lines.
5. Caulking Gun
A caulking gun is useful for sealing holes and gaps in the walls to prevent air leaks and moisture intrusion. Select an appropriate sealant for the specific wall material.
IV. Planning the Route of the Refrigerant Lines
A. Determining the Entry and Exit Points
Before cutting any holes or running the refrigerant lines, carefully plan the entry and exit points for the lines. Consider the following:
1. Locating the Condenser Unit
Identify the optimal location for the condenser unit, typically on the exterior of your home. The refrigerant lines will connect to the condenser, so choose a position that allows for easy access and proper airflow.
2. Identifying the Evaporator Unit Location
The evaporator unit is usually located inside your home, such as in the attic, basement, or utility room. Determine the best location for the evaporator unit, considering factors such as accessibility, space availability, and airflow requirements.
B. Mapping the Desired Path
Once you have determined the entry and exit points, map out the desired path for the refrigerant lines. Consider the following:
1. Avoiding Obstructions
Identify potential obstructions along the path, such as electrical wiring, plumbing pipes, or structural components. Avoid running the lines near or through these obstructions to prevent damage or interference with other systems.
2. Determining the Optimum Path for Refrigerant Lines
Choose the path that allows for the shortest and most direct route between the condenser and evaporator units. Minimizing bends and curves in the lines helps maintain proper refrigerant flow and reduces the risk of restrictions or pressure drops.
V. Cutting Holes in the Wall
A. Marking the Locations for Holes
Once you have determined the path for the refrigerant lines, mark the locations for the holes where the lines will pass through the walls. Follow these steps:
1. Measuring and Marking the Entry and Exit Points
Measure the distance from the condenser unit to the entry point and from the evaporator unit to the exit point. Use these measurements to mark the corresponding locations on the walls.
2. Ensuring Proper Alignment
Verify that the entry and exit points align with the planned path for the refrigerant lines. Make any necessary adjustments to ensure a straight and direct route.
B. Drilling Holes
With the locations marked, it’s time to drill the holes for the refrigerant lines. Follow these guidelines:
1. Using the Appropriate Hole Saw Size
Select a hole saw size that matches the diameter of the refrigerant lines. Carefully drill the holes, applying consistent pressure and keeping the saw level to create clean, circular openings.
2. Taking Precautions When Drilling Through Different Wall Materials
Depending on the wall composition, different precautions may be necessary when drilling the holes. For example:
- For drywall, use a stud finder to locate and avoid electrical wires or other concealed components behind the wall.
- For plaster or masonry walls, use a masonry bit or a hammer drill to penetrate the surface.
HVAC Installation: Brazing Refrigerant Lines
Frequently Asked Questions (FAQ)
Can refrigerant lines be run through walls?
What are the considerations when running refrigerant lines through walls?
Do I need a professional to run refrigerant lines through walls?
How much does it cost to run refrigerant lines through walls?
Are there any alternatives to running refrigerant lines through walls?
Final Words: Successfully Running Refrigerant Lines Through Walls for HVAC Installations and Repairs
In conclusion, running refrigerant lines through walls is an essential part of HVAC installations and repairs. To ensure a successful installation, it is important to prepare adequately, assess the wall structure, and check local codes and regulations.
Selecting the right tools and materials is crucial for a smooth installation process, and careful planning of the route of the refrigerant lines is necessary to avoid obstructions and ensure proper refrigerant flow. Cutting holes in the wall requires accurate marking and drilling, taking precautions based on the wall composition.
By following these steps, you can effectively run refrigerant lines through walls and ensure the efficient and effective operation of your air conditioning system. It is important to remember that running refrigerant lines through walls may require professional assistance, particularly when dealing with load-bearing walls or complex installations. Consulting with an HVAC professional can provide valuable guidance and expertise throughout the process.
Overall, understanding the process of running refrigerant lines through walls and following the necessary steps can help you successfully install or repair your air conditioning system. By ensuring proper installation, you can maintain a comfortable indoor environment and optimize the performance of your HVAC system.