How To Remove Dometic Ac Inside Cover: A Step-By-Step Guide
To remove the Dometic AC inside cover, follow these step-by-step instructions: 1. Turn off the power: Ensure that the AC unit is completely powered off before attempting any maintenance. 2. Locate the screws: Look for the screws or fasteners holding the inside cover in place. They are usually found around the edges or corners. 3. Unscrew the fasteners: Use a screwdriver or appropriate tool to loosen and remove the screws. Keep them in a safe place for reassembly. 4. Gently remove the cover: Carefully lift the cover off, taking care not to damage any internal components or wiring. 5. Clean or replace filters: If necessary, clean or replace the air filters before reattaching the cover. 6. Reinstall the cover: Align the cover with the AC unit and secure it back in place using the screws or fasteners. 7. Power on the AC unit: Once the cover is securely reinstalled, you can turn on the power and test the AC system. Remember to refer to the manufacturer’s manual for specific instructions and safety guidelines during the process.
In the world of home maintenance, there are certain tasks that can leave even the most skilled DIYers scratching their heads in frustration. One such conundrum that often arises is how to remove the Dometic AC inside cover.
Whether you’re a seasoned homeowner or a newbie in the realm of air conditioning systems, this seemingly simple task can quickly evolve into a perplexing puzzle. But fear not! In this comprehensive guide, we will unravel the mystery and provide you with a step-by-step solution.
By the end of this article, you’ll have the knowledge and confidence to tackle this task with ease, ensuring that your Dometic AC system remains in top-notch condition. So, grab your toolkit and join us on this journey as we navigate the ins and outs of removing the Dometic AC inside cover. Get ready to unlock the secrets of AC maintenance like a true pro!

- Fast-Acting Waste Digester & Odor Eliminator – MAX Control – Natural uses a proprietary enzyme and bacteria formula to quickly break down waste and eliminate odors in marine holding tanks.

- Fit type: Universal Fit
- Package Dimensions: 40.6 H x 0.9 L x 15.3 W (centimetres)
- Package Weight: 0.02 kilograms
- Country of Origin : China

- Waste digester and odor eliminator Eliminate odors and break down waste in your marine holding tank with MAX Control – Natural.
- Concentrated formula – 4 oz. liquid per 40 gallon black or gray water tank treatment.
- Proprietary enzyme/bacteria formula starts working quickly environmentally safe, enhances septic systems and also complies with strict regulations.
- Has a light, appealing fragrance for open system applications (portables and gravity toilets) helps keep tank sensors clean and unobstructed.

- BREATH BETTER IN YOUR RV – Basic RV air filters don’t remove pollutants like dust, pollen, or pet dander. And the more you travel, the dirtier the air inside your RV can get. The technology in our RV air conditioner filters keeps the air in your RV fresh and clean to keep your family healthy.
- THE PERFECT FIT FOR YOUR DOMETIC AC UNIT – Compared to other 3313107.103 / 3105012.003 replacement filters, our RV air filters are made with polyester fibers and are designed to last longer than standard OEM AC filters. Our replacement RV AC air filters are precision cut for the perfect fit in your RV air conditioner.
- TRAPS THE SMALLEST OF PARTICLES – Our filters capture pollen, dust, pet dander and other allergens, providing you clean air without restricted airflow. With a MERV 6 rating, the unwoven polyester design creates a better barrier against airborne contaminants that may shorten the peformance life of your RV AC.
- REPLACE ON SCHEDULE TO ENSURE CONTINOUS CLEAN AIR – Depending on the amount of use and locations traveled in your RV, we recommennd replacing RV Air AC filters after 90 days of continous use or every year, whichever comes first. Order a few so you’ll always be ready to replace on the road.
- MADE IN THE USA – Made in America from recycled materials, the RV Air Filter is manufactured so that you can breathe easy wherever the road takes you. Because no matter how luxurious your RV may be, you’re only as comfortable as the air you breathe.

- LIGHTWEIGHT CONSTRUCTION: Lighter design reduces weight load and is easy to install
- BACKWARDS COMPATIBLE: Keep your existing ADB and upgrade your unit, makes setting up easy; (Non-Ducted Units)
- E-COATED EVAPORATOR COILS: Dometic is the only company in the RV industry using this revolutuionary design; E-coating is a flexible epoxy polymer coating process engineered specifically for HVAC heat transfer coils; Exceptional flexibility and durability; E-Coat adhesion properties and flexibility of the coating material provides excellent coil coverage and corrosion resistance
- E-COATED EVAPORATOR COILS: Dometic is the only company in the RV industry using this revolutionary design; E-coating is a flexible epoxy polymer coating process engineered specifically for HVAC heat transfer coils; Exceptional flexibility and durability; E-Coat adhesion properties and flexibility of the coating material provides excellent coil coverage and corrosion resistance

- MAXIMUM AIRFLOW: The FreshJet 3 Series rooftop air conditioner delivers powerful and quiet performance, with 13% higher cooling capacity and 15% more airflow.
- OUR LIGHTEST ONE YET: 14% lighter than our lightest unit weighing only 64 lbs.
- QUIET: Enjoy restful nights with a 4dB reduction in noise level for more restful sleep.
- E-COATED EVAPORATOR COILS: Dometic is the only company in the RV industry using this revolutionary design. E-coating is a flexible epoxy polymer coating process engineered specifically for HVAC heat transfer coils. Exceptional flexibility and durability. E-Coat adhesion properties and flexibility of the coating material provides excellent coil coverage and corrosion resistance.
- BACKWARDS COMPATIBLE: Keep your existing ADB and upgrade your unit, makes setting up easy. (Non-Ducted Units)


- Most powerful, longest lasting control of tank odors without formaldehyde
- Additives break down effluent and help tanks rinse cleaner during pump-out
- 1.5 oz. drop-in packs
- Quantity: 24 drop-ins

- Bottle Size: 8 oz.
- Powerful odor control, even in hot weather breaks down waste and toilet tissue.
- Keeps tank interior clean scent and fresh.
- Long lasting treatment eliminates and controls holding tank odors.

- High-performance motor and fan
- Low profile – 11 1/4″ / 29 cm high
- high Sleek, contemporary shroud improves aerodynamics, reduces wind resistance
- Ducted or Non-ducted cooling
- Requires inside ceiling assembly and control kit (available separately)
I. Overview of Dometic AC Inside Cover
Before we delve into the step-by-step guide on how to remove the Dometic AC inside cover, let’s first understand what it is and why it is important.
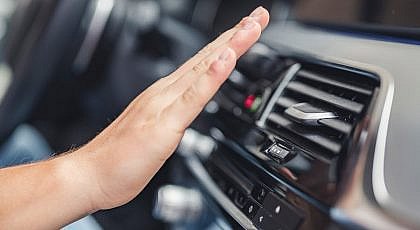
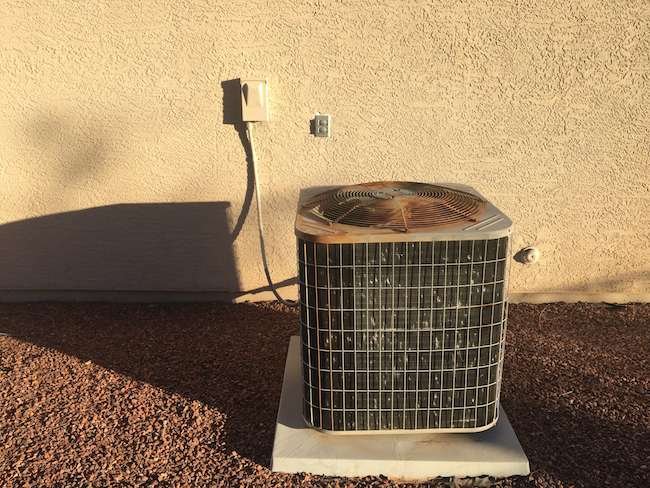
The Dometic AC inside cover is an essential component of your air conditioning system. It is designed to protect the internal components of the unit and ensure efficient operation. The cover also helps in maintaining the desired temperature inside your home by preventing air leakage and minimizing heat exchange with the surroundings.
Over time, the inside cover may accumulate dirt, dust, and debris, hindering the performance of your AC system. Regular inspection, cleaning, and maintenance are necessary to ensure optimal functioning and longevity of your Dometic AC unit.
II. Preparing for Removal
Before you start the process of removing the Dometic AC inside cover, it is crucial to take some necessary preparatory steps. This will help ensure your safety and prevent any damage to the unit.
A. Turn off the power
Before working on any electrical component, it is vital to turn off the power supply. Locate the circuit breaker panel in your home and switch off the breaker that powers the AC system. This will prevent any risk of electric shock while performing the removal process.
B. Gather necessary tools
To efficiently remove the Dometic AC inside cover, you’ll need a few tools. Before you begin, gather the following items:
- Screwdriver (Phillips or flathead, depending on the type of screws used)
- Electrical tape
- Plastic or rubber gloves
- Flashlight
C. Take safety precautions
It’s essential to prioritize safety throughout the process of removing the Dometic AC inside cover. Take the following precautions:
- Wear protective gloves to avoid any cuts or injuries while handling sharp edges or components.
- Use a sturdy ladder or step stool to reach the AC unit, ensuring stability and balance.
- Be cautious of any electrical connections and wirings to prevent accidental contact.
III. Removing Dometic AC Inside Cover
Now that you’re well-prepared, let’s dive into the step-by-step process of removing the Dometic AC inside cover.
A. Accessing the inside of the AC unit
Before you can remove the inside cover, you need to gain access to the internal components of the AC unit. Here’s how you can do it:
1. Locate the access panel
The access panel is typically located on the ceiling or the wall, depending on the installation of your Dometic AC unit. Look for a rectangular or square-shaped cover that blends with the surrounding surface.
2. Remove screws or fasteners
Most Dometic AC inside covers are secured in place with screws or fasteners. Use the appropriate screwdriver to remove these fasteners, ensuring you keep them somewhere safe to avoid misplacement.
B. Disconnecting wiring and components
Once you’ve gained access to the inside of the AC unit, it’s time to disconnect the wiring and any additional components that may be attached to the cover.
1. Identify electrical connections
Before disconnecting any electrical connections, it’s crucial to identify them accurately. Inspect the wiring and take note of their positions and connections, ensuring you can reconnect them correctly later.
2. Disconnect the wiring
Using electrical tape, label each wire according to its corresponding connection. Carefully disconnect the wiring by removing any connectors or screws holding them in place. Take extra care to avoid damaging the wires or connectors during this step.
3. Remove any additional components
Inspect the inside cover for any additional components that may be attached. These can include filters, brackets, or any other accessories. Remove them by unscrewing or detaching as necessary.
C. Detaching the inside cover
With the wiring and additional components disconnected, you’re now ready to detach the inside cover itself.
1. Identify mounting points
Take a close look at the inside cover and identify the mounting points. These are usually screw holes or brackets that secure the cover in place. Make sure you have a clear understanding of their locations.
2. Remove screws or brackets
Using the appropriate screwdriver, remove the screws or brackets that hold the inside cover in place. Start from one corner and work your way around, ensuring you keep track of each screw or bracket removed.
3. Lift and remove the cover
Once all the screws or brackets are removed, gently lift the inside cover and carefully slide it out of its position. Be cautious of any protruding wires or components that may hinder the removal process.
IV. Inspection and Cleaning
Now that you have successfully removed the Dometic AC inside cover, it’s time to inspect and clean the internal components of your AC unit.
A. Inspecting the interior components
Take a close look at the interior components of the AC unit to identify any signs of dirt, debris, or damage.
1. Check for dirt, debris, or damage
Inspect the evaporator coil, fan blades, and any other visible components for the accumulation of dirt, dust, or debris. If any parts appear damaged or worn out, consider seeking professional assistance for repair or replacement.
2. Inspect the evaporator coil
The evaporator coil plays a crucial role in the cooling process. Ensure it is clean and free from any blockages, as this can affect the overall performance of your AC system. Use a flashlight to get a clear view of the coil.
B. Cleaning the AC unit
Proper cleaning of the AC unit is essential to maintain its efficiency and prolong its lifespan.
1. Use appropriate cleaning products
Refer to the manufacturer’s guidelines or consult with an HVAC professional to determine the appropriate cleaning products for your specific AC unit. Avoid using harsh chemicals or abrasive cleaners, as these can cause damage.
2. Wipe down surfaces and components
Using a soft cloth or sponge, gently wipe down the surfaces and components of the AC unit. Pay special attention to the evaporator coil, fan blades, and any other visible parts that may have accumulated dirt or debris.
3. Clear any clogged drainage channels
Check for any clogged drainage channels or condensate lines. Use a thin brush or a straightened paperclip to remove any blockages. Clearing these channels will ensure proper drainage of condensation and prevent water damage.
V. Reinstalling the Dometic AC Inside Cover
Now that you have inspected and cleaned the interior components of your AC unit, it’s time to reinstall the Dometic AC inside cover.
A. Aligning the cover
Before securing the inside cover, ensure it is aligned correctly with the AC unit.
1. Match mounting holes or brackets
Carefully align the mounting holes or brackets on the inside cover with the corresponding points on the AC unit. Ensure they match perfectly before proceeding.
2. Ensure proper orientation
Double-check that the inside cover is oriented correctly. It should be fitted in the same position and direction as before the removal. Orienting it improperly can impact the overall functioning of the AC unit.
B. Securing the cover
Once aligned, it’s time to secure the Dometic AC inside cover back in place.
1. Reattach screws or brackets
Using the saved screws or brackets, reattach the inside cover to the AC unit. Start from one corner and work your way around, ensuring each screw or bracket is tightened securely but not excessively.
C. Reconnecting wiring and components
With the inside cover securely in place, it’s time to reconnect the wiring and any additional components.
1. Reconnect electrical connections
Refer to the labels you made earlier and reconnect the electrical wiring to their respective connections. Ensure each connector is firmly attached and secured to avoid any electrical issues.
2. Install any additional components
If you removed any additional components during the removal process, now is the time to reinstall them. Follow the manufacturer’s instructions or guidelines to ensure proper installation.
VI. Testing the AC Unit
Now that you’ve completed the reinstallation process, it’s time to test your AC unit to ensure everything is functioning correctly.
A. Turning on the power
Go back to the circuit breaker panel in your home and switch on the breaker that powers the AC system. This will restore power to the unit.
B. Observing the operation of the unit
After turning on the power, observe the operation of the AC unit. Check if the inside cover is securely in place and if there are any abnormal sounds, vibrations, or leaks.
C. Checking for any issues or abnormalities
If you notice any issues or abnormalities with the AC unit, such as inadequate cooling, reduced airflow, or unusual odors, it’s essential to address them promptly. Consult with an HVAC professional if needed.
VII. Maintenance Tips for Dometic AC Inside Cover
Maintaining the Dometic AC inside cover and the overall AC system is crucial to ensure its longevity and optimal performance. Here are some maintenance tips to keep in mind:
A. Regular cleaning and inspection
Regularly clean and inspect the interior components of your AC unit, including the inside cover. This will help prevent the accumulation of dirt, dust, and debris, ensuring efficient operation.
B. Proper storage during off-season
If you live in an area with seasonal weather changes and don’t need to use your AC unit year-round, it’s crucial to store the inside cover properly. Clean it thoroughly, ensure it is dry, and store it in a clean and dry location to avoid any damage.
C. Seeking professional help if needed
If you encounter any issues with your Dometic AC unit or are unsure about any maintenance tasks, it’s always best to seek professional help. HVAC technicians have the knowledge and expertise to handle complex AC systems and can provide the necessary assistance.
VIII. Troubleshooting Common Problems
Even with proper maintenance, issues may arise with your Dometic AC unit. Here are some common problems and their potential solutions:
A. AC unit not turning on after cover removal
If your AC unit fails to turn on after removing the inside cover, check the following:
- Ensure the power supply is turned on at the circuit breaker panel.
- Verify that the inside cover is properly aligned and securely in place.
- Double-check the connections of the electrical wiring.
B. Airflow issues after reinstallation
If you notice reduced airflow or inconsistent cooling after reinstalling the inside cover, consider the following:
- Inspect the air filters and clean or replace them if necessary.
- Ensure there are no obstructions or blockages in the air ducts or vents.
- Check the fan blades for any debris or dirt that might be affecting their performance.
C. Water leakage or excessive condensation
If you notice water leakage or excessive condensation, take the following steps:
- Clear any clogged drainage channels or condensate lines.
- Inspect the evaporator coil for ice buildup and thaw it if necessary.
- Verify that the inside cover is properly aligned and securely in place to prevent air leaks.
IX. Conclusion
Congratulations! You have successfully learned how to remove the Dometic AC inside cover and perform essential maintenance tasks. By following the step-by-step guide provided in this article, you can ensure your AC unit remains in optimal condition and enjoy cool and comfortable indoor temperatures.
Fix Your Loud RV AC [Fast and Cheap] DIY
Frequently Asked Questions (FAQ)
How do I remove the Dometic AC inside cover?
Can I remove the inside cover of my Dometic AC myself?
Do I need any special tools to remove the Dometic AC inside cover?
Will removing the inside cover of my Dometic AC void the warranty?
What should I do if I encounter any difficulties or issues while removing the Dometic AC inside cover?
Final Words: Maintaining Your Dometic AC Inside Cover for Optimal Functioning and Longevity
In conclusion, the Dometic AC inside cover is an important component of your air conditioning system that protects the internal components and ensures efficient operation. Regular inspection, cleaning, and maintenance of the inside cover are necessary to maintain optimal functioning and longevity of your AC unit.
Before removing the inside cover, it is important to turn off the power and gather necessary tools. Safety precautions should also be taken, such as wearing protective gloves and using a sturdy ladder or step stool.
The process of removing the inside cover involves accessing the internal components of the AC unit, disconnecting wiring and components, and detaching the cover itself. Once the inside cover is removed, it is recommended to inspect and clean the interior components of the AC unit, such as the evaporator coil and fan blades. After cleaning, the inside cover can be reinstalled by aligning it correctly with the AC unit and securing it with screws or brackets.
Wiring and any additional components should be reconnected properly. Finally, it is important to test the AC unit to ensure everything is functioning correctly. Regular maintenance, proper storage during the off-season, and seeking professional help when needed are also important for the maintenance of the inside cover and overall AC system.