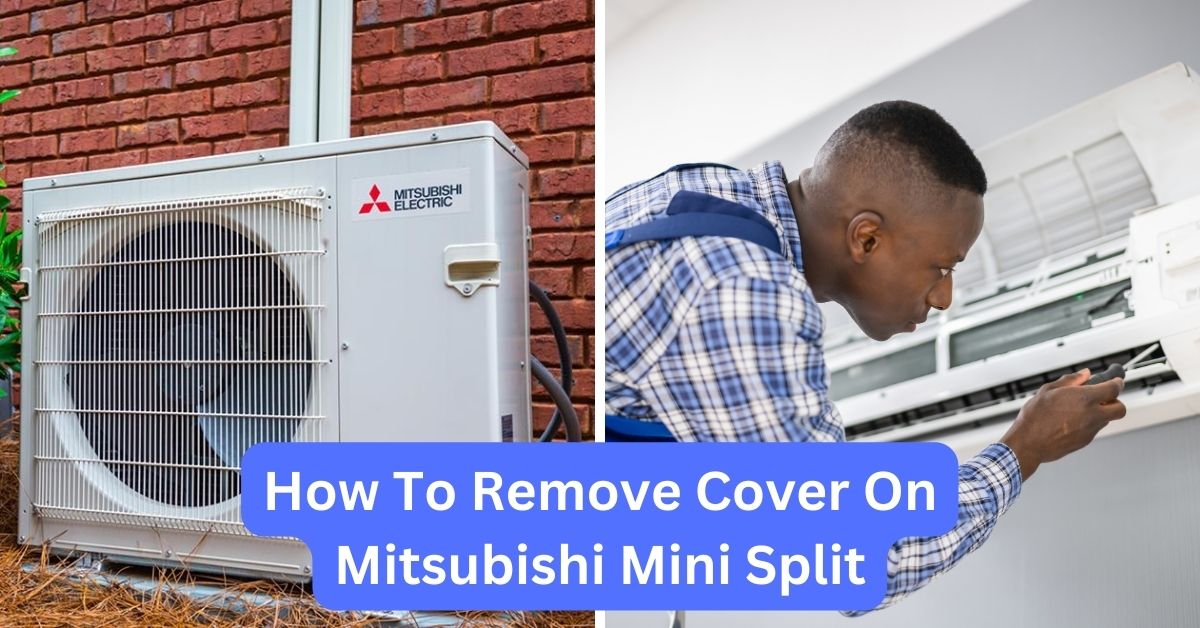
How To Remove Cover On Mitsubishi Mini Split: Easy Steps For Efficient Diy Maintenance
To remove the cover on a Mitsubishi mini split, locate the screws or clips securing the cover in place. Use a screwdriver or release the clips to detach the cover from the unit. Be careful not to damage any components while removing the cover.
Are you a proud owner of a Mitsubishi mini split air conditioning system? Are you looking to maintain it yourself and save on costly repairs? If so, you’ve come to the right place. In this article, we will delve into the essential steps of removing the cover on your Mitsubishi mini split, without causing any damage or compromising its functionality.
For individuals interested in DIY home maintenance, understanding the intricacies of HVAC systems is crucial. And if you are someone who values energy efficiency and wants to optimize the performance of your Mitsubishi mini split, then mastering the skill of removing the cover is a must.
Unlocking the cover of your unit may seem like a daunting task, but fear not. With our expert guidance, you’ll be able to perform this task with ease, ensuring that you can access the components inside the system for cleaning and maintenance purposes. Throughout this article, we will provide you with comprehensive instructions, practical tips, and insider knowledge on how to remove the cover on your Mitsubishi mini split without any hassle.
From locating the screws to safely detaching the cover, we’ll cover it all. So, if you’re ready to become a pro at maintaining your Mitsubishi mini split, let’s dive in and learn the secrets to effortlessly remove the cover, ensuring your unit functions at its best. Get ready to take control of your HVAC system and enjoy the benefits of a well-maintained mini split.


- SMART REMOTE CONTROL FOR YOUR MINI SPLIT, WINDOW OR PORTABLE AC: Cielo Breez Eco Smart AC controller works with mini split, portable and Window ACs that have an IR remote control. It connects to the Wi-Fi router and lets you control your air conditioners with smartphone, Amazon Alexa or Google Home. Comes with all required accessories even a free table stand if you prefer to place it on a desk or table. It helps you create zones for efficient heating or cooling.
- MONITOR TEMPERATURE & HUMIDITY ON APP AND CONTROL YOUR AC: Extremely affordable with complete range of smart features plus local power on/off button in case of no Wi-Fi. Has precise on-device temperature & humidity sensing to ensure perfect temperature in your room. Provides live air filter status to ensure healthy environment in your home. Create zones, set schedules, configure geo-fencing and much more to save energy and enjoy healthy home environment.
- CONTROL YOUR AC FROM ANYWHERE THROUGH YOUR PREFERRED PLATFORM: iOS, Android, Web, Alexa, Google Home or device itself – Set weekly schedules, configure location-based controls to enjoy geo-fencing. Cielo Breez Eco saves you up to 25% on your AC’s energy bills. It enhances your lifestyle, comfort and convenience. ‘Cielo Home’ Apps come with complete timeline of actions meaning you always get to know the latest. Achieve your saving goals by keeping a watch on weekly or monthly usage history.
- AUTO REMOTE CONTROL DETECTION – SUPER EASY TO CONFIGURE: Cielo Breez Eco automatically detects your remote control and is super easy to configure. In case you face any problem, Cielo WiGle has a dedicated support team to help. Support team is available 9am-9pm EST (Mon-Fri) – please visit website of Cielo WiGle. You may mount the device on the wall or place it on a desk with its table stand. All accessories included.
- CONVENIENCE & SAVINGS: Cielo Breez Eco brings ultimate convenience and savings to you by helping you save up to 25% on energy bills of your ACs. A feature rich device that is taking smart air conditioning to its very best. It provides you detailed usage statistics of your ACs on Cielo Apps. Don’t just get the data; get the insights.

- Displays SET temperature (displaying) in Fahrenheit degrees. Exclusively a Vtronix option! Can be switched from Celsius, slide the switch that is located to the right of the temperature display. Only reflects SET temperature- no room temperature!!
- Includes a bracket for mounting the remote on the wall (as opposed to the included table stand) for a better way to secure it (another exclusive Vtronix option!)
- WiFi remote control with easy setup, point to point quick brand search. WI-FI DOES NOT WORK IF NOT ON THE CHARGING BASE OR DIRECTLY PLUGGED IN.
- Allows for full weekly programming of your mini split unit. Typical AC remotes only provide a “one time” timer function.
- Easy app download on your iPhone or Android device. Follow APP configuration mentioned on the box to pair with your device and control your A/C with a mobile phone anytime, anywhere.

- [High Quality Materials] This air conditioning hose adapter is made of carefully selected high-quality brass alloy, which is easy to weld, not easy to burst, and has the characteristics of high resistance and high hardness.
- [Utility Adapter] 5/16 “internal thread, 1/4” external thread R410a rotary adapter, 45 ° angle, converts the 5/16 inch inflatable vacuum port (new R410a model) to accept 1/4 inch specification hose assembly.
- [Specially Designed Valves]The R410A adapter is specially designed with a top pin, which can effectively avoid opening the air conditioning core tube during operation and prevent fluoride leakage.
- [Easy to Install] The coupling nut has deep knurling, which can be quickly tightened with fingers, fits tightly, has no leakage, and is safe to use; The service port is positioned at a 45 ° angle for easy entry and exit.
- [Applicable] This R410A connector adapter features a 5/16 “SAE internal thread plug and a 1/4” SAE external thread plug, making it an ideal choice for most new R410A mini split air conditioners, HVAC systems, and other refrigeration equipment.

- [Set Included] The set includes a set of 410A refrigerant, including 2 R410A direct rotation adapter, 2 45 -degree angle adapter, 2 90 -degree air -conditioned pipe -free charging vacuum port adapter, 1 wire shaft disassembly, 5 top needles, and 5 top needles, and 5 top needles, and 5 top needles, and 5 top needles, and 5 top needles, and 5 top needles. 5 pads and 5 5V1 axes.
- [High -quality Materials] The R410A mini -split vacuum pump adapter is made of strong high -quality brass. The structure is solid and durable and can be used for a long time.
- [R410A Mini Split Adapter] Our R410A adapter is specially designed with a thimble, which can effectively avoid turning on the air -conditioning core tube during operation and effectively prevent fluoride leakage. The R410A vacuum pump adhesive adhesive adopts excellent sealing design and additional green cushion, which further provides good sealing.
- [Function] The R410A adapter can solve the problem of leakage well. The outer layer of the coupling of the coupling of the shaft device has deep rolling flowers, which is easy to install. It can be quickly tightened by hand. The R410A adapter charging vacuum port adapter converter converts the 5/16 “SAE charging vacuum port to 1/4” SAE specification hose set, which is one of your excellent tools.
- [Widely Applicable] This mini -split vacuum pump cover is very suitable for most new R410A mini split air conditioners and other refrigeration equipment, which is widely used and can provide a lot of convenience for your daily use equipment.

- ✔️ Upgrade Your Cleaning Experience: The waterproof layer of the cleaning bag is made of double-sided thickened Oxford fabric and equipped with PU-grade waterproof seal, double waterproof tight stitching, more sturdy and durable, reusable and cost-effective to meet your cleaning needs.
- ✔️ Protect Your Space, Inside and Out: This split air conditioning cleaning waterproof cover is designed with flexibility, Equipped with the rope and buckle along the cover to fit different air conditioner sizes flexibly, prevent dirty water from splashing or soiling your walls during use. The included water pipe ensures efficient sewage discharge, effectively preventing moisture from seeping into your walls, floors, and other areas for comprehensive cleaning protection.
- ✔️ Size Variations Available: The clean bag is suitable for all models of air condition. The medium size fits most 9,000 to 12,000 BTU split air conditioners, with dimensions of 81.07x 20.54x 29.18cm/31.91×8.08×11.41in. The large size fits most 12,000 to 24,000 BTU split air conditioners, with dimensions of 109.95x 22.6x 33.27cm/43.28×8.89×13.09in. Before purchasing, please measure the size of your air conditioner to ensure a proper fit.
- ✔️ Wide Application: The mini split cleaning kit is suitable for wall-mounted AC units in homes, offices, hotels, and stores. AC cleaning cover can help you easily clean your split air conditioner with no mess. You can also use it as a dust cover for your AC to provide additional protection during non-use time.
- ✔️ Enhance your cleaning experience now with our high-quality air conditioner cleaning covers. Installation is simple and easy to use. If you have any questions or need any further assistance, please don’t hesitate to contact us.

- CONTROL YOUR AC FROM ANYWHERE: Cielo Breez Lite makes any ductless air conditioner or heat pump smart. Use the free iOS or Android app to control your AC from anywhere, anytime. NO monthly subscriptions.
- SUPER EASY SET-UP: Cielo Breez Lite is compatible with 2000+ ductless mini-split, window, or portable AC and heat pump models. It automatically detects your remote control and is super easy to configure. It just takes a minute to set up. No tools required.
- MORE OPTIONS, BETTER CONTROL: Talk to your air conditioner using Google Assistant, Amazon Alexa, and Siri shortcuts. Cielo Breez Lite is also compatible with SmartThings and IFTTT!
- ENHANCED COMFORT & SAVINGS: Designed to prioritize energy savings without compromising your comfort. Cielo Breez Lite is loaded with next-gen smart features to help you save up to 25% on heating and cooling bills.
- PERFECT TEMPERATURE ALWAYS: Built-in temperature and humidity sensors, in combination with smart features, ensure perfect room temperature. You can always set intelligent triggers for an automated home climate.

- 【Thicker Design】The latest thicker car window shades in 2024! More sun shades! More sun protection! Our car sunshade is designed with 240T thickened titanium silver coating, which can greatly block the sunlight and heat, so you can enjoy the cool and quiet time alone in your car in the hot summer sun!
- 【Blocking U/V Rays and Heat Insulation】This car sunshade has powerful sun shading and heat insulation functions! It can block and reflect 99% of U/V rays. Its heat insulation and cooling effect is 60 times more effective than old-fashioned sun visors! Create a cool and comfortable driving atmosphere for you!
- 【Foldable Storage】The front windshield of the car sunshade is designed with “memory steel ring” which can be twisted and folded freely, when you want to store it, just fold it up, twist it along the steel ring into an “8” shape and put it into the storage bag that comes with the product, it can be easily placed in the car door or passenger compartment.
- 【Compatible Models】Our car sunshade is suitable for 99% of car models and is available in three sizes. M: 55.12″x27.6″: for normal family cars, SUVs, etc. L: 57.08″x31.5″, XL: 59″x31.5″: for medium to large vehicles, SUVs, etc. Please measure your car windshield size carefully before purchase.
- 【Installation】The installation of this windshield visor is very simple. Method 1: You can use the elasticity of the visor and put it directly in front of the car windshield. Method 2: You can also use the two sunshades that come with the original car to press and fix it. It takes you only a few seconds to install and is truly easy to use.

- [Set Includes] A set of 410a refrigerant, including 2 R410A straight swivel adapters, 2 45 degree angle adapters, 2 90 degree air conditioner ductless charging vacuum port adapters, 1 spool remover, 5 ejector pins, 5 washers, 5 5V1 spools.
- [High-quality Materials] The R410A adapter kit is made of high-quality brass, which is sturdy and durable, The sealing ring on the brass nut gives it better sealing performance.
- [Easy to Use] The coupler nut is deeply knurled and can be quickly tightened with fingers. The service port position is at a 45° angle, which is easy to operate, and you can tighten it with one hand; it is also equipped with a valve core remover for easy use and quick replacement of the valve core.
- [A Practical Kit for Seamless Operation]The vacuum hose adapter kit for R410A mini split system comes with a straight adapter, a 45° adapter, and a 90° adapter; its versatility makes it easy to manage a variety of situations and is very useful in the compact space where the mini split adapter works; in addition, we also provide seals, spools, and ejector pin replacements for emergencies.
- [Ideal Fit] Our comprehensive r410a adapter kit has 5/16″ SAE internal thread and 1/4″ SAE external thread, suitable for most R410A ductless mini split systems, R410a mini split systems air conditioning, HVAC and refrigeration services.

- 【Split Flange Repair Kit】: Car flange repair kit package includes a set of split flanges, 2 flange bolts. Manufactured according to strict craftsmanship, each part is precision machined, the folio design makes it more convenient for you to use, old or damaged gaskets can be replaced directly.
- 【2/2.5/3inch Exhaust Gasket】: Our car flange kits are available in three different sizes of 2inch, 2.5inch and 3inch to meet the needs of different car models and systems. When purchasing our car flange repair kits, make sure you choose the correct size to match your vehicle’s system!
- 【Low Carbon Steel Material】: Automotive flange repair kit is made of premium quality mild steel material, which has good mechanical properties and can withstand high temperature and high pressure working environment, so that it keep the stability of the products during installation and use.
- 【Easy Installation】: Car gasket kits are designed with the user’s installation convenience in mind. The fat elliptical exhaust fange is easy to repair your car.They do not require welding or cutting of your pipe to apply. It must be attached to the flare tube and then bolted to the existing flange to be attached.
- 【Performance Enhancement】: The automotive replacement products improves the efficiency and performance of the entire system, providing an effective fixing solution with removable intercooler system and turbo components to keep the engine working efficiently.
Understanding the Importance of Removing the Cover
The Role of the Cover in a Mitsubishi Mini Split
Before diving into the process of removing the cover on your Mitsubishi mini split, it’s essential to understand the role it plays in the overall system. The cover acts as a protective barrier, shielding the internal components from dust, debris, and potential damage.
By removing the cover, you gain access to the inner workings of the unit, making it easier to clean, inspect, and perform maintenance tasks. Regularly removing the cover and cleaning the internal components can significantly improve the efficiency and longevity of your Mitsubishi mini split.
The Benefits of Removing the Cover
Removing the cover on your Mitsubishi mini split offers several advantages:
- Improved Performance: Over time, dust and debris can accumulate on the internal components, hindering airflow and reducing the system’s efficiency. By removing the cover and cleaning the unit regularly, you can ensure optimal performance.
- Enhanced Air Quality: The cover acts as a barrier, and if left uncleaned, it can become a breeding ground for mold, bacteria, and allergens. Removing the cover allows you to clean and sanitize the internal components, resulting in better air quality.
- Extended Lifespan: A well-maintained Mitsubishi mini split is more likely to have a longer lifespan. By removing the cover and inspecting the internal components, you can identify any potential issues early on and prevent costly repairs or replacements.
- Cost Savings: Hiring a professional for routine maintenance can be expensive. By learning how to remove the cover and perform basic maintenance tasks yourself, you can save money in the long run.
Preparing for Cover Removal
Gather the Necessary Tools
Before you begin the process of removing the cover, gather the following tools:
- Screwdriver: Depending on the model of your Mitsubishi mini split, you may need either a Phillips head or flathead screwdriver. Check the manufacturer’s manual to determine the type of screwdriver required.
- Ladder or Step Stool: Depending on the height of your mini split unit, you may need a ladder or step stool to safely reach the cover.
- Protective Gloves and Eyewear: It’s always a good idea to protect your hands and eyes while working with any HVAC system.
Turn Off the Power
Prior to attempting to remove the cover, ensure that the power to your Mitsubishi mini split is turned off. This will prevent any potential accidents or electrical shocks.
Locate the power switch or circuit breaker associated with your mini split unit and switch it off. It’s important to double-check that the power is indeed off by testing the system before proceeding.
Removing the Cover
Locating the Screws
The cover of your Mitsubishi mini split is typically held in place by screws. To locate these screws:
- Refer to the manufacturer’s manual to identify the exact location and number of screws.
- Inspect the outer casing of the unit, paying attention to any visible screws or fasteners.
- Some models may have decorative covers or panels that need to be removed first before accessing the screws. Carefully remove these panels to reveal the screws.
Unscrewing the Cover
Once you have located the screws, follow these steps to safely remove the cover:
- Using the appropriate screwdriver, loosen and remove each screw one at a time.
- Place the screws in a safe location, such as a small container or bag, to avoid misplacing them.
- After removing all the screws, gently lift the cover straight up to detach it from the unit.
- Set the cover aside in a clean and secure area, ensuring it won’t get damaged or lost.
Cleaning and Maintenance
With the cover removed, you now have access to the internal components of your Mitsubishi mini split. This is an opportune time to perform some cleaning and maintenance tasks:
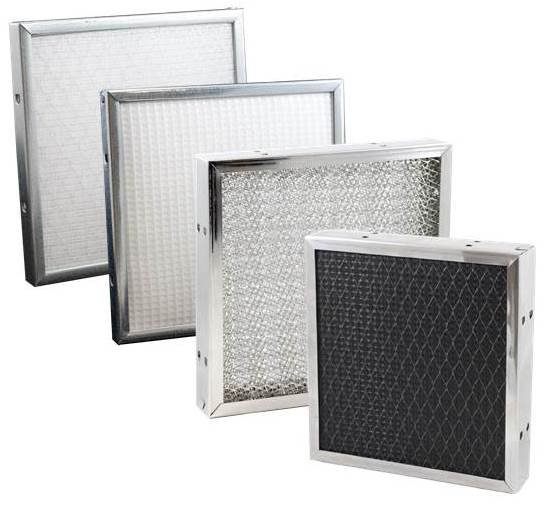
- Clean the Filters: Remove the air filters and wash them with mild soap and water. Allow them to dry completely before reinstalling.
- Remove Dust and Debris: Use a soft brush or cloth to gently clean the internal components, removing any accumulated dust or debris.
- Check for Damage: Inspect the components for any signs of damage, such as loose wires or corroded connections. If you notice any issues, consult a professional for further assessment.
- Lubricate Moving Parts: Consult the manufacturer’s manual to determine if any moving parts require lubrication. Apply a small amount of lubricant as instructed.
Reassembling the Cover
After completing the necessary cleaning and maintenance tasks, it’s time to reassemble the cover:
- Ensure that the internal components are dry and free from any moisture before reattaching the cover.
- Align the cover with the unit, ensuring that it fits properly and securely.
- Insert and tighten the screws back into their respective positions using the screwdriver.
- Double-check that all screws are securely tightened, but be careful not to overtighten, as it may damage the cover or the unit.
Powering On Your Mitsubishi Mini Split
With the cover securely reattached, it’s time to power on your Mitsubishi mini split:
- Turn on the power switch or circuit breaker associated with your mini split unit.
- Wait for the system to start up and ensure that it’s functioning properly.
- Test the air conditioning or heating function to verify that the unit is operating as intended.
Removing the cover on your Mitsubishi mini split is a crucial step in maintaining its performance and ensuring its longevity. Regularly cleaning and inspecting the internal components can greatly enhance its efficiency and improve the air quality in your space. By following the step-by-step instructions provided in this article, you can confidently remove the cover and perform basic maintenance tasks on your own. Remember to always prioritize safety by turning off the power before starting any maintenance procedures. Take control of your HVAC system and enjoy the benefits of a well-maintained Mitsubishi mini split.
DIY Mini Split Install – All the Things Nobody Shows You
How do I remove the cover on a Mitsubishi mini split?
Do I need any special tools to remove the cover on a Mitsubishi mini split?
What precautions should I take when removing the cover on a Mitsubishi mini split?
Can I clean the cover of a Mitsubishi mini split?
Is it safe to remove the cover on a Mitsubishi mini split myself?
Conclusion: The Importance and Benefits of Removing the Cover on Your Mitsubishi Mini Split Unit
In conclusion, removing the cover on your Mitsubishi mini split is an important maintenance task that can improve the performance, air quality, and lifespan of your unit. By regularly cleaning and inspecting the internal components, you can ensure optimal efficiency and prevent potential issues.
The benefits of removing the cover include improved performance, enhanced air quality, extended lifespan, and cost savings. By learning how to remove the cover and perform basic maintenance tasks yourself, you can save money on professional services.
Before removing the cover, it is important to gather the necessary tools, such as a screwdriver, ladder or step stool, and protective gloves and eyewear. It is also crucial to turn off the power to the unit to ensure safety. To remove the cover, locate and unscrew the screws holding it in place.
Carefully lift the cover to detach it from the unit, and set it aside in a clean, secure area. With the cover removed, you can clean the filters, remove dust and debris, check for damage, and lubricate moving parts. After completing the cleaning and maintenance tasks, reassemble the cover by aligning it with the unit and tightening the screws.