How To Fix Low Refrigerant In Ac Unit: Effective Solutions For Optimal Cooling
To fix low refrigerant in an AC unit, follow these steps: 1. Identify the low refrigerant issue by checking if the AC is blowing warm air. 2. Call a professional HVAC technician to diagnose the problem and determine the refrigerant levels. 3. If there is a leak, the technician will repair it and add more refrigerant to the system. 4. To prevent future leaks, make sure to schedule regular maintenance for your AC unit. By following these steps, you can restore your AC unit’s cooling capabilities and ensure optimal performance.
Did you know that low refrigerant levels in your AC unit can significantly impact its cooling performance? It’s true. Picture this: it’s the peak of summer, and the sweltering heat is relentless.
You desperately rely on your air conditioning to provide a cool oasis in your home, only to find that it’s blowing warm air instead. Frustration sets in as you realize that your AC unit’s refrigerant levels are running low, leading to decreased cooling efficiency and increased energy consumption.
But fear not, for there are effective solutions to fix this issue and restore your AC unit’s optimal cooling capabilities. In this article, we will explore practical steps that homeowners or renters can take to remedy low refrigerant levels in their AC units. Whether you’re a cooling system novice or have some understanding of the mechanics behind an AC unit, these solutions will empower you to maintain your cooling system and beat the heat.
So, let’s dive in and get your AC unit back to its cooling glory.

- Clemons, Jerry (Author)
- English (Publication Language)
- 144 Pages – 10/09/2019 (Publication Date) – CarTech (Publisher)

- [All In One] R-134a Refrigerant, lubricant enhancer and ac leak sealer, all in one! This powerful ac refrigerant kit can provide effective cooling, extend system life, and stop some small leaks. Complies with Section 612 of the EPA Clean Air Act. Hose and wireless digital temperature sensor are reusable.
- [Charge More Accurately] Our r134a refrigerant recharge kit use precision technology to measure the air temperature of the vent instead of measuring system pressure, which is more intuitive and accurate to avoid charging failure due to different system pressures between vehicles.
- [Upgrade Digital Temperature Indicator] Get rid of the dial, our freon 134a refrigerant using the latest wireless digital temperature display. Just observe the temperature of the number, you can know whether to complete charging! More simple and safety!
- [Do It Yourself] No more time and high costs to the mechanic, you can do it yourself and get your car’s air conditioner back to cooling easily! This r134a car ac recharge kit is acceptable for use in motor vehicle A/C (MVAC) system, and not compatible with r1234yf systems. Please confirm your correct system type.
- [Notes & After-Sales] Customer should complying with all federal, state and local regulations when purchasing, handling, storing and installing refrigerants. For safe use, please follow all safety precautions when handling. After-sales is guaranteed, if you have any questions please feel free to contact us.

- For R134A service ports quick coupler adapter, 1/4″ SAE male flare.
- Universal Compatibility: The adjustable Adapter Fittings provides universal compatibility for all models.
- Contain with Low side & High side. Blue: Low side quick connector/adapter; and Red: High side quick connector/adapter.
- Accuracy and Durability: Accurate snap lock & knurled grip ring for easy operation, detachable adapter for longer maintenance.
- How to Use: Connect bottoms with vehicle’s R134A service port; connect the ACME adapter with the refrigerant hose; turn on/off the switch at top to turn it on/off.

- 【WIDELY COMPATIBLE】Professional recharge kit for car/home air conditioners/refrigerators with R134a, R-22, R-12 Freon.
- 【BPV-31 Bullet Piercing Valve】Built-in special composite sealing “O” ring. Compatible with 1/4,5/16,3/8 inch Universal Refrigerator Tubes, direct replacement for AP4502525, BPV31D, GPV14, GPV31, GPV38, GPV56, MPV31,etc.
- 【EASY TO USE】Easy to operate, accessories can be disassembled and combined, perfect for DIY car air-conditioning refrigerator system repairs.
- 【PROFESSIONAL TOOL】Extra-large pressure dial with accurate scale display is easy to read. High-strength hoses, brass connections and high-quality fittings to avoid refrigerant leakage.
- 【PRODUCT INCLUDE】Everything you need for quick recharge:pressure gauge,hose,r134a low side quick coupler,puncture can tap,bullet piercing valves.

- THE EASIEST INJECTION METHOD: No more fussing with messy syringes, hoses, or pressurized cans. The Leak Saver injects directly and easily into the system with a basic manifold gauge set or even easier with our Leak Shot Injection Kits. Note: for automotive systems, you will still need the standard 134A to 1/4” charging adapter. Mini-splits may require a 5/16” to 1/4” charging adapter.
- MORE THAN 3 MILLION UNITS SOLD SINCE 2015: The Leak Saver can permanently seal small refrigerant leaks where the complete refrigerant charge is not lost within 72 hours. It’s similar to how blood in your body reacts to a cut. When a leak occurs, the Leak Saver reacts with the air and moisture at the leak site to permanently seal the leak. When used for preventative maintenance, the active ingredient circulates safely in the system to seal future leaks.
- WITH ADDED UV DYE FOR FINDING LARGE LEAKS: Seal it or find it! If you have a leak that is simply too large for leak sealants to seal, the added UV Dye will light up brightly at the leak site when using a UV flashlight.
- COMPATIBLE WITH ALL SYSTEMS AND REFRIGERANTS: : The Leak Saver UV is compatible with all systems, refrigerants (except ammonia), and oils. It is great for central air conditioners, car and automotive air conditioners, refrigerators, ductless mini-splits, heat pumps, geothermal heat pumps, commercial refrigeration systems, micro channel coils and more. It also works with all refrigerants including R410A Freon, R22 and replacements, R134A, r1234yf, R404A, R290, R600a, and more.
- YOUR SATISFACTION IS OUR PRIORITY: We stand behind the effectiveness 100%. If for any reason you are not satisfied with your product, please contact us and we will make it right.

- This is for MVAC use and comes in 12-Ounce Self-Sealing Container.
- This echarge refill protects against extreme temperatures and high use.
- It is formulated with 2 times the cooling boosters compared the next leading brand.
- Revives rubber components and helps to protect and extend the life of your vehicles AC system.

- 3-IN-1 SEALANT + MOISTURE REMOVER + UV DYE – Our proven leak sealant now includes moisture remover and UV dye for the complete system treatment! Now, you can seal your leak, remove system moisture, or find large leaks with the UV Dye…all in one easy to install package!
- STOP LEAKS PERMANENTLY – The Leak Saver can permanently seal refrigerant leaks where the complete refrigerant charge is not lost within 7 days. When a leak occurs, the Leak Saver reacts with the air and moisture at the leak site to permanently seal the leak. When used for preventative maintenance, the active ingredient circulates safely in the system to seal future leaks
- WORKS WITH ALL SYSTEMS & REFRIGERANTS INCLUDING CARS – Our product is compatible with all systems, refrigerants (except ammonia), car refrigerants, and oils. It is great for central air conditioners, automotive air conditioners, refrigerators, ductless mini-splits, heat pumps, geothermal heat pumps, commercial refrigeration systems, micro channel coils and more. It also works with all refrigerants including R410A Freon, R22 and replacements, R134A , r1234yf, R404A, R290, R600a, and more
- STRAIGHTFORWARD INSTALLATION – No more fussing with messy syringes, hoses, or pressurized cans. The Leak Saver HVAC sealant injects directly and easily into the system with a basic manifold gauge set or even easier with our Leak Shot Injection Kits. NOTE: for automotive systems, you will still need the standard 134A to 1/4” charging adapter. Mini-splits may require a 5/16” to 1/4” charging adapter. You can see our straightforward installation videos below
- SAFE FOR ALL TOOLS AND PARTS – Our HVAC leak sealer is safe for all manifold gauges, hoses, expansion valves (TXVs, TEVs, capillary tubes, etc), Schrader valves, and anything needed to service your system. Adapter required for mini splits (5/16″ to 1/4″) and automotive systems ( 134A to 1/4″)

- 1. Efficient automotive refrigerator recharge kit for automotive A/C system with R-134a R-1234yf types freon.
- 2. Extra large and colored dials with fahrenheit scale is easy to read, gauge rated 250psi (blue) max pressure, extra long 5ft hose rated 4000 psi burst pressure and 800 psi max working pressure.
- 3. Four compact can taps were equipped to match both piercing and self sealing style refrigerator cans bottle.
- 4. Two straight quick connect adapter couplers will compatible with 134a or 1234yf style automotive compressor’s low pressure side suction port.
- 5. Comes include 1x pressure gauge with hose assembly, 1x R134 puncture can tap, 1x R134 self sealing can tap, 1x R134 quick coupler, 1x R1234 puncture can tap, 1x R1234 self sealing can tap, 1x R1234 quick coupler for a efficiently ac charging work.

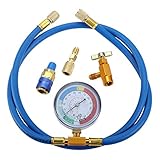
- [R134A CHARGING HOSE] The R134a Charging Hose is 19.68″ with 2.75“ Air Conditioning Gauge, R-134a Can to R-12/R-22 service port connection, 1/4″ end fits R12, 22, 502 fittings. And the gauge has scale readings for R134, R12, & 22.
- [BPV31 PIERCING VALVE] BPV31 Piercing Valve ( Not OEM)for HVAC System, 3-In-1 Line Tap Piercing Valve for Bullet, fits 3 sizes of tubing: 1/4″, 5/16″ and 3/8″, include: 1 valve, 1 Hex Key, 2 Adapters.
- [ADAPTER] The 1/4 to 1/4 Adapter with valve core, 1/4″ Male 5/16″ Female Adapter fits for Mini Split System Air Conditioners, HVAC and Refrigeration.
- [PREMIUM QUALITY] The replacement part is made from durable high quality material and well-tested by the manufacturer.
- [SERVICE GURANTEE] Package include: 1Pc x R134a Charging Hose, 1Pc x BPV31 Piercing Valve, 1Pc x R134a Low Side Quick Couple, 1Pc x 1/4 to 1/4 Adapter, 1Pc x 1/4 Male 5/16 Female Adapter. If it fails, feel free to contact us.
- ❄ WIDE COMPATIBILITY —- R134A refrigerant recharging hose kit fits for R134A R12 or R22 refrigerant refrigerant to vehicle or home air-conditioning, with highly working performance.
- ❄ PREMIUM QUALITY —- R134A can tap, R134A low side quick coupler are made of aluminium alloy, mini split adapter fitting is made of brass alloy for high heat resistance durability and safety.
- ❄ EASY INSTALLATION —- Push & lock coupler with auto shut off, easy and convenient to use. Come with gauge for easily viewing during use and getting a correct charge.
- ❄ DIMENSION —- 1/2’’ female x 1/4’’ SAE male can tap opener, 59’’length recharge hose, 13mm R134A Low Pressure quick couple, 2.7’’ length gauge, R410A mini split adapter with 5/16’’ SAE female x 1/4’’ SAE male thread.
- ❄ PACKAGE INCLUDES —- R134A air conditioning refrigerant charging hose with gauge, 1Pc R134A can opener, and R134A quick coupler, 1/4″ SAE M to 5/16″F R410A Straight Adapter.
Signs of Low Refrigerant
When your AC unit is running low on refrigerant, there are several telltale signs that can help you identify the issue. It’s important to pay attention to these signs as they can indicate a decrease in cooling performance and a potential need for refrigerant replenishment.
Insufficient cooling
If you notice that your AC unit is no longer providing the cool and comfortable environment you desire, low refrigerant levels could be the culprit. As refrigerant plays a vital role in the cooling process, a decreased amount can result in reduced cooling capabilities.
Poor airflow
Low refrigerant levels can also impact the airflow coming from your AC unit. When there isn’t enough refrigerant circulating through the system, the air blowing from the vents may feel weak or insufficient. This can lead to uneven cooling and discomfort in your living space.
Ice buildup on the evaporator coil
Another sign of low refrigerant in your AC unit is the formation of ice on the evaporator coil. When refrigerant levels are insufficient, the evaporator coil can become too cold, causing condensation to freeze. This ice buildup restricts airflow and further hampers the cooling process.
Causes of Low Refrigerant
Understanding the causes of low refrigerant levels is essential in effectively fixing the issue and preventing future occurrences. Let’s explore some common reasons why your AC unit may be experiencing refrigerant loss.
Leaks in the system
One of the primary culprits behind low refrigerant levels is leaks in the AC system. These leaks can occur in various components, including the refrigerant lines, coils, valves, or fittings. Over time, wear and tear or improper installation can lead to small or significant leaks, resulting in a gradual loss of refrigerant.
Improper installation or maintenance
Improper installation or maintenance practices can also contribute to low refrigerant levels. If the AC system was not installed correctly or if regular maintenance tasks, such as checking for leaks or replenishing refrigerant, are neglected, it can lead to refrigerant loss and decreased cooling efficiency.
Normal wear and tear
Over time, even with proper installation and maintenance, the AC system can experience normal wear and tear. This gradual wear can lead to small leaks or decreased refrigerant levels. Regular inspection and maintenance can help identify and address these issues before they become significant problems.
Precautions and Safety Measures
Before embarking on any maintenance or repair tasks related to your AC unit’s refrigerant, it’s crucial to prioritize safety. Here are some precautions and safety measures to keep in mind:
Turn off power to the AC unit
Before working on your AC unit, always ensure that the power is turned off. This step protects you from any potential electric shock and avoids accidental activation of the system while you’re performing maintenance tasks.
Wear protective gear
When dealing with refrigerant, it’s essential to protect yourself from potential health hazards. Wear safety goggles, gloves, and a mask to shield yourself from direct contact with the refrigerant and any harmful fumes.
Use proper tools
Ensure that you have the necessary tools to handle refrigerant safely. This includes a refrigerant gauge or manifold set, leak detection tools, and compatible refrigerant for your AC unit. Using the right tools minimizes the risk of errors and accidents during the repair process.
Tools and Materials Required
Before you begin fixing the low refrigerant in your AC unit, gather the following tools and materials:
- Refrigerant gauge/manifold set
- Leak detection tools (electronic or UV dye)
- Refrigerant (compatible with the AC unit)
- Safety goggles, gloves, and mask
Step-by-Step Guide on Fixing Low Refrigerant
Now that you have the necessary tools and precautions in place, let’s dive into the step-by-step guide on fixing low refrigerant in your AC unit:
Step 1: Identify the leak
The first step in fixing low refrigerant is to identify the source of the leak. This can be done through visual inspection or by using a leak detection tool.
Visual inspection
Perform a thorough visual inspection of the refrigerant lines, coils, valves, and fittings. Look for any signs of oil stains, residue, or visible damage. These can indicate the location of the leak.
Using a leak detection tool
If a visual inspection doesn’t reveal the leak, utilize a leak detection tool. Electronic leak detectors or UV dye can help identify even the smallest leaks in your AC system.
Step 2: Repair the leak
Once you’ve identified the leak, it’s time to repair it. The approach to repairing the leak depends on its size:
Small leaks
For small leaks, you have a couple of options:
- Tightening fasteners: Check if any fasteners in the refrigerant lines, coils, valves, or fittings are loose. Use the appropriate tools to tighten them and ensure a secure connection.
- Application of sealants: There are sealants available specifically designed to repair small refrigerant leaks. Follow the manufacturer’s instructions to apply the sealant to the affected area.
Large leaks
For large leaks or significant damage to components, the best course of action is to replace the damaged parts. This may involve replacing refrigerant lines, coils, valves, or fittings. Consult a professional technician or refer to the manufacturer’s guidelines for the proper replacement procedure.
Step 3: Evacuate the system
After repairing the leak, it’s essential to evacuate the system to remove any air or moisture that may have entered during the repair process. Follow these steps to evacuate the system:
Connect the refrigerant gauge
Attach the refrigerant gauge or manifold set to the AC unit. The gauge will allow you to monitor the pressure and vacuum levels during the evacuation process.
Open the manifold valves
Open the manifold valves on the refrigerant gauge set. This step allows the vacuum pump to draw the air and moisture out of the system.
Vacuum the system
Turn on the vacuum pump and allow it to run for the recommended amount of time, typically around 30 minutes. This process removes any residual air and moisture from the AC system.
Step 4: Recharge the AC unit
After evacuating the system, it’s time to recharge the AC unit with the appropriate amount of refrigerant. Follow these steps to recharge the system:
Connect refrigerant canister to the gauge
Attach the refrigerant canister to the refrigerant gauge or manifold set. This connection allows you to transfer the refrigerant from the canister into the AC system.
Open the refrigerant valves
Open the refrigerant valves on the manifold set, allowing the refrigerant to flow into the AC system. Make sure to follow the manufacturer’s guidelines regarding the specific type and amount of refrigerant required for your AC unit.
Recharge the system according to manufacturer specifications
Monitor the pressure and refrigerant levels on the gauge set as you recharge the system. Follow the manufacturer’s specifications to ensure you add the correct amount of refrigerant for optimal cooling performance.
Step 5: Test the AC unit
After recharging the AC unit, it’s crucial to test its functionality and ensure that everything is functioning correctly. Follow these steps to test the system:
Turn on power to the AC unit
Once you’ve completed the recharge process, turn on the power to the AC unit. This step allows the system to start cooling and enables you to monitor its performance.
Monitor temperature and airflow
Observe the temperature and airflow coming from the vents. The air should feel cool and consistent throughout your living space. If you notice any irregularities, such as warm air or weak airflow, it may indicate an underlying issue that requires further inspection.
Check for any leaks or abnormalities
Inspect the AC unit for any signs of leaks or abnormalities. Check the refrigerant lines, coils, valves, and fittings for any oil stains, residue, or visible damage. Identifying and addressing any issues early can prevent future refrigerant loss and ensure optimal cooling performance.
Preventive Measures
To minimize the likelihood of low refrigerant levels in the future, it’s important to implement preventive measures and regular maintenance for your AC unit. Here are some recommended practices:
Regular maintenance
Perform routine maintenance tasks to keep your AC unit in optimal condition:
- Inspecting and repairing leaks: Regularly check for any signs of leaks and address them promptly to prevent refrigerant loss.
- Checking refrigerant levels: Periodically monitor the refrigerant levels in your AC unit and replenish if necessary.
- Cleaning or replacing filters: Dirty or clogged filters can hinder airflow and cooling efficiency. Clean or replace filters regularly to maintain optimal performance.
Professional inspection and service
Consider scheduling regular professional inspections and maintenance for your AC unit. HVAC technicians have the expertise to identify potential issues, perform thorough inspections, and ensure your cooling system is functioning at its best.
Low refrigerant levels can have a significant impact on the cooling performance of your AC unit. Recognizing the signs of low refrigerant and addressing the issue promptly is crucial to restore optimal cooling capabilities and maintain a comfortable living space. By following the step-by-step guide we’ve provided, along with implementing preventive measures and regular maintenance, you can effectively fix low refrigerant in your AC unit and enjoy the cool relief you deserve.
How to Find AC Leaks in Your Car (UV Dye)
Frequently Asked Questions (FAQ)
How do I know if my AC unit has low refrigerant?
Can I add refrigerant to my AC unit myself?
What are the common causes of low refrigerant in an AC unit?
How can I prevent low refrigerant in my AC unit?
Is low refrigerant in my AC unit harmful to my health?
Conclusion: Fixing Low Refrigerant in Your AC Unit: A Step-by-Step Guide
In conclusion, low refrigerant levels can lead to insufficient cooling, poor airflow, and ice buildup on the evaporator coil in your AC unit. These signs indicate a need for refrigerant replenishment.
The main causes of low refrigerant levels are leaks in the system, improper installation or maintenance, and normal wear and tear. To fix low refrigerant, it is important to take safety precautions, such as turning off the power and wearing protective gear.
The necessary tools and materials for fixing low refrigerant include a refrigerant gauge/manifold set, leak detection tools, and compatible refrigerant. The step-by-step guide for fixing low refrigerant involves identifying and repairing the leak, evacuating the system, recharging the AC unit, and testing its functionality. Regular maintenance, including inspecting and repairing leaks, checking refrigerant levels, and cleaning/replacing filters, can help prevent low refrigerant levels in the future.
Professional inspection and service can also be beneficial. By following these guidelines and implementing preventive measures, you can effectively fix low refrigerant in your AC unit and maintain a comfortable living space.