How To Clean Ac Unit Inside: Expert Tips For A Spotless Cooling System
To clean the inside of your AC unit, follow these steps: 1. Turn off the power: Before starting any cleaning, make sure to turn off the power supply to the AC unit to avoid any accidents. 2. Remove the front cover or panel: Depending on the type of AC unit you have, you may need to remove the front cover or panel to access the inside components. 3. Clean the filters: Take out the filters and clean them thoroughly. Use a vacuum cleaner or wash them with mild detergent and water. Allow them to dry completely before reinserting. 4. Clean the coils: Use a soft brush or a coil cleaning spray to remove any dirt, dust, or debris from the coils. Be gentle to avoid damaging the fins. 5. Clean the drainage pan and drain line: Check the drainage pan for any standing water or debris. Use a mixture of vinegar and water to clean the pan and flush the drain line to prevent clogs. 6. Check and clean the fan blades: Inspect the fan blades for any dirt or buildup. Clean them using a soft cloth or brush, being careful not to bend or damage them. 7. Reassemble and turn on the power: Once all the components are clean and dry, reassemble the AC unit and turn on the power. Enjoy the improved performance of your clean AC unit. Remember, regular cleaning and maintenance of your AC unit will help it run efficiently and prolong its lifespan.
When was the last time you thought about cleaning your AC unit? Probably not recently, right? Well, here’s something that might surprise you: a dirty AC unit can lead to reduced cooling efficiency, increased energy consumption, and even potential breakdowns. That’s right, neglecting to clean the inside of your AC system can have some serious consequences.
But fear not, because in this article, we’re going to share expert tips to help you achieve a spotless cooling system. Whether you’re a homeowner or a renter, maintaining a comfortable living environment and reducing energy costs are key priorities.
So, if you’re tired of the sweltering heat and expensive energy bills, it’s time to roll up your sleeves and give your AC unit some TLC. From cleaning the filters to disinfecting the coils, we’ve got you covered. Get ready to transform your AC unit into the shining star of your home and enjoy a cool, refreshing summer.
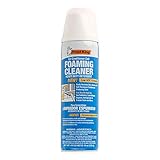
- Heavy-duty foam dissolves stains, removes grease & oil, and loosens dirt
- Cleans coils, fan blades, and reusable air filters
- Neutralizes odors from standing water in drain pans
- Air conditioner coil foaming heavy duty detergent cleaner with low VOC formula
- Pleasant lemon fragrance leaves deodorized, fresh smell after cleaning. No rinse necessary.
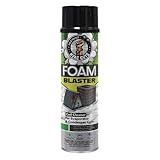
- HVAC PROFESSIONAL FORMULA: Supercharge your coil cleaning with the HVAC Guys Foam Blaster penetrating evaporator and condenser coil air conditioner coil cleaner. Field tested and used by fellow HVAC professionals, the high pressure spray and delayed foaming action will liquify grime and deodorize dirty coils and drain pans. Designed for professional use.
- POWERFUL ACTIVE EXPANDING FOAM ACTION: The Foam Blaster works by using a high pressure spray that penetrates deep into the coil and then actively expands into a dirt liquifying foam. Effectively clean dirty ac coils and restore their efficiency. Leaves a mild citrus scent.
- FOR EVAPORATORS (NO-RINSE) AND CONDENSERS: The Foam Blaster is made for both evaporators (no rinsing required) and condensers (light rinsing with water required). When using on evaporators, the condensate water from the unit in operation will rinse off the dirt, debris, and product.
- DESIGNED FOR ALL COOLING EQUIPMENT: The Foam Blaster is suitable for use on all HVAC units, refrigeration systems, automotive radiators, fan blades, metal filters, and more! Works great as a mini split cleaning kit, car ac cleaner and radiator cleaner, hvac coil cleaner, air conditioner coil cleaner, evaporator coil cleaner, ac condenser coil cleaner, refrigerator coil cleaner and more.
- 100% SATISFACTION GUARANTEE: We stand 100% behind the quality of our products. If for any reason you are not satisfied with your order, reach out to us directly and we will make it right.

- AC Condenser Cleaner: The Essential Values (Gallon/128 FL OZ) AC evaporator and condensor coil cleaner is cost effective, fast acting and effective at removing stubbon buildup on all makes and model of air conditioning units.
- Easy To Apply: Our hvac coil cleaner is a technicians’ best friend! Designed for both commercial & residential AC evaporator & condenser coils. Cuts through grease and grime better than other brands.
- Non Foaming Formula: Dilution not required but recommended. Simply fill your garden sprayer, trigger sprayer, and/or comparable power sprayer with condenser cleaner. Spray, soak and rinse away. As simple as that. Fantastic results in minutes to remove grease and stuck on dirt to keep your AC working effectively, so you can be cooler and more energy efficient.
- Removes Debris, Dirt & Grime: Our evaporator coil cleaner instantly penetrates & lifts off oil, grime & other corrosive deposits that reduce the life of your AC unit. For outside use only
- Made in USA – Trusted by Thousands: We believe in customer service and stand by all of our products. If you are not happy with your ac condenser cleaner, return it to us for a money back guarantee. Tested, developed and manufactured in a US certified facility.

- Multipack (6 Cans)
- Effective Cleaning: Easily removes dirt, grease, and oil from air conditioner coils and car radiators.
- Eco-Friendly Formula: New low “VOC” composition, free from CFCs, chlorinated, and fluorinated solvents.
- Versatile Use: Suitable for car radiators, lawnmower engines, refrigerator/freezer coils, condenser/evaporator coils, metal filters, fan blades, and more.
- Energy and Cost Savings: Regular cleaning of coils increases efficiency, saving money.
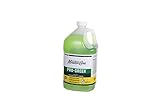
- CONCENTRATED CLEANER: Pro-Green offers a comprehensive solution by efficiently removing deposits from coils, eliminating slime in condensate pans, and preventing buildup and overflow in the pan
- FOR INDOOR AND OUTDOOR APPLICATION: Our versatile indoor/outdoor solution is perfectly suited for a wide range of applications providing effective cleaning wherever non-corrosive solutions are needed
- MULTIPLE USES: Our no rinse cleaner effectively cleans aluminum micro-channels, mini-split systems, air-cooled condensers, evaporators, electronic and permanent filters, fan blades, and grilles
- SELF-RINSING CONVENIENCE: Enjoy hassle-free cleaning, our deodorizing, non-toxic green cleaner eliminates the need for rinsing after application, saving time and effort while ensuring thorough results
- NSF APPROVED: Feel confident in your choice, our NSF approved product is compliant with safety and quality standards set by the National Sanitation Foundation

- ❄【Efficient Cooling with a 3.2-Gallon Tank】Our 3-in-1 portable air conditioner serves as a fan, humidifier and swamp cooler. The upgraded 2024 motor delivers powerful cooling, quickly reducing temperatures and adding moisture to hot spaces. Featuring a large 3.2-gallon water tank and 6 ice packs, this portable air conditioners provides up to 20 hours of continuous cooling without frequent refills. Perfect for any room, from the living room and bedroom to the kitchen, garage, and office.
- ❄【Easy to Clean & Move】Featuring a sink cleaning system for effortless maintenance, our 2024 upgraded portable air conditioner is designed for convenience. With a built-in handle, 4×360° wheels, a 26-foot remote control range, and the 78-inch extendable electric cord, this swamp cooler moves easily to any location, offering seamless cooling from indoor relaxation to outdoor gatherings. Its compact and lightweight design makes it a versatile addition to your daily life.
- 😊【Easy to Clean & Move】Featuring a sink cleaning system for effortless maintenance, our 2024 upgraded portable air conditioner is designed for convenience. With a built-in handle, 4×360° wheels, a 26-foot remote control range, and the 78-inch extendable electric cord, this swamp cooler moves easily to any location, offering seamless cooling from indoor relaxation to outdoor gatherings. Its compact and lightweight design makes it a versatile addition to your daily life.
- 😊【Convenient Dual Control】Experience the convenience of dual control with our portable air conditioner. Whether you prefer using the remote or the control panel, adjusting settings is easy and intuitive. Whether you’re relaxing on the couch or working at your desk, you can customize the cooling experience to suit your preferences, ensuring maximum comfort and convenience.
- 🌀【Super-Quiet Technology & Risk-Free】PurchaseOur portable air conditioners boast a noise level of just 45dB, providing a tranquil environment ideal for work, study, or sleep. Featuring Ultra Quiet technology, this ac unit ensure a deep sleep environment. With a 30-day no-questions-asked return policy and professional 24/7 customer service, your purchase is risk-free. Should any issues arise, don’t hesitate to reach out—your satisfaction is our priority.
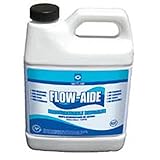
- Non-Corrosive, Non-Toxic, Fully Biodegradable, Safe to Handle, Zero VOC
- Quickly dissolves water scale, lime rust and other water formed deposits, restoring efficiency to most all appliances
- Certified to NSF/ANSI 60 for use as a cleaner in potable water systems
- 32oz bottle (1 quart)

- ✥Durable and Reusable: Our air conditioner cleaning is made of high-quality and durable PP material, ensuring it is wear-resistant and reusable. And you can use it for a long time.
- ✥Outlet Cleaning Design: Our Air Conditioner Cleaning features a drip system with a funnel-shaped bottom and outlet design, allowing for hassle-free cleaning and easy collection of dirty water into a bucket.
- ✥Widely Used: Keep your home clean while protecting your air conditioner with this versatile dust . Perfect for use at home, in hotels, shops, and more.
- ✥Easy Storage: Keep your Air Conditioner Cleaning neatly stored in any vehicle or toolbox for quick access whenever you need it. This lightweight and foldable is the perfect solution for easy storage and portability, making AC cleaning a hassle-free task!
- ✥Perfect Gift: Keep your air conditioner clean and efficient. The mini split cleaning bag is ideal for birthdays, holidays, or as a thoughtful present for friends, family, or colleagues.

- Versatile 3-in-1 Portable Air Conditioner:Discover the versatility of our 3-in-1 portable air conditioners, serving as a fan, humidifier, and cooler. Whether you seek a refreshing breeze, added moisture, or icy coolness, this portable AC delivers versatile solutions for your diverse needs. With an upgraded efficient motor, this air conditioner swiftly cools hot air and adds moisture to dry or hot spaces. Enjoy reliable cooling in bedrooms, offices, and beyond for enhanced comfort.
- Wide Range Cooling & Powerful Wind:Designed with meticulous attention to detail, our 2024 upgraded portable air conditioners are tailored for cooling rooms up to 300 sq.ft. Equipped with 6 ice crystal and a wider 70° oscillation, alongside 3 adjustable wind speeds ranging from Low to High, you have full control over your cooling experience. The swamp cooler boasts a strong airflow of 450 cubic feet/minute, enabling you to customize the airflow according to your preference for optimal comfort.
- Efficient Cooling with 3 Gallon Tank:Our portable air conditioners boast a 3-gallon capacity water tank. The top-loading design allows easy ice water addition without bending over, enhancing convenience. Tested to increase humidity by 50% and operating at just 65W, this air conditioners reduce power consumption by up to 75%, offering a cost-effective solution to summer heat.
- Portable Convenience & Easy Maintenance:Our portable air conditioners combine portability with easy maintenance. Featuring a built-in handle and 4×360° wheels, this portable ac can be effortlessly moved to any location. Its compact, lightweight design and a 26-foot remote control range enhance everyday convenience. Additionally, with panel control and a 2m extend cord, adjusting power on/off, 1-7h timer, and swing direction extends comfort to every corner of your space.
- Quiet Operation & Cost-Saving Convenience:Operating at a mere 45dB, our portable air conditioners guarantee a peaceful environment for work, study, or sleep. With no hose installation or modifications required, setup is a breeze—simply plug in and enjoy instant cooling. Experience powerful airflow and whisper-quiet operation with our convenient and cost-saving alternative. Plus, enjoy peace of mind with an extended one-year warranty.

- MARINE-GRADE FOAMING COIL CLEANER – Dive into cleaning with our multi-purpose marine cleaner! Perfect for ice boxes, marine heads, fish wells, and evaporator coils, it annihilates dirt, oil, and grease, ensuring a spotless marine environment.
- SELF-RINSING FORMULA – As the foam breaks down, condensation will self-rinse the grime from the surface. If the coils do not produce adequate condensation or any residue remains, simply rinse with water.
- VOC-FREE – Sail into a world of clean with our industrial cleaner. A marine-grade evaporator coil cleaner and multi-purpose boat cleaner with zero VOCs. Protect the seas and your equipment, a clean conscience and a pristine environment.
- LEMON-FRESH – Unleash the power of our air conditioner coil cleaner. Enjoy a refreshing lemon scent after every use. This HVAC coil cleaner is tough on grime and gentle on your boat.
- CLEAN WITH CONFIDENCE – Disconnect power to the unit, shake, and spray on the target surface. For coils, allow condensation to lift the residue. For other surfaces, let the cleaner sit for a minute. Rinse with water and repeat if necessary.
I. Understanding the Importance of Cleaning the AC Unit Inside
Welcome to the world of AC unit cleaning! In this section, we will delve into why it is crucial to clean the inside of your AC unit regularly. Are you ready to discover the benefits of a spotless cooling system?
A. Introduction to the topic
Before we jump into the nitty-gritty of cleaning your AC unit, let’s take a moment to understand why it is essential. Your AC unit works hard to keep your home cool and comfortable, but over time, dust, dirt, and debris can accumulate inside the system. This buildup can hinder the unit’s performance and efficiency, resulting in higher energy consumption and increased wear and tear.
By regularly cleaning the inside of your AC unit, you can ensure optimal performance, lower energy costs, and extend the lifespan of the system. Cleaning your AC unit also improves indoor air quality by removing allergens, pollutants, and mold spores that can circulate throughout your home.
B. Explanation of the benefits of cleaning the AC unit inside
Cleaning the inside of your AC unit offers a multitude of benefits. Let’s take a closer look at some of the advantages:
- Improved energy efficiency: When your AC unit is clogged with dirt and debris, it has to work harder to cool your home. By cleaning the inside components, you can restore the system’s efficiency, reducing energy consumption and saving money on your utility bills.
- Enhanced cooling performance: A clean AC unit can provide better air circulation and more effective cooling. By removing blockages in the system, you can ensure that cool air reaches every corner of your home, keeping you comfortable even during the hottest summer days.
- Extended system lifespan: Regular maintenance, including cleaning the AC unit inside, can significantly extend the lifespan of the system. By preventing dust and debris from accumulating on vital components, you can reduce the risk of breakdowns and costly repairs.
- Healthier indoor air quality: The inside of your AC unit can become a breeding ground for allergens, bacteria, and mold. Cleaning the unit can help eliminate these contaminants, improving the air quality in your home and promoting a healthier living environment for you and your family.
Now that you understand the importance and benefits of cleaning the inside of your AC unit, it’s time to roll up your sleeves and get started!
II. Tools and Materials Required for Cleaning the AC Unit Inside
Before diving into the cleaning process, it’s essential to gather the necessary tools and materials. Here’s a comprehensive list of what you’ll need:
A. List of essential tools for cleaning
- Screwdriver set: You may need various sizes of screwdrivers to remove panels and access different components of the AC unit.
- Soft brush or old paintbrush: Ideal for gently brushing away dust from delicate components.
- Vacuum cleaner with a brush attachment: Useful for sucking up loose debris and dirt.
- Coil cleaner solution: Specifically designed for cleaning the evaporator and condenser coils.
- Garden hose with a spray nozzle: Required for rinsing off the cleaning solutions and ensuring a thorough clean.
B. Necessary safety equipment
While cleaning your AC unit, it is essential to prioritize your safety. Here are some safety equipment items you should have on hand:
- Protective gloves: Shield your hands from dirt, cleaning solutions, and potential sharp edges.
- Safety goggles: Protect your eyes from dust, debris, and cleaning solutions.
- Dust mask: Prevent inhaling dust and allergens while cleaning.
C. Overview of cleaning products and solutions
When cleaning the inside of your AC unit, you’ll need various cleaning products and solutions. Here are a few to consider:
- All-purpose cleaner: Perfect for removing dirt and grime from surfaces outside the AC unit.
- Soap or mild detergent: Used for cleaning air filters and other washable components.
- Vinegar: A natural cleaning agent that can be used to unclog the condensate drain line and remove mineral deposits.
Now that you have all the necessary tools and materials, it’s time to move on to the next section: preparing for the cleaning process.
III. Preparing for the Cleaning Process
Getting ready for the cleaning process is crucial to ensure a smooth and efficient experience. This section will guide you through the necessary steps to prepare your AC unit for a thorough cleaning.
A. Turning off the power supply to the AC unit
Before you start any cleaning or maintenance work on your AC unit, it’s vital to turn off the power supply. Locate the circuit breaker or disconnect switch for your AC unit and switch it off to prevent any electrical accidents or damage to the system.
B. Removing debris and obstructions from the unit
Next, visually inspect the exterior of your AC unit and remove any debris or obstructions that could interfere with the cleaning process. Clear away leaves, branches, grass clippings, or any other debris that may have accumulated around or inside the unit.
C. Gathering necessary tools and materials
Now that the power supply is off and the unit is clear of debris, gather all the tools and materials you assembled previously. Having everything within reach will help streamline the cleaning process and ensure you have everything you need when you need it.
With the preparations complete, it’s time to dive into the step-by-step process of cleaning the various components of your AC unit. In the next section, we’ll tackle one of the most critical components: the air filters.
IV. Cleaning the Air Filters
The air filters play a crucial role in the efficiency and performance of your AC unit. In this section, we’ll explore how to locate, remove, and clean these essential components.
A. Explanation of the role and importance of air filters
Air filters are responsible for trapping dust, pollen, pet dander, and other airborne particles, preventing them from circulating in your home. Over time, these filters can become clogged with trapped particles, obstructing airflow and reducing the cooling efficiency of your AC unit.
Regularly cleaning and replacing air filters is essential for maintaining good indoor air quality and ensuring optimal performance of your AC system. Dirty filters not only impede airflow but can also cause the system to work harder, leading to increased energy consumption and potential damage to the unit.
B. How to locate and remove the air filters
The location of the air filters can vary depending on the type of AC unit you have. Here are a few common places to find the filters:
- Wall-mounted AC units: The filters are typically located behind a cover on the front of the unit, accessible from the interior of your home.
- Ceiling-mounted AC units: The filters can usually be found behind a cover or grille on the bottom of the unit, accessed from below.
- Ducted AC systems: The filters are typically located in the return air ducts, which are usually located in ceilings, walls, or closets.
Refer to your AC unit’s user manual or consult a professional if you have trouble locating the air filters.
C. Step-by-step process of cleaning air filters
Once you have located and removed the air filters, it’s time to clean them. Follow these steps for a thorough clean:
- Step 1: Washing the filters with soap and water
For washable air filters, start by rinsing them under lukewarm water to remove loose dirt and dust. Then, fill a basin or sink with warm water and a mild detergent or soap. Gently agitate the filters in the soapy water, ensuring that all surfaces are cleaned. Rinse the filters thoroughly with water to remove any soap residue. Allow the filters to dry completely before reinstallation.
- Step 2: Using a vacuum cleaner for thorough cleaning
If your air filters are not washable, you can clean them using a vacuum cleaner with a brush attachment. Use the brush attachment to gently vacuum both sides of the filters, removing any dust, dirt, or debris. Pay extra attention to the pleats or folds in the filters to ensure a thorough clean. Once cleaned, inspect the filters for any damage or signs of wear and tear. If they are damaged or excessively dirty, it may be time to replace them.
- Step 3: Drying and reinstalling the filters
After washing or vacuuming the filters, allow them to dry completely before reinstalling them in your AC unit. Ensure the filters are properly aligned and secure, following the manufacturer’s instructions. Once the filters are in place, you can move on to the next step of cleaning your AC unit: cleaning the blower motor and fan blades.
V. Cleaning the Blower Motor and Fan Blades
The blower motor and fan blades are critical components responsible for moving air through your AC unit and distributing it throughout your home. Over time, these components can accumulate dust and dirt, affecting the unit’s performance and air quality. In this section, we’ll guide you through the process of cleaning the blower motor and fan blades.
A. Identifying the blower motor and fan blades
The blower motor is typically found inside the air handler or furnace unit, while the fan blades are connected to the motor. To access these components, you may need to remove a panel or cover. Refer to your AC unit’s user manual or consult a professional if you are unsure how to access these parts.
B. Removing the fan grill and housing
Before cleaning the blower motor and fan blades, it’s crucial to ensure the power supply to the unit is turned off. Once the power is off, you can remove the fan grill and housing to gain access to the components. Use a screwdriver or the appropriate tools to safely remove any screws or fasteners securing the grill and housing in place.
C. Proper cleaning techniques for the blower motor and fan blades
Now that you have access to the blower motor and fan blades, it’s time to clean them. Follow these steps for a thorough clean:
- Step 1: Using a brush to remove dust and dirt
Start by using a soft brush or an old paintbrush to gently remove dust, dirt, and debris from the blower motor and fan blades. Be careful not to bend or damage the blades during this process.
- Step 2: Cleaning with a damp cloth or sponge
If there is stubborn dirt or grime on the blower motor or blades, you can dampen a cloth or sponge with water or a mild cleaning solution. Wipe away the dirt, being cautious not to wet any electrical components. Take extra care when cleaning the blower motor to avoid damage.
- Step 3: Ensuring proper drying before reassembling the components
Before reassembling the fan grill and housing, ensure that the blower motor and fan blades are completely dry. You can use a dry cloth or allow them to air dry naturally. Once dry, carefully reattach the fan grill and housing, ensuring that all screws or fasteners are securely tightened.
Now that the blower motor and fan blades are clean, let’s move on to the next step: cleaning the evaporator coil.
VI. Cleaning the Evaporator Coil
The evaporator coil is a vital component of your AC unit responsible for cooling the air. Over time, the coil can become dirty and covered in dust and debris, hindering its ability to cool the air effectively. In this section, we’ll guide you through the process of cleaning the evaporator coil to restore its performance and efficiency.
A. Understanding the function of the evaporator coil
The evaporator coil plays a crucial role in the cooling process. It works by absorbing the heat from the air, allowing the refrigerant to cool it before circulating it back into your home. As the air passes over the coil, moisture in the air condenses on the coil’s surface, eventually dripping into the condensate pan and draining away.
B. Accessing the evaporator coil inside the AC unit
The exact location of the evaporator coil can vary depending on the type and model of your AC unit. In most cases, the coil is located inside the air handler or furnace unit. Refer to your AC unit’s user manual or consult a professional if you are unsure how to access the evaporator coil.
C. Methods for cleaning the evaporator coil
There are several methods you can use to clean the evaporator coil. Depending on the level of dirt and debris, you can choose the most suitable method for your AC unit. Here are a few common cleaning methods:
- Step 1: Using a coil cleaner solution
Coil cleaner solutions are specifically designed to remove dirt, grime, and mold from evaporator coils. Follow the manufacturer’s instructions on the coil cleaner solution for the best results. Typically, you’ll need to apply the solution to the coil and allow it to sit for a specified period before rinsing it off. Use a soft brush or a fin comb to gently remove any stubborn dirt or debris.
- Step 2: Brushing the coil with a soft brush
If you prefer a more manual approach, you can use a soft brush to gently scrub the evaporator coil. Be cautious not to apply too much pressure or damage the fins. Brush in the direction of the fins to prevent them from bending or breaking.
- Step 3: Rinsing the coil with water
After using a coil cleaner solution or brushing, rinse the evaporator coil thoroughly with water. Use a spray bottle or a garden hose with a spray nozzle to ensure a thorough rinse. Take care not to oversaturate the coil or let water seep into other components or electrical connections.
- Step 4: Allowing the coil to dry completely before reinstallation
Before reassembling the AC unit, allow the evaporator coil to dry completely. This can take several hours, so be patient. You can use a fan or a dehumidifier to speed up the drying process if necessary.
With the evaporator coil now clean and dry, it’s time to move on to the next step: cleaning the condensate drain line.
VII. Cleaning the Condensate Drain Line
The condensate drain line plays a critical role in removing excess moisture from your AC unit. Over time, this drain line can become clogged with debris, resulting in water backup and potential damage to your system. In this section, we’ll guide you through the process of cleaning the condensate drain line to ensure proper drainage and prevent future issues.
A. Explaining the purpose of the condensate drain line
As your AC unit cools the air, moisture from the air condenses on the evaporator coil and drips into a condensate pan. From there, the water is directed into a condensate drain line, which carries it away from the system. The condensate drain line prevents water from accumulating inside the unit, protecting it from potential damage and mold growth.
B. Locating the condensate drain line inside the AC unit
The condensate drain line is typically located near the evaporator coil, inside the air handler or furnace unit. It is a small PVC or plastic pipe that extends from the unit and drains outside your home or into a designated drain pipe. Refer to your AC unit’s user manual or consult a professional if you are unsure how to locate the condensate drain line.
C. Clearing and cleaning the condensate drain line
- Step 1: Using a wet/dry vacuum to suction out the clogs
If your condensate drain line is clogged, you can use a wet/dry vacuum to suction out the clog. First, switch the vacuum to the wet setting and attach it to the end of the condensate drain line. Seal any gaps between the vacuum and the pipe with duct tape or a towel to create a tight seal. Turn on the vacuum to create suction and remove the clog.
- Step 2: Flushing the line with a mixture of vinegar and water
Once you have cleared the initial clog, it’s essential to clean the condensate drain line to prevent future clogs. Mix equal parts vinegar and water in a container and pour it into the condensate drain line. The vinegar helps eliminate any remaining mold or bacteria that may be causing clogs. Allow the mixture to sit in the line for about 30 minutes before flushing it out with water.
- Step 3: Regular maintenance tips to prevent future clogs
To keep your condensate drain line free from clogs, there are a few preventive measures you can take:
- Regularly inspect the drain line for any signs of clogs or blockages.
- Install a condensate drain line overflow device to prevent water backup in case of clogs.
- Consider using condensate drain line tablets or treatment products to prevent the growth of algae and mold.
- Keep the area around the drain line clear of debris and obstructions.
With the condensate drain line now clean and clear, let’s move on to the next step: cleaning the ductwork and vents.
VIII. Cleaning the Ductwork and Vents
Cleaning the ductwork and vents in your home is essential for maintaining good indoor air quality and ensuring optimal performance of your AC system. In this section, we’ll explore the importance of cleaning the ductwork and vents and provide tips for a thorough cleaning.
A. Importance of cleaning the ductwork and vents
The ductwork and vents in your home play a vital role in distributing cooled air from your AC unit throughout your living spaces. Over time, dust, dirt, allergens, and other debris can accumulate in the ductwork and vents, negatively impacting indoor air quality and the efficiency of your AC system.
Regular cleaning of the ductwork and vents can help remove these contaminants, improving the air you breathe and reducing the strain on your AC unit. It is especially important to clean the ducts if you notice any signs of mold growth, rodent infestation, or excessive dust and debris.
B. Inspecting and removing dust and debris from the vents
Before cleaning the ductwork, start by inspecting the vents for any visible dust, dirt, or debris. Remove the vent covers, if possible, and use a soft brush or vacuum cleaner with a brush attachment to gently remove the dust and dirt. Pay extra attention to the vent louvers or fins, ensuring they are clean and unobstructed.
C. Hiring a professional for thorough duct cleaning
While cleaning the vents can be a DIY task, duct cleaning is best left to professionals. Professional duct cleaning involves using specialized tools and equipment to access and clean the entire duct system thoroughly. They can remove accumulated dust, debris, and allergens that are beyond the reach of regular cleaning methods.
If you decide to hire a professional duct cleaning service, ensure they are reputable and follow industry best practices. It’s also a good idea to inquire about the cleaning methods, equipment used, and any guarantees or warranties provided.
Now that your vents are clean, you can move on to the next section: reassembling and testing the AC unit.
IX. Reassembling and Testing the AC Unit
The cleaning process for your AC unit is almost complete! In this section, we’ll guide you through the final steps of reassembling the components and testing the unit for functionality.
A. Reinstalling all the components in the correct order
With each component of your AC unit now clean and dry, it’s time to reassemble everything in the correct order. Follow the manufacturer’s instructions or refer to your AC unit’s user manual to ensure proper alignment and attachment of each component.
B. Double-checking for proper alignment and connections
Before turning the power supply back on, double-check that all components are properly aligned, securely fastened, and connected. Ensure that no wires or connections are loose or damaged. This step is crucial for the safe and effective operation of your AC unit.
C. Turning on the power supply and testing the AC unit for functionality
Now it’s time to turn on the power supply to your AC unit and test it for functionality. Switch on the circuit breaker or reconnect the disconnect switch, allowing power to flow to the unit.
Set your thermostat to a lower temperature and wait for the AC system to kick in. Pay attention to the airflow, cooling performance, and any unusual sounds or smells. If everything appears to be working correctly, congratulations! You have successfully cleaned the inside of your AC unit.
In the final section, we’ll explore some maintenance tips for keeping your AC unit clean and efficient in the long run.
X. Maintenance Tips for Keeping the AC Unit Clean and Efficient
Cleaning your AC unit is just the first step in maintaining a clean and efficient cooling system. In this section, we’ll share some essential maintenance tips to help you keep your AC unit running smoothly for years to come.
A. Regularly changing air filters
One of the simplest yet most effective maintenance tasks is regularly changing or cleaning your AC unit’s
HydroKleen Air Conditioner Clean Demonstration
Frequently Asked Questions (FAQ)
How often should I clean the inside of my AC unit?
What supplies do I need to clean the inside of my AC unit?
How do I clean the coils inside my AC unit?
How can I clean the blower fan inside my AC unit?
Can I clean the inside of my AC unit myself or should I hire a professional?
Final Words: Maintaining Your AC Unit for Improved Indoor Air Quality and Efficiency
air filters. This should be done every 1-3 months, depending on the level of dust and allergens in your home.
Clean filters will improve indoor air quality and help your AC unit run more efficiently.
B.
Cleaning the outdoor unit
In addition to cleaning the inside of your AC unit, it’s important to also clean the outdoor unit. Remove any debris, such as leaves or grass clippings, that may have accumulated around the unit. You should also gently hose down the unit to remove dirt and dust from the exterior.
C. Scheduling regular professional maintenance
While regular cleaning is essential, it’s also important to have your AC unit professionally serviced on an annual basis. A professional technician can inspect the unit, check for any potential issues, and perform necessary maintenance tasks to keep it running smoothly.