How To Bypass Thermostat At The Control Board
To bypass the thermostat at the control board, you need to locate the control board, identify the terminal marked “Y” and “C”, and then connect these two terminals with a wire or jumper. This will bypass the thermostat and allow the control board to directly control the cooling or heating system. However, it is important to note that bypassing the thermostat should only be done temporarily and as a troubleshooting measure, as it can potentially damage the system if not properly handled.
Are you tired of constantly battling with your thermostat? Do you wish you had more control over your heating and cooling systems? If you’re someone with a moderate to advanced level of knowledge in HVAC systems and electrical wiring, then this blog article is for you. We understand that troubleshooting HVAC issues can be frustrating, especially when it comes to malfunctioning thermostats or the need for temporary control board bypassing.
But fear not, because in this article, we will guide you through the process of how to bypass a thermostat at the control board. Whether you’re a DIY enthusiast, a homeowner looking to improve your HVAC system, or simply someone who wants to have better control over their heating and cooling, this article will provide you with the knowledge and techniques you need.
We’ll cover everything from the basics of thermostat bypassing to step-by-step instructions on how to do it safely and effectively. No more relying on a faulty thermostat or waiting for expensive repairs – with our help, you’ll regain control over your comfort. Throughout the article, we’ll provide real-life examples and practical tips to ensure that you have a comprehensive understanding of the topic.
We’ll explain the importance of temporary bypassing and how it can be a useful solution in certain situations. By the end of this article, you’ll have the knowledge and confidence to take control of your HVAC system, saving both time and money. So, if you’re ready to tackle those thermostat woes and gain better control over your heating and cooling, read on.

- ▲𝗨𝗽𝗴𝗿𝗮𝗱𝗲 𝗣𝗜𝗗 𝗖𝗼𝗻𝘁𝗿𝗼𝗹𝗹𝗲𝗿: Thermostat Controller can maintain consistent temperatures within +/- 5ºF, guaranteeing perfect cooking results each time. This PID controller is compatible with SmokePro DLX (PG24/PG24S/PG24B), XT Pellet Grill, and Portable models.
- ▲𝟭-𝟭𝟬 𝗦𝗺𝗼𝗸𝗲 𝗠𝗼𝗱𝗲:You can adjust the smoke intensity to your preference using the Digital Controller Kit Replacement, setting it anywhere from level 1 to 10, allowing you to achieve the ideal smoky flavor for your grilled dishes.
- ▲𝗜𝗻𝘁𝘂𝗶𝘁𝗶𝘃𝗲 𝗠𝗲𝗻𝘂 𝗗𝗶𝗮𝗹:The digital thermostat controller simplifies the navigation of settings and options with the user-friendly menu dial, LCD screen clearly displays the temperature,enhancing your grilling experience with effortless control.
- ▲𝗔𝗰𝗰𝘂𝗿𝗮𝘁𝗲 𝘁𝗲𝗺𝗽𝗲𝗿𝗮𝘁𝘂𝗿𝗲 𝗺𝗲𝗮𝘀𝘂𝗿𝗲𝗺𝗲𝗻𝘁:The control board kit includes 2 meat probes, 1 Temperature Probe Sensor enabling you to simultaneously monitor the internal temperatures of multiple meats for precise cooking.
- ▲𝗡𝗼𝘁𝗲:It is normal for smoke to come out after shutting down, which indicates that there are still unburned particles in the oven; The 300/600 setting option is specific to the size of the oven. We recommend choosing 300 for small ovens and 600 for large ovens. If you have any questions, please feel free to consult us. We will patiently solve them for you and provide you with perfect after-sales service

- BD Diesel parts have a level of precision and quality that goes above and beyond the competition.
- Whether hauling that heavy load, cruising down the highway, or launching down the quarter mile, BD has a turbo solution that will work for you.
- BD Diesel has the product that best fits your performance or application goals.
- Thermostats
- BD Thermostat Bypass

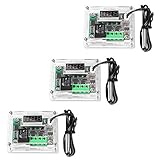
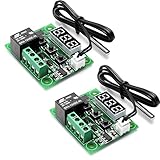
- Intelligent Control: Embedded CPU chip (MCU), more intelligent, lower power consumption.
- High Accuracy:W1209 Digital Temperature Controller with 3-Digit LED Display and Using SMD Patch Technology,High Accuracy, Stable Performance.
- Function:The W1209 thermostat module controller has a sensor input, keys, LED display, and a relay. It can be reprogrammed for control, timing, or counting.
- NTC10K waterproof probe:equipped for convenient usage. The NTC probe is allows to control the temperature even of fluids, allowing the controlled heated or cooling.
- Temperature Measurement Range: -50~110℃. Control Precision: 0.1 celsius.Input Power (DC): 12V; Measuring Inputs: NTC (10K 0.5%) ; Waterproof Sensor: 0.5M; Output: 1 Channel Relay Output, Capacity: 10A; Power Consumption: Static Current: 35mA; Current: 65mA.
- The W1209 thermostat module has a STM8S controller, a sensor input, keys, LED display, and a relay. It can be reprogrammed for control, timing, or counting.
- Temperature Measurement Range: -50~110℃. Control Precision: 0.1 celsius.
- Electronic digital thermostat with a 3-digit LED display, extremely bright. Operation both in heating and cooling to easily control equipment and devices.
- The NTC probe is waterproof and allows to control the temperature even of fluids, allowing the controlled heated or cooling
- The output is electronically controlled by a microprocessor, to guarantee the utmost precision of intervention and an excellent resolution of reading temperature

- Convenient ON/OFF switch with a heavy duty rotary switch for temperature control.
- Suitable for TRAEGER, etc.Easy use. Helps control your temperatures.It also has smoke mode and temperature modes from 180 ℉ to 375 ℉.
- Easy use. Helps control your temperatures. High mode can be used for highest heat possible.
- This product features auto start to self ignite your BBQ. It also has smoke mode and temperature modes from 180 to 375.
- Take full control of your pellet stove with this Direct Igniter Digital Thermostat Control Board.

- DROK electronic thermostat controller power supply is DC 6-30V or 5V micro USB; control load current is 10A (Max); test temperature is -50~110℃; sensor length is 0.5 meter.
- High current: Our digital temperature control board adopts high density PC board installation technology, the switch capacity can be up to 10A in spite of the small size.
- LCD display: Designed with bright LCD display, people can check the temperature clearly from any angle.
- User-friendly functions: The thermostat module has the function of real-time temperature reporting, temperature correction function, high-temperature alarm, emergency stop function and support UART Set, which make the module reliable and easy to use.
- Applications: With waterproof temperature sensor probe, it can be widely used for domestic appliance, office machine, audio, equipment, automobile, etc. (Remote control TV receiver, monitor display, Audio,Raspberry Pi equipment high rushing current use application)
- 100% complete machine patch, wave soldering, stable performance, good consistency.
- Embedded CPU chip (MCU), more intelligent, lower power consumption.
- Automatic power set memory (MCU built-in EEPROM memory unit).
- Control accuracy of 0.1 degrees Celsius. Have been tested for stability, consistency and reliability.
- Tips: – long press set to get menu, starts at P0 – press +/- to get next P-parameter – press set to choose that parameter – press +/- to select the value you want for that parameter – press set to accept it – long press +/- = reset to default – power-out does reset to default – default temp set is 34.5C

- Item:Valve Assembly, Thermal Bypass TBV.
- Compatiable with:Fit for 14-20 Cadillac Chevrolet GMC.
- Material:High-quality Aluminum.
- Replace part number:86774933,13511136,85585333.
- The purpose of the thermal bypass valve (TBV) is to bring the transmission fluid up to temperature quickly. This allows the transmission to operate more efficiently because the fluid is thinner (less viscous).

- Upgrade Models. Digital display is modified to Fahrenheit temperature display (old section is Celsius display). Dual LED display, Red + Blue, Precise temperature control, high sensitivity, suitable for any occasion required temperature.
- Temperature range:-58℉ to + 257℉ ; Resolution: temperature range -3.9℉ ~ 99.9 ℉ is 0.1℉, other temperature ranges 1 ℉.
- Temperature measurement accuracy: 1 ℉. Backlash accuracy: 0.1 ℉. Refresh rate: about 0.5S. Input Power: DC 12V.
- Measuring input: 1 meter NTC (10K 0.5%) waterproof metal sensors.
- Relay Load: DC 14V 20A / AC 125V 20A. ( If the module works for a long time, it is recommended not to exceed 10A.)
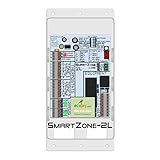
- 2 ZONES (Temp Sensor Included)
- MULTI-STAGE Equipment automatically controlled
- EASY to install & SIMPLE to use
- Universally Compatible – works with any system
- BEST VALUE in zoning!!!!!
The Basics of Thermostat Bypassing
Before we dive into the step-by-step instructions on how to bypass a thermostat at the control board, let’s start by understanding the basics of thermostat bypassing. This will give you a solid foundation and help you grasp the importance of this technique.
Why Bypassing the Thermostat is Necessary
Thermostat bypassing can be a useful solution in various situations. Let’s explore why you might need to bypass the thermostat and gain a better understanding of its importance.

Situations that Call for Thermostat Bypassing
There are several specific situations where bypassing the thermostat becomes necessary. Understanding these situations will help you determine if bypassing is the right solution for your HVAC system. Let’s take a look at some common scenarios:
Tools and Materials You’ll Need
Before you get started with bypassing the thermostat at the control board, it’s essential to gather all the necessary tools and materials. Having everything prepared in advance will make the process smoother. Here’s a list of what you’ll need:
Step-by-Step Guide to Bypassing the Thermostat at the Control Board
Now that you’re familiar with the basics and understanding when bypassing the thermostat is necessary, let’s dive into the step-by-step process of actually bypassing the thermostat at the control board.
Step 1: Shut Off the Power
Before beginning any electrical work, it’s crucial to shut off the power to your HVAC system. This ensures your safety and prevents any damage to the components. Follow these steps to turn off the power:
Step 2: Locate the Control Board
The control board is the central hub of your HVAC system, where all the electrical connections are made. To bypass the thermostat, you’ll need to locate the control board. Here’s how:
Step 3: Identify the Thermostat Wires
Now that you’ve found the control board, it’s time to identify the thermostat wires. These wires connect the thermostat to the control board and carry signals that control the heating and cooling functions. Here’s how to identify the wires:
Step 4: Disconnect the Thermostat Wires
Once you’ve identified the thermostat wires, it’s time to disconnect them from the control board. This will effectively bypass the thermostat and allow you to take control of your HVAC system. Follow these steps to disconnect the wires:
Step 5: Secure the Exposed Wires
With the thermostat wires disconnected, you’ll notice exposed ends that were previously connected to the control board. It’s important to secure these wires to prevent any electrical hazards. Here’s how:
Step 6: Restore Power and Test
Now that you’ve bypassed the thermostat at the control board and secured the exposed wires, it’s time to restore power to your HVAC system and test if the bypass is successful. Follow these steps:
Safety Precautions and Tips
While bypassing the thermostat at the control board is a relatively straightforward process, it’s important to prioritize safety. Here are some safety precautions and tips to keep in mind:
Common Issues and Troubleshooting
Even with proper bypassing, you may encounter some common issues with your HVAC system. Here are a few troubleshooting tips to help you address these problems:
Bypassing the thermostat at the control board can give you greater control over your HVAC system, allowing you to troubleshoot and make temporary changes without relying on a faulty thermostat. However, it’s essential to remember that bypassing should only be done if you have a good understanding of HVAC systems and electrical wiring. If you’re unsure or uncomfortable with the process, it’s best to seek professional help to avoid any damage or safety hazards.
Troubleshooting if a Thermostat is BAD: Explained!
Frequently Asked Questions (FAQ)
How can I bypass the thermostat at the control board?
Can I bypass the thermostat without affecting the system?
What are the risks of bypassing the thermostat at the control board?
Are there any alternative methods to bypassing the thermostat at the control board?
Is it recommended to bypass the thermostat at the control board?
Conclusion: The Process and Importance of Bypassing the Thermostat for HVAC Systems
In conclusion, bypassing the thermostat at the control board can be a useful technique for troubleshooting and making temporary changes to your HVAC system. Understanding the basics of thermostat bypassing and the situations that call for it is crucial in determining if it is the right solution for your system.
By following the step-by-step guide and taking necessary safety precautions, you can successfully bypass the thermostat and gain control over your HVAC system. Before starting the bypassing process, make sure to gather all the necessary tools and materials.
Begin by shutting off the power to your HVAC system to ensure safety. Locate the control board, identify the thermostat wires, and disconnect them from the control board. Remember to secure the exposed wires to prevent any electrical hazards.
Once the bypassing is complete, restore power to your system and test if the bypass was successful. While bypassing the thermostat can provide temporary solutions, it is important to prioritize safety and have a good understanding of HVAC systems and electrical wiring. It is advised to seek professional help if you are unsure or uncomfortable with the process to avoid any damage or safety hazards.