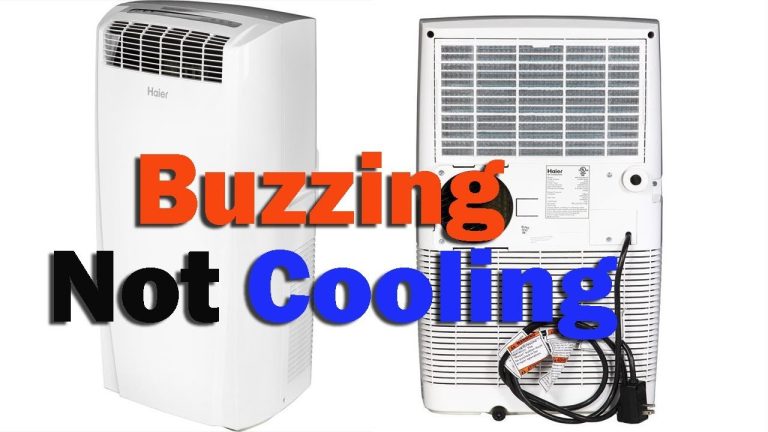
How Do I Fix Error Code E9? Simple Solutions To Resolve The Issue
To fix error code E9, you can try the following solutions: 1. Restart your device – Sometimes a simple restart can resolve the error. 2. Check for software updates – Ensure that your device’s software is up to date, as outdated software can cause errors. 3. Run a virus scan – Use a reliable antivirus software to scan your device for any malware or viruses that could be triggering the error. 4. Check hardware connections – Make sure all cables and connections are secure and properly plugged in. 5. Reset device settings – Resetting your device’s settings to default can help resolve any configuration issues causing the error. 6. Contact customer support – If the above steps don’t work, reach out to the manufacturer’s customer support for further assistance.
Error code E9 can be a real headache. Imagine this scenario: you’re in the middle of an important project on your computer when suddenly, a mysterious error code E9 appears on your screen.
Panic sets in as you try to figure out what it means and how to fix it. Sound familiar? You’re not alone.
Error code E9 is a common problem that many individuals face when using electronic devices or appliances. But fear not, because in this article, we will provide you with simple solutions to resolve this issue. Whether you’re a tech-savvy individual or someone who struggles with technology, our step-by-step guide will help you troubleshoot and fix error code E9 in no time.
So, let’s dive in and put an end to the frustration caused by error code E9 once and for all.

- Comprehensive and Affordable – Engineered for heavy-duty truck owner-operators and small commercial fleets, this indispensable heavy-duty truck scanner is powerful and cost-effective. Simply connect TruckRx to the diagnostic port and pair it with the free smartphone app to unlock comprehensive HD diagnostic insights.
- Efficient and Versatile – Our heavy-duty truck scanner identifies diagnostic trouble codes (DTCs) and brand-specific error codes for leading heavy-duty truck brands in North America, including Freightliner, Peterbilt, Mack, Kenworth, Volvo, Western Star, and more. Plus, it offers the flexibility to perform DPF regenerations on select model years of Cummins, International, Detroit, Isuzu, Paccar, Mercedes, Hino, and Mack/Volvo.
- Instant Repair Assistance – Seamlessly link to a comprehensive Diesel Repair Platform library, powered by Diesel Laptops, TruckRx provides instant access to diagnosis and repair guidance, enabling you to swiftly resolve issues and hit the road again without delay.
- Ongoing Improvement – Take advantage of continuous enhancements through direct feature additions and updates delivered via the app. TruckRx features will grow over time, eliminating cumbersome updates and costs associated with replacing expensive diagnostic equipment.
- Fast and Accurate Scan; scans all ID and driver license cards in the U.S. and Canada; fast and accurate verification of age and ID status; eliminate the human error factor while documenting the transaction; integral to a comprehensive ID checking policy
- Easy verification; intuitive design, simple operation, and large Age and Expiration display for easy operation; simplify your job and work smarter
- Compliance reporting; memory can be enabled or disabled giving you the flexibility to store ID transactions for due diligence proof or visitor management; create, print, and export reports
- Value; comes standard with accessories, compliance software, ID updates for the life of the device, no subscriptions or hidden fees

- Purpose – Our reflex series auto lighting anti-flicker are designs for fixing auto lighting failure, bulb rejection, hyper flashing, eliminate error codes, cancels radio interference, etc,.
- Efficient Performance – More efficiently solve vehicles power issues from upgrading to auto lighting bulbs. stops flickering and cancels error warning messages.
- Durable and Long-Lasting – Our reflex series cable made of premium nylon braided, more durable and flexible. the heavy duty casing made it most robust and heat resistant.
- Easy Installation – all in one design. plug ‘n’ play, no modification needed.(if you ‘re not 100% satisfied with this product, simply return it for a full refund in 30 days.)
- Fitment – H7 plug for auto lighting or fog light.(note: not for use with hid lights; cause account of numerous brands and models, we are sorry that we cannot guarantee that all problems can be solved.)
![TRUE MODS Tailgate Light Bar Signal Relay Box [4-Pin Flat] [Ford F-150 F-250 F-350 Super-Duty up to 2018] [Tow Package] [BLIS] Trouble-Shoot Solution for Ford Pick-up Trucks with Error Code](https://m.media-amazon.com/images/I/41zqNHmA15L._SL160_.jpg)
- SIMPLE SOLUTION – For Ford trucks up to 2018, our signal relay box is the easiest way to solve hyper-flash and power delivery issues that occur when installing an LED tailgate light bar on your truck with a tow package or BLIS.
- HAVE IT ALL – Equipped with the technology to keep you up and running, our unique relay box lets you power your light bar through your 4 pin trailer plug without sacrificing any of your truck’s driver-assist features.
- NO RISK INSTALL – With a single power wire and a simple plug and play design, the in-line box is easily installed without any need to hack into your stock wiring harness or push a jumper wire into the back of your tow module.
- TOUGH AS YOUR TRUCK – This signal relay box is ready to go wherever your truck takes you. Armed with silicone encased electronics and an impact-resistant body, these boxes aren’t afraid to take on the job site or the campsite.
- NO HASSLE MOUNTING – Even mounting this relay box is easy. With the included double-sided tape and screw mounting options, you can turn any flat surface into a viable mounting location.

- website running connection domain name converted IP domain name error 404 appeared for simple reason that the page did not load properly This can be checked quite easily by clicking on the Refresh button in your browser or also by pressing the F5 button.
- A 404 error is rarely a reason to celebrate the website’s visitors have not found the content that they were looking for However the appearance 404 page does not necessarily mean that the desired information is not available In many cases the solution.
- Lightweight, Classic fit, Double-needle sleeve and bottom hem

- [Easy to Use for Car Owners] – FOXWELL NT201 obd2 scanner is designed with car owners in mind, it is easier and more intuitive for those who may not have extensive automotive knowledge. It can help identify why the check engine light is on, read and clear engine fault codes, turn off the check engine light (MIL), and reset monitors.
- [Accurate Diagnosis] – Quickly scan engine system in seconds, reading and clearing stored codes, pending codes, and permanent codes. With its built-in trouble code library, NT201 obd code reader provides immediate code definition, making it easier for users to understand the issues and potentially fix them like a professional mechanic.
- [One-Key Emissions Test] – FOXWELL NT201 auto code scanner gives you the ability to get access to emission readiness status with just one single click. Provides unique visual & audible indicators during the car’s emissions test. The red-yellow-green LEDs and built-in speaker will indicate emissions monitor status in time. Now you can perform home emissions checks before a state inspection.
- [Comprehensive OBDII Modes] – Equipped with full OBDII modes, the NT201 car scan tool supports O2 Sensor Test (Mode 5) and EVAP Test (Mode 8) on vehicles that use CAN protocol. It can be used to detect the oxygen content in exhaust gas, which is important for diagnosing and repairing engine performance issues. And let you initiate a leak of test for the car’s EVAP system.
- [Wide Vehicle Coverage] – Works with all OBDII/EOBD compliant cars, light-duty trucks, SUVs, minivans, and hybrids sold worldwide. NT201 automotive scanner supports J1859-41.6, J1850-10.4, ISO9141, KWP2000 (ISO14230), and CAN (Control Area Network ISO11898). Comes with multilingual menu options in English, German, French, Spanish, etc. If you cannot confirm your car’s protocol before purchase, please contact us to check it.

- 【New Advantages】: The OBD2 scanner can fully diagnose the car’s data. It can determine the cause of the engine light, read code, erase code, view freeze frame, I/M ready, vehicle information, data flow, real-time curve, get vehicle speed information, calculate load value, engine coolant temperature, get engine speed. Six popular languages are supported: English, German, Dutch, Spanish, French, and Italian.
- 【Save Money & Time】: The automotive diagnostic scanner can quickly diagnose your car at any time, reading and erasing fault codes that may be causing vehicle emission problems in seconds. It helps you detect potential problems and avoid unnecessary excessive repair costs. We recommend that when you find a fault code, please fix the problem before erasing the code.
- 【Convenient & Portable】: OBD2 diagnostic tool is very easy to use, you just need to plug it into your car’s OBD port and turn on the ignition, you will be able to find the problem about your car’s engine system and possibly fix it. The compact size of 6.10 x 3.34 inches is easy to grip with one hand, and you can put it in any toolbox or pocket, and it doesn’t take up too much space.
- 【Compatibility】: The car code reader is compatible with 99% of OBDII vehicles. For OBD2 cars, usually, post 1996 for US market, post 2006 for EU market and post 2009 for Asian market. It has a 16pin OBDII standard interface. It requires no additional apps and allows even novices to quickly find and fix car troubles.
- 【Instructions】: There are 6 buttons on OBD2 Scanner: scroll up/down, enter/exit and buttons that quick query VIN vehicle number& the DTC fault code. If you have any product problems or installation problems, we promise to always provide satisfactory solutions and serve you.

- Solution for fast turn signal blinking response after installing LED light bulbs. This 6ohm resistor consumes 24W in a 12V system. If the power consumption of your stock halogen bulb is 28W and your LED bulb is 4W, the total power consumption of the resistor and LED bulb will match that of the stock halogen bulb. This alignment is necessary to eliminate the turn signal hyperflash issue.
- Not designed for consistant working bulbs( Day time running light, fog light, headlight LED bulbs). Resistors may become very hot to melt plastic parts nearby.
- Warning: Load Resistors heat up like halogen bulbs. They get really HOT when working. Mount them on metal surface by screws(not included). Keep resistors inchs away from plastic parts.
- You may connect the wires with the splice taps provided(quick but maybe not solid). Or you may cut the wires and connect them more solidly.
- Usually each LED bulb installation requires one resistor connected in parellel (see picture below for instruction)

- 【Specification】 4Pcs 50W 6ohm Load resistors with 8Pcs T-Taps. Mounting screw not included. Vlotage: DC 12V, Operating Temperature: -65℃ – +200℃.
- 【Eliminate Lights Error】 Solution for LED turn signal hyper flashing/no flash. Solution for bulb rapid flicker, bulb out indicator, error code on the dash.
- 【High Quality Material】 AUXLIGHT load resistors are made of super-high strength aluminum alloy, not easy to deform or break, ensuring maximum durability for long-term use.
- 【Pretty Easy to Wire Up】 Simple connect one wire to ground and the other wire to the positive, such as turn/brake wire. Each LED bulb requires one resistor connected in parellel (see picture for instruction).
- 【Warning】 Load Resistors heat up like halogen bulbs. They get really HOT when working. Must be mounted to Metal Surface, NOT plastic. Keep resistors inches away from any plastic parts.

- [Transform Your Car Care Experience] – With BLCKTEC, instantly become your own professional mechanic. Effortlessly read and clear your car’s trouble codes and check engine light, ensuring your vehicle stays in top condition.
- [Empower Yourself with Comprehensive Diagnostics] – Unlock the full potential of your vehicle with the BLCKTEC 430. Access detailed diagnostics previously exclusive to professional mechanics’ OBD2 scan tools, including ABS, Airbag, SRS, TPMS codes, and beyond, right at your fingertips.
- [Drive with Confidence] – The BLCKTEC 430 is more than just a car code reader; it’s your personal vehicle health advisor. Receive tailored repair reports with potential causes and verified solutions for your specific make and model, guiding you to the right fix every time.
- [Seamless Connectivity, Ultimate Convenience] – Experience the freedom of wireless diagnostics with this portable car scanner. Easily connect via Bluetooth to our intuitive sensor, and enjoy all the functionalities of high-end scan tools without the clutter of wires, directly from your smartphone or tablet.
- [DIY Repairs Made Easy] – Navigate car maintenance with ease using our premium app. Access a vast library of easy-to-follow repair videos, guiding you through each step of the repair process, compatible with both iOS & Android devices.
I. Understanding Error Code E9
Error code E9 can be a frustrating issue that many people encounter when using electronic devices or appliances. It often indicates a hardware or software problem that requires troubleshooting and resolution. By understanding the nature of error code E9, you can effectively address the issue and get back to using your device without any disruptions.
II. Causes of Error Code E9
A. Faulty hardware
One common cause of error code E9 is faulty hardware. This could include a malfunctioning component, loose connections, or a hardware failure. Identifying and fixing the problematic hardware is crucial in resolving the error.
B. Software issues
Error code E9 can also be caused by software-related problems. Outdated drivers, incompatible software installations, or corrupt system files can trigger this error. Addressing these software issues is vital to resolving error code E9.
C. Configuration problems
Incorrect configurations or settings on your device can lead to error code E9. This could involve BIOS settings, driver configurations, or system settings that are not properly optimized. Identifying and rectifying these configuration problems can help eliminate error code E9.
III. Troubleshooting Error Code E9
When encountering error code E9, there are several troubleshooting steps you can take to resolve the issue:
A. Check hardware connections
1. Inspect cables and connectors
Ensure that all cables and connectors are properly connected and secure. Loose or damaged connections can cause error code E9. Carefully examine the cables and connectors associated with the problematic hardware.
2. Ensure proper power supply and voltage
Make sure that the device or appliance receiving error code E9 is receiving adequate power supply and correct voltage. Power issues can lead to error codes, and resolving them can help eliminate error code E9.
B. Update or reinstall drivers
1. Identify the device causing the error
Determine which device or component is triggering error code E9. This can usually be identified through error messages or by examining the device itself.
2. Download and install the latest drivers
Visit the manufacturer’s website or a trusted driver download platform to obtain the latest drivers for the problematic device. Install these updated drivers to ensure optimal compatibility and functionality, resolving error code E9.
C. Reset BIOS settings
1. Access the BIOS menu
Restart your device and enter the BIOS menu. This is usually done by pressing a specific key during boot-up (e.g., F2 or Del).
2. Restore default settings
Within the BIOS menu, look for the option to restore default settings or load optimized defaults. This will reset the BIOS configurations to their original state, potentially resolving error code E9.
D. Perform a system restore
1. Use Windows System Restore
If error code E9 persists, utilize the Windows System Restore feature to roll back your system to a previous point in time. This can help undo any changes that may have caused the error.
2. Choose a restore point before the error occurred
Select a restore point that predates the appearance of error code E9 and initiate the system restore process. This can potentially resolve the issue and eliminate error code E9.
E. Run hardware diagnostics
1. Use manufacturer-provided diagnostic tools
Many hardware manufacturers offer diagnostic tools that can help identify and resolve issues with their products. Check the manufacturer’s website or user manual for information on how to run these diagnostics.
2. Scan for hardware issues
Run comprehensive hardware scans using reputable third-party software or built-in diagnostic utilities provided by your operating system. These scans can detect and resolve potential hardware problems causing error code E9.
IV. Advanced Troubleshooting for Error Code E9
If the basic troubleshooting steps did not resolve error code E9, you may need to consider more advanced solutions:
A. Replace faulty hardware
1. Identify the problematic component
If a specific hardware component is causing error code E9 and all other troubleshooting steps have been exhausted, it may be necessary to replace that component. Identify the faulty hardware through thorough testing and diagnostics.
2. Purchase and install a new one
Once you have determined the faulty component, purchase a replacement from a reputable source. Follow the manufacturer’s instructions or consult an expert to ensure proper installation of the new hardware.
B. Reinstall the operating system
1. Backup important data
Prior to reinstalling the operating system, create a backup of all your important files and data. This will help prevent any potential loss of information during the reinstallation process.
2. Clean install the OS
Perform a clean installation of your operating system using the installation media or recovery options provided by your device or operating system. Follow the on-screen instructions to reinstall the OS, resolving error code E9.
C. Contact technical support
1. Consult the device manufacturer’s support
If all else fails, reach out to the manufacturer’s technical support team for guidance. Provide them with detailed information about the error code E9 and the steps you have already taken to resolve it.
2. Seek professional assistance from experts
If you are unable to resolve error code E9 on your own, consider seeking assistance from computer technicians or experts who specialize in troubleshooting and repairing electronic devices. They can provide advanced solutions and further guidance.
V. Preventing Error Code E9
To avoid encountering error code E9 in the future, consider implementing these preventive measures:
A. Keep software and drivers up to date
Regularly update your software, drivers, and operating system to ensure compatibility and address any known bugs or vulnerabilities. This can help prevent error code E9 caused by outdated or incompatible software.
B. Regularly clean and maintain hardware components
Keep your hardware components clean and free from dust or debris. Regularly inspect and clean the internal and external parts of your devices to prevent error code E9 caused by hardware issues.
C. Avoid incompatible hardware or software installations
Before installing new hardware or software, ensure its compatibility with your existing setup. Incompatible installations can lead to error code E9 and other problems. Read user manuals, compatibility guides, and system requirements to make informed decisions.
D. Perform regular system maintenance and optimization
Regularly perform system maintenance tasks such as disk cleanup, defragmentation, and malware scans. Optimize your device’s performance by removing unnecessary files and programs. These practices can help prevent error code E9 and ensure smooth operation.
VI. Conclusion
Error code E9 can be a frustrating and disruptive issue, but with the appropriate troubleshooting techniques, you can resolve it effectively. By understanding the underlying causes, following the recommended steps, and implementing preventive measures, you can eliminate error code E9 and enjoy uninterrupted use of your electronic devices and appliances.
Fixing a Viewer’s BROKEN Gaming PC? – Fix or Flop S1:E9
Frequently Asked Questions (FAQ)
How do I fix error code E9?
What causes error code E9?
Can I fix error code E9 myself?
Is error code E9 common?
How can I prevent error code E9?
Final Recommendations for Resolving Error Code E9
In conclusion, error code E9 is a common issue that many individuals face when using electronic devices or appliances. This error can be caused by faulty hardware, software issues, or configuration problems.
To troubleshoot error code E9, you can check hardware connections, update or reinstall drivers, reset BIOS settings, perform a system restore, or run hardware diagnostics. If these basic troubleshooting steps fail, you may need to replace faulty hardware or reinstall the operating system.
Seeking technical support or professional assistance is also an option. To prevent error code E9 in the future, it is important to keep software and drivers up to date, clean and maintain hardware components regularly, avoid incompatible installations, and perform regular system maintenance and optimization. By following these recommendations, you can effectively resolve error code E9 and ensure smooth operation of your electronic devices and appliances.