
Introduction
Is your GE refrigerator dispensing whole ice cubes when you select “crushed”? This is a common problem that can be frustrating, especially when you’re making smoothies or cocktails. Not having crushed ice can be a minor inconvenience or a major annoyance if you rely on it regularly. Let’s diagnose why your ice maker isn’t crushing ice and walk you through some troubleshooting steps. We’ll focus on simple solutions first to avoid costly repairs or replacements.
💡 Technical Key Takeaways:
- Core Focus: Diagnostic schematic and terminal connection layout for Ge Refrigerator Ice Maker Not Crushing Ice.
- Target Scope: Field technicians, automotive DIYers, and residential/commercial electricians.
- Safety Rule: Always disconnect the primary power source/battery terminal and verify zero voltage with a multimeter before touching wires.
Common Causes of GE Refrigerator Ice Maker Not Crushing Ice
Here are several reasons why your GE refrigerator ice maker might not be crushing ice:
- Ice Jam in the Chute: Ice can melt and refreeze, creating a blockage in the ice chute that prevents the crusher from working.
- Frozen Ice Cubes: Excessively frozen or clumped-together ice cubes can be too hard for the crusher to handle.
- Defective Crusher Blades: The blades responsible for crushing the ice can become dull, damaged, or broken over time.
- Motor Malfunction: The motor that powers the ice crushing mechanism might be failing or has stopped working entirely.
- Ice Bucket Overfill: Too much ice in the bucket can prevent the mechanism from properly grabbing and crushing the cubes.
- Foreign Object Obstruction: Small objects can sometimes find their way into the ice maker and jam the crushing mechanism.
- Faulty Solenoid: A solenoid controls the ice dispensing functions, and a faulty one can prevent the crushed ice function from activating.
- Control Board Issue: In rare cases, a malfunctioning control board can send incorrect signals to the ice maker and dispenser.
Symptoms Checklist
Here are some indicators to help you accurately identify the issue:
- Whole ice cubes dispensing instead of crushed ice.
- No ice dispensing at all, even when selecting “cubes.”
- Unusual noises (grinding, clicking) when attempting to dispense crushed ice.
- Ice getting stuck or jammed in the dispenser chute.
- Ice dispenser working intermittently, sometimes crushing, sometimes not.
- Ice bucket overflowing.
How to Fix GE Refrigerator Ice Maker Not Crushing Ice Step-by-Step Guide
Follow these steps to troubleshoot and potentially fix your ice maker:
- Unplug the Refrigerator: For safety, disconnect the refrigerator from the power outlet before starting any troubleshooting.
- Remove the Ice Bucket: Carefully take out the ice bucket from the dispenser area.
- Inspect for Ice Jams: Check for any ice buildup or frozen clumps in the ice chute and around the crusher blades. Use a plastic utensil to gently break up any ice jams. Important: Avoid using sharp metal objects that could damage the mechanism.
- Melt Ice Jam with Hair Dryer: Using a hair dryer on a low setting, carefully melt any stubborn ice jams in the chute. Keep the hair dryer moving to avoid overheating any single spot.
- Inspect Crusher Blades: Examine the crusher blades for any signs of damage, such as cracks, breaks, or excessive wear.
- Clear Foreign Objects: Look for any foreign objects (small wrappers, plastic pieces) that might be obstructing the crusher mechanism.
- Check Ice Bucket Alignment: Make sure the ice bucket is properly aligned and seated in its designated slot. Misalignment can prevent the dispensing mechanism from engaging correctly.
- Test Dispenser Function: After clearing any blockages and ensuring proper alignment, plug the refrigerator back in and test the dispenser function. Select “crushed ice” and observe if the mechanism starts crushing ice.
- Adjust Freezer Temperature: If the ice is excessively hard, try slightly raising the freezer temperature to prevent over-freezing.
- Defrost the Ice Maker: If the problem persists, try defrosting the ice maker compartment. Leave the refrigerator unplugged for several hours, with the freezer door open, to allow any ice buildup to melt completely.
- Clean the Ice Maker: While the ice maker is defrosted, clean the interior with a mild soap and water solution. Rinse thoroughly and dry completely before reconnecting the power.
- Check the Water Filter: A clogged water filter can affect ice production and hardness. Replace the water filter if it’s been longer than six months or as recommended by the manufacturer.
- Reset the Refrigerator: Some GE refrigerators have a reset function. Consult your owner’s manual for specific instructions on how to reset the appliance.
Fix the Issue Without Buying Parts
Many issues with ice makers not crushing ice can be resolved without buying new parts:
- Reset the Refrigerator: Power cycling the refrigerator by unplugging it for 5-10 minutes can sometimes resolve minor electrical glitches affecting the ice maker.
- Regular Cleaning: Regularly clean the ice bucket and dispenser area to prevent ice jams and buildup.
- Inspect Ice Maker Periodically: Check the ice maker for any signs of ice buildup or foreign objects.
- Maintain Freezer Temperature: Keep the freezer temperature at the recommended setting (usually around 0F) to prevent ice from becoming too hard.
When Replacement Might Be Necessary
If the above steps don’t resolve the issue, you may need to consider replacing a component. Common parts that fail include:. For more related activities, check out our Ice Maker On Kenmore Fridge Not Working.
- Crusher Motor: If the motor isn’t running at all, this might be the issue.
- Crusher Blades: Severely damaged or broken blades will need replacement.
- Solenoid: A faulty solenoid preventing the selection of crushed ice.
Estimated costs for these parts range from $50 to $200, depending on the specific model and retailer. Consider contacting a qualified appliance repair technician for diagnosis and repair before replacing any parts yourself.
Safety Warning
- Always unplug the refrigerator before performing any maintenance or repairs.
- Avoid using sharp objects to clear ice jams, as they can damage the ice maker.
- Be careful when using a hair dryer to melt ice, as excessive heat can damage plastic components.
- If you’re uncomfortable working with electrical components, contact a qualified appliance repair technician.
Tools You May Need
- Plastic spatula or utensil
- Hair dryer
- Mild soap and water
- Clean cloths
- Screwdriver (depending on the repair)
FAQ
Here are some frequently asked questions:
- Q: Why is my ice maker making ice, but not crushing it? A: The issue is likely with the crusher motor, the crusher blades, or an ice jam in the chute.
- Q: How do I know if my crusher motor is broken? A: If you hear no sound at all when selecting “crushed ice,” the motor may be faulty.
- Q: Can I replace the crusher blades myself? A: Yes, but you’ll need to purchase the correct replacement blades and follow the manufacturer’s instructions.
- Q: My ice maker is frozen solid. What should I do? A: Unplug the refrigerator and allow it to defrost completely. Clean the ice maker thoroughly before reconnecting the power.
Conclusion
Troubleshooting a GE refrigerator ice maker that isn’t crushing ice can be a straightforward process. By following these steps, you can often resolve the issue without needing to call a technician or replace any parts. Start with the simplest solutions, like clearing ice jams and cleaning the ice maker, and work your way up to more complex troubleshooting steps. If you’ve exhausted all options and the problem persists, don’t hesitate to contact a qualified appliance repair technician for professional assistance. Good luck!
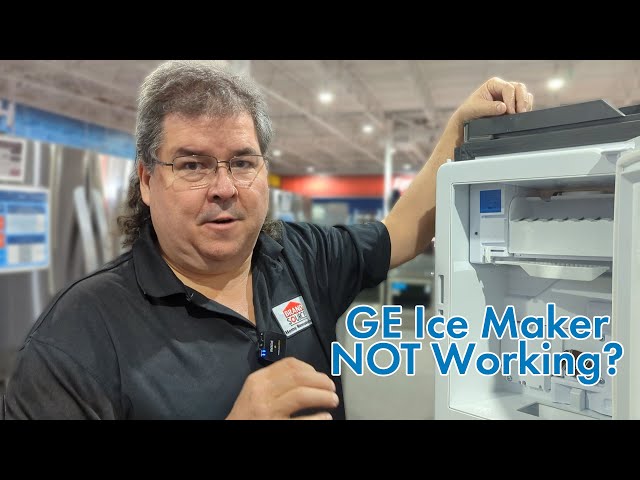
Youtube Video:
Quick Wiring Specifications & Terminal Guide
| Component / Circuit | Standard Wire Gauge | Recommended Protection |
|---|---|---|
| Control & Trigger Signals | 18 – 20 AWG | 5A – 7.5A Inline Fuse |
| Standard Auxiliary Load | 14 – 16 AWG | 15A – 20A Circuit Breaker |
| Main Power Feed / Supply | 10 – 12 AWG | 30A – 40A Heavy-Duty Relay |
Images References
Looking for more diagnostic guides? Explore our complete Refrigerator Problems 3 section for step-by-step troubleshooting solutions.
