Introduction
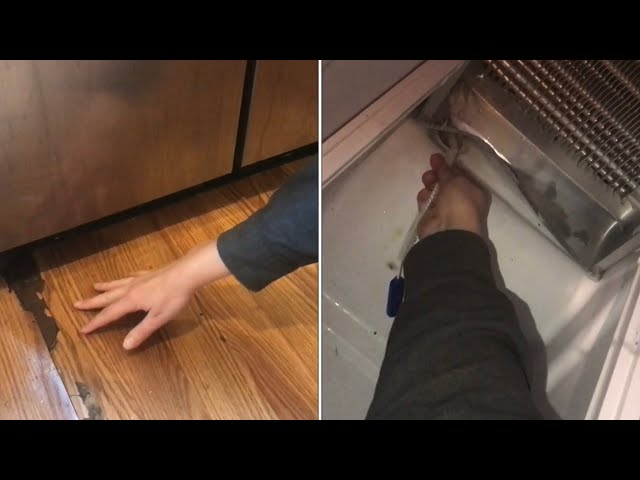
Discovering water leaking from your Frigidaire freezer onto your floor is a common household problem that can be frustrating. This issue not only creates a slippery hazard but can also damage your flooring and, if left unaddressed, lead to mold growth. It typically happens after a defrost cycle, or when the freezer is overly full, or after you have refilled the freezer after it was left open for too long. Addressing this issue promptly is important to prevent further damage and ensure your freezer operates efficiently.
Common Causes of Frigidaire Freezer Leaking Water on Floor
Here are some frequent reasons why your Frigidaire freezer might be leaking:
- Clogged Defrost Drain: Ice buildup can block the drain that carries water away during the defrost cycle.
- Icemaker Issues: A faulty icemaker or its water line could be leaking.
- Overfilled Freezer: Too much food can block vents and cause ice to melt improperly.
- Door Seal Problems: A damaged or dirty door seal allows warm air to enter, leading to excessive condensation and melting.
- Temperature Setting Too Warm: If the freezer isn’t cold enough, ice will melt faster.
- Unlevel Freezer: An unlevel freezer can cause water to pool and leak.
- Water Line Problems: If you have an icemaker, the water line could be loose or damaged.
- Defrost Timer Malfunction: A faulty defrost timer might cause the freezer to defrost too often or not often enough.
Symptoms Checklist
Check these indicators to accurately identify the problem:
- Water pooling on the floor in front of the freezer.
- Ice buildup inside the freezer, particularly around the defrost drain.
- Water dripping from the bottom of the freezer.
- Condensation on the door or walls of the freezer.
- Unusual noises coming from the icemaker.
- Food items in the freezer appear to be thawing and refreezing.
How to Fix Frigidaire Freezer Leaking Water on Floor Step-by-Step Guide
- Unplug the Freezer: For your safety, disconnect the freezer from the power outlet.
- Empty the Freezer: Remove all food items and store them in a cooler or another freezer to prevent spoilage.
- Locate the Defrost Drain: This is usually at the back wall on the inside of the freezer, often a small hole or indentation.
- Melt Ice Buildup: Use a hairdryer (on a low setting) or pour warm water to melt any ice blocking the drain. Be careful not to overheat the plastic.
- Clear the Drain: Use a turkey baster or a long, flexible object like a pipe cleaner or a thin wire to dislodge any debris in the drain.
- Flush the Drain: Pour a cup of warm water down the drain to ensure it’s clear.
- Check the Door Seal: Inspect the rubber seal around the freezer door for damage, dirt, or debris.
- Clean the Door Seal: Use a damp cloth and mild detergent to clean the door seal. Ensure it is completely dry.
- Level the Freezer: Use a level to check if the freezer is properly leveled. Adjust the feet at the bottom to make it level.
- Inspect the Icemaker (if applicable): Look for any signs of leaks or damage to the icemaker and its water line.
- Check the Water Line (if applicable): Ensure the water line connection to the freezer is tight and there are no kinks or damage to the line.
- Adjust the Temperature: Make sure the freezer temperature is set correctly (typically around 0F or -18C).
- Rearrange Food Items: Ensure food items are not blocking the vents inside the freezer.
- Plug the Freezer Back In: Once everything is clear and dry, plug the freezer back into the power outlet.
- Monitor the Freezer: Observe the freezer for a few days to see if the leaking problem has been resolved.
Fix the Issue Without Buying Parts
Often, you can resolve the leak without purchasing new parts:
- Reset the Freezer: Unplug the freezer for 30 minutes, then plug it back in. This can sometimes reset the defrost cycle.
- Thorough Cleaning: Clean the entire interior of the freezer, paying attention to vents and drains.
- Recalibrate Temperature: Ensure the temperature setting is accurate and appropriate.
- Inspect Regularly: Routinely check the door seal and defrost drain to prevent future problems.
- Proper Maintenance: Avoid overfilling the freezer and promptly address any condensation.
When Replacement Might Be Necessary
If the leaking persists after attempting these fixes, or if you notice significant damage to components, replacement may be necessary. Common parts that fail include:
- Defrost timer ($30 – $70)
- Door seal ($20 – $50)
- Icemaker assembly ($80 – $200)
Keep in mind that professional repair can range from $100-$300. If the freezer is very old, replacement may be more cost-effective.
Safety Warning
- Always unplug the freezer before attempting any repairs.
- Avoid standing water; dry the floor immediately to prevent slips.
- Be careful when using electrical appliances like hairdryers near water.
- If you are uncomfortable with electrical repairs, consult a qualified technician.
Tools You May Need
- Screwdriver (Phillips and flathead)
- Adjustable wrench
- Turkey baster or pipe cleaner
- Warm water
- Mild detergent
- Clean cloth
- Level
- Hairdryer (optional)
FAQ
- Q: Why is my freezer leaking water after I defrost it?
- A: The defrost drain is likely clogged with ice or debris. Follow the steps to clear the drain.
- Q: How often should I defrost my freezer?
- A: It depends on the model, but generally, you should defrost your freezer when ice buildup exceeds inch.
- Q: Can a damaged door seal cause a freezer to leak?
- A: Yes, a damaged door seal allows warm air in, leading to condensation and melting ice.
- Q: What temperature should my freezer be set at?
- A: The ideal freezer temperature is around 0F (-18C).
Conclusion
Troubleshooting a Frigidaire freezer leaking water on the floor can often be resolved with simple DIY fixes. By following these steps, you can save money and prevent further damage. However, if the problem persists after trying these solutions, it’s best to consult with a qualified appliance repair technician to ensure safe and effective repairs.
Youtube Video:
Looking for more useful options?
Check out recommended resources that others find helpful.