Clutch On Ac Compressor Not Engaging: Troubleshooting Tips For A Faulty System
If the clutch on the AC compressor is not engaging, it could be due to electrical or mechanical issues. Troubleshooting and addressing these common problems can help you get your AC system working again.
Picture this: you’re cruising down the highway on a blazing hot summer day, seeking refuge from the scorching temperatures within the comfort of your vehicle. You reach out to adjust the air conditioning, but instead of the expected cool breeze, all you feel is frustration.
The clutch on your AC compressor is not engaging, leaving you sweltering in a cabin that resembles an oven on wheels. For anyone who has experienced this maddening predicament, this article is here to rescue you from the clutches of a faulty AC system.
Whether you’re a seasoned auto enthusiast or just a regular vehicle owner, understanding the intricacies of your air conditioning system is crucial. With the right troubleshooting tips, you can diagnose the problem and get your AC up and running again. In this comprehensive guide, we will delve into the inner workings of your AC compressor and explore the common reasons why the clutch fails to engage.
From electrical issues to mechanical malfunctions, we’ll equip you with the knowledge and techniques to troubleshoot and address these common problems. So, buckle up and embark on a journey to cool, comfortable driving once more.

- 𝐏𝐞𝐫𝐟𝐞𝐜𝐭 𝐅𝐢𝐭: New AC compressor compatible with Chevrolet Silverado 1500/1500 HD 02-06, for Silverado 2500/2500 HD 01-06, for Silverado 3500 5.7L 05-06, for Avalanche 1500/2500 02-06, for Express 3500 15-16, for Tahoe 5.3 2010, for GMC Sierra 5.3 2015, for Sierra 1500/1500HD 2500/2500HD 3500 02-06, for Hummer H2 Cadillac Escalade EXT. (For more details, please scroll down to Product Description.)
- 𝐏𝐫𝐞𝐦𝐢𝐮𝐦 𝐁𝐫𝐚𝐧𝐝 𝐍𝐞𝐰: This air conditioning compressor is meticulously crafted using high-quality materials and advanced technology,ensuring durability while significantly reducing noise levels.It provides a cooling effect that is consistent with that of original equipment parts.
- 𝐏𝐥𝐞𝐚𝐬𝐞 𝐍𝐨𝐭𝐞: Before purchasing, please use “Amazon Confirmed Fit” feature to check if this AC compressor is compatible with your vehicle model to avoid any mistakes that may delay your repair plans.
- 𝐈𝐧𝐬𝐭𝐚𝐥𝐥𝐚𝐭𝐢𝐨𝐧 𝐂𝐚𝐮𝐭𝐢𝐨𝐧𝐬: Before installing the air conditioning compressor, clean your car’s cooling system pipes and check that the fan and condenser are working properly so as not to affect the use of new parts.
- 𝐈𝐧𝐜𝐥𝐮𝐝𝐞𝐝 𝐢𝐧 𝐭𝐡𝐞 𝐤𝐢𝐭: Fast cooling AC compressor kit Includes the new ac compressor with clutch ; accumulator; o-ring kit; Black orifice tube; Pre-filled oil in the compressor

- Brand New, OE replacement, UAC branded Compressor Replacement Kit
- Lab tested in the United States to meet or exceed OEM specifications (Premium ISO/TS 16949 quality)
- Add your car (year/make/model) to garage to confirm a perfect fit

- Brand New, OE replacement: UAC branded 10S17F Compressor Assembly
- Premium ISO/TS 16949 quality; tested to meet or exceed OEM specifications
- Includes: body, clutch, pulley & coil; compressor may come charged with shipping oil to keep the part lubricated during transit – drain and replace according to your system’s requirements

- 【OEM Fit & Compatibility】The CO 29134C ac compressor fit for GMC Yukon&Yukon XL 5.3L/6.2L 2015-2020. Fit for GMC Sierra 1500 4.3L/5.3L/6.2L 2014-2019. Fit for GMC Sierra 1500 Limited 5.3L 2019. Fit for Chevrolet Suburban 5.3L 2015-2020. Fit for Chevrolet Suburban 6.0L 2016-2019. Fit for Chevrolet Suburban 6.2L 2019 2020. Fit for Chevrolet Tahoe 5.3L 2015-2020. Fit for Chevrolet Tahoe 6.2L 2018-2020. Fit for Chevrolet Cheyenne 5.3L/6.2L 2014-2018. Fit for Chevrolet Silverado 1500 4.3L/5.3L/6.2L 2014-2019. Fit for Chevrolet Silverado 1500 LD 5.3L 2019. Fit for Chevrolet Silverado 2500 5.3L 2014-2017. Fit for Cadillac Escalade & Escalade ESV 6.2L 2015-2020.
- 【3800kcal/h Efficient Cooling Performance】The ac compressor replacement is designed with a high-performance piston and precision-engineered internal components to deliver rapid, powerful cooling. With a cooling capacity of up to 3800kcal/h-4600kcal/h, the air conditioner compressor ensures quick temperature drops, achieving a temperature decrease of 10°F within 5 minutes of operation. It maintains stable airflow at up to 400 CFM, providing maximum comfort in all driving conditions.
- 【Upto 50dB, Low Noise & Vibration】Aftermarket auto ac compressor replacement for chevy gmc, which is engineered with advanced balancing technology and a double isolation design to minimize operational noise and vibrations. The compressor’s noise levels are reduced to less than 50 dB at full operation, significantly lower than the industry average of 65 dB. Its optimized design helps prevent excessive wear and tear, with a lifespan of up to 150,000 miles, enhancing durability while maintaining a comfortable and noise-free driving experience.
- 【A/C compressor with clutch, Enhanced Energy Efficiency】chevy ac compressor assembly features an advanced clutch and precision-engineered internal components, it reduces energy loss and improves overall system efficiency. A/C compressor with clutch, the compressor engages only when needed, contributing to better fuel economy and reduced emissions.
- 【Durable & High-Quality Construction】The AC compressor is built using premium-grade aluminum and reinforced steel components, ensuring exceptional strength, corrosion resistance, and long-lasting durability. Designed to withstand high-pressure conditions and extreme temperatures, this AC compressor provides stable and efficient cooling operation over an extended lifespan.

- 【Compatibility with】Fits for Nissan Rogue 2.5 2.5L 2008 2009 2010 2011 2012 2013; Rogue Select S 2.5L 2014-2015 (only S); Cabstar 2.5L 2008-2009. [NOTES: w/One Plug]
- 【Specifications】Compressor Type: DKS17D; OIL TYPE: PAG 100; Oil Prefilled: 170ML; Pulley Diameter (mm): 125; Grooves: 6
- 【Replaces Numbers】for CO 11200C, 97490; 92610JM01C; 10347900; 10362251; 98490; 141004C; 141004NC; 141004NEW; 6512863; 7512863; TEM275998; TEM255769; 2021180AM
- 【Important Note】Before install, the entire air conditioning system must be disassembled and clean, check the condenser are working properly. New compressor can be installed only after the cleaning agent is completely evaporated to prevent damage.
- 【Energy Saving & Low Noise】The AC compressor works steady and efficient under a low noise condition, provide you with a chill nice and cold ride. Under a lower load factor, low power will be input when driving at high speed, which increases fuel economy and makes operation smoothly.

- Engineered for superior durability, backed by industry-leading 2-year, unlimited-mileage warranty
- Guaranteed Exact Fit for easy installation
- 100% BRAND NEW, premium ISO/TS 16949 quality – no core deposit or return required!
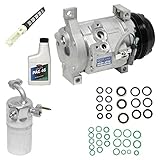
- Kit includes compressor with clutch, drier filter, expansion valve, oil and O-ring seals. Please note: for use only in motor vehicle air conditioner (MVAC) systems. Use in a 20-ounce self-sealing container.
- Fits 2003-2005 Dodge Ram Cummins 5.9L Diesel

- Brand New, OE replacement: UAC branded Compressor Kit
- 100% Guaranteed Fit! Add your car (year/make/model) to Amazon’s garage to confirm
- Premium ISO/TS 16949 quality; tested to meet or exceed OEM specifications
- Includes: compressor & clutch, drier / accumulator, expansion device, 8oz bottle of PAG oil, seal kit; compressor may come charged with shipping oil to keep the part lubricated during transit – drain and replace according to your system’s requirements
- Product is backed by industry leading warranty

- 【Compatibility with】AC Compressor with A/C Clutch Fits for GMC Envoy 4.2L 2002-2009, Envoy XL 4.2L 2002-2006, Envoy XUV 4.2L 2004 2005; Fits for Chevrolet Trailblazer 4.2L 2002-2009, Trailblazer EXT 4.2L 2002-2006; Fits for Buick Rainier 4.2L 2004-2007; Fits for Saab 9-7x 4.2L 2005-2009; Fits for Oldsmobile Bravada 4.2L 2002-2004; for Isuzu Ascender 4.2L 2003-2008.
- 【Specifications】Compressor Type: TRSA12; OIL TYPE: PAG 100; R-efrigerant Type: R134a; Oil Prefilled: 120±10ML; Pulley Diameter (mm): 100; Grooves: 6
- 【Replaces Numbers】for CO 4910AC, 1521182, 1521731, 6511418, CS10054, 77561, 15070473, 25825339, 6511418, 7511418, 363450NA, 14SD3450NC, 2557N, 3450, 3452, 3454, 3456, 4910, 10349190, 10349191, 8258253390, C2646, 0610103, TEM275517, 254427, 2003450AM, DW77561, 77561.
- 【Important Note】Before install, the entire air conditioning system must be disassembled and clean, check the condenser are working properly. New compressor can be installed only after the cleaning agent is completely evaporated to prevent damage.
- 【Energy Saving & Low Noise】The AC compressor works steady and efficient under a low noise condition, provide you with a chill nice and cold ride. Under a lower load factor, low power will be input when driving at high speed, which increases fuel economy and makes operation smoothly.
- Brand New, OE replacement: UAC branded Compressor Kit
- Premium ISO/TS 16949 quality; tested to meet or exceed OEM specifications
- Includes: compressor & clutch, drier / accumulator, expansion device, 8oz bottle of PAG oil, seal kit; compressor may come charged with shipping oil to keep the part lubricated during transit – drain and replace according to your system’s requirements

- Check our product description to make sure our compressor fit your vehicle
- OEM Part Number 8832004060
- Materials are matching the same requirements as OE products. Only high-quality materials.
- All Items Tested for Reliability, Durability and Performance
- 100% BRAND NEW,Utilizes the latest design and material technology
I. Understanding the Clutch on AC Compressor
Before we dive into the troubleshooting tips for a faulty AC system, let’s first understand the clutch on the AC compressor. This component plays a crucial role in the proper operation of your vehicle’s air conditioning system.
A. Definition and Function of AC Compressor Clutch
The AC compressor clutch is a device that allows the compressor to engage and disengage from the engine’s power. It consists of three main parts: the pulley, the electromagnet, and the clutch plate.
The pulley is connected to the engine through a drive belt and spins continuously when the engine is running. The electromagnet is mounted on the front of the compressor and is responsible for engaging and disengaging the clutch. When the clutch is engaged, the pulley and the clutch plate rotate together, compressing the refrigerant and generating cold air for the cabin.
B. Importance of Clutch Engagement
The engagement of the AC compressor clutch is crucial for the proper functioning of your vehicle’s air conditioning system. When the clutch fails to engage, the compressor does not receive power, resulting in no cold air being produced.
Without the clutch engaging, the compressor continues to spin freely without compressing the refrigerant. This not only leads to a lack of cooling but can also cause damage to the AC system and other engine components over time.
II. Common Causes of Clutch Not Engaging
Now that we have a basic understanding of the AC compressor clutch, let’s explore the common causes behind its failure to engage. These issues can be categorized into electrical and mechanical problems.
A. Electrical Issues
Electrical problems are one of the primary culprits behind a clutch not engaging. Here are some electrical issues that can disrupt the clutch operation:
1. Blown Fuse
A blown fuse can be the reason why the AC compressor clutch is not engaging. The fuse is designed to protect the electrical components from excessive current. If it blows, it indicates an electrical fault or overload in the system.
2. Faulty Relay
The relay is responsible for supplying power to the AC compressor clutch. A faulty relay can interrupt the power flow, preventing the clutch from engaging. Common causes of relay failure include corrosion, a loose connection, or internal damage.
3. Wiring Problems
Faulty or damaged wiring can disrupt the communication between the AC control module, relay, and clutch. It can cause a loss of power or a weak signal, preventing the clutch from engaging. Wiring issues can result from wear and tear, rodents, or improper installation.
B. Mechanical Issues
Alongside electrical problems, mechanical issues can also prevent the AC compressor clutch from engaging. Let’s take a look at some common mechanical causes:
1. Worn Clutch Plate
The clutch plate engages with the pulley to rotate the compressor. Over time, the clutch plate can wear down due to constant friction, aging, or improper maintenance. A worn clutch plate may not fully engage, leading to a lack of cooling.
2. Defective Clutch Coil
The clutch coil is an electromagnetic device that creates a magnetic field to engage the clutch. If the clutch coil is faulty or damaged, it may not generate enough magnetic force to engage the clutch properly. Common causes of clutch coil failure are wear and tear, overheating, or manufacturing defects.
3. Compressor Seizure or Damage
In some cases, the AC compressor itself may be the root cause of the clutch not engaging. A seized or damaged compressor can hinder the clutch’s operation. Compressor seizure can occur due to a lack of lubrication, contamination, or internal component failure.
III. Testing and Troubleshooting the Clutch
Now that we have identified the common causes of a clutch not engaging, let’s move on to testing and troubleshooting the problem. This will help us diagnose the exact issue and determine the necessary steps for repair.
A. Checking for Power Supply
The first step in troubleshooting is to ensure that the clutch is receiving power. Here are a few methods to check for power supply:
1. Using a Multimeter
With a multimeter, you can measure the voltage at the clutch connector. Start by setting the multimeter to the appropriate voltage range and probe the positive and negative terminals of the clutch connector. If the multimeter reads a voltage within the specified range, it indicates that power is reaching the clutch.
2. Inspecting Fuses and Relays
Inspect the fuse box and relay box to check for any blown fuses or faulty relays. Replace any damaged components with the appropriate replacements. Ensure that the fuses and relays are properly seated and secure.
B. Inspecting the Clutch Coil
If the power supply is confirmed to be working correctly, the next step is to inspect the clutch coil itself. Here’s how you can do it:
1. Visual Inspection
Start by visually inspecting the clutch coil for any signs of damage, such as cracks, corrosion, or burnt marks. If you notice any visible issues, it’s likely that the clutch coil needs to be replaced.
2. Resistance Testing
Using a multimeter, measure the resistance across the clutch coil terminals. Compare the reading with the manufacturer’s specifications. If the resistance is outside the recommended range, it indicates a faulty clutch coil.
C. Verifying Compressor Functionality
If the power supply and clutch coil are in good condition, it’s essential to verify the functionality of the compressor itself. Here are a couple of methods to check the compressor:
1. Checking for Mechanical Seizure
Try rotating the compressor pulley by hand. It should spin freely without any resistance. If you encounter resistance or the pulley does not rotate at all, it indicates a mechanical seizure, and the compressor may need to be replaced.
2. Listening for Unusual Noises
Start the engine and turn on the AC. Listen carefully for any unusual noises coming from the compressor, such as grinding, rattling, or squealing. These noises can indicate internal damage or a failing compressor.
IV. Fixing Electrical Issues
If the clutch issue stems from electrical problems, here are some steps to fix them:
A. Replacing Blown Fuses
If you find any blown fuses during the inspection, replace them with new fuses of the same rating. Make sure to use the correct fuse type to avoid any electrical issues in the future.
B. Swapping Faulty Relays
If a faulty relay is identified, swap it with a new relay of the same type. Ensure that the relay is compatible with your vehicle’s make and model. Test the AC system after replacing the relay to confirm that the clutch engages properly.
C. Repairing or Replacing Wiring
If faulty or damaged wiring is the culprit, repair or replace the damaged sections. Ensure that the wiring is properly insulated and securely connected. Test the AC system to verify whether the clutch engages correctly after the wiring repair.
V. Fixing Mechanical Issues
If the clutch problem is due to mechanical issues, follow these steps to resolve them:
A. Replacing Worn Clutch Plate
To replace a worn clutch plate, follow these steps:
1. Removal of Clutch Plate
Start by removing the drive belt connected to the AC compressor. Then, remove the center bolt securing the clutch plate to the compressor shaft. Carefully remove the clutch plate from the compressor.
2. Installation of New Clutch Plate
Install the new clutch plate onto the compressor shaft, aligning the splines. Secure it with the center bolt and torque it to the manufacturer’s specifications. Reinstall the drive belt and adjust its tension.
B. Repairing or Replacing Defective Clutch Coil
To repair or replace a defective clutch coil, follow these steps:
1. Removal of Old Coil
Disconnect the electrical connector and mounting bolts securing the clutch coil to the compressor. Carefully remove the old coil from the compressor.
2. Installation of New Coil
Install the new clutch coil onto the compressor, aligning the mounting holes. Secure it with the mounting bolts and tighten them to the specified torque. Reconnect the electrical connector to the new coil.
C. Addressing Compressor Seizure or Damage
If the compressor is seized or damaged, it’s best to consult with a professional mechanic or AC specialist. They can assess the extent of the damage and recommend either repairing or replacing the compressor.
VI. Maintenance and Prevention Tips
Prevention is always better than cure, and the same applies to your vehicle’s AC system. Here are some maintenance and prevention tips to ensure the smooth operation of the AC compressor clutch:
A. Regular Inspection of AC System
Regularly inspect your AC system for any signs of wear, damage, or leaks. Look out for unusual noises, reduced cooling performance, or any visual abnormalities. Addressing issues early can prevent major problems down the line.
B. Maintenance of Clutch Components
Keep the clutch components clean and well-lubricated. Remove any debris or dirt that may accumulate on the pulley, clutch plate, or electromagnet. Use a suitable lubricant recommended by the manufacturer to ensure smooth operation.
C. Checking System Pressure
Periodically check the system pressure using a pressure gauge. Abnormal pressure readings can indicate a refrigerant leak, a failing compressor, or other underlying issues. If you notice any significant deviations, consult a professional for further inspection and maintenance.
VII. Conclusion
In conclusion, troubleshooting a clutch on an AC compressor that is not engaging can be a challenging task. However, armed with the knowledge and tips provided in this comprehensive guide, you can diagnose the problem and take the necessary steps to fix it.
Remember to approach electrical and mechanical issues separately and perform the appropriate tests to identify the root cause. Whether it requires replacing blown fuses, swapping faulty relays, repairing wiring, or addressing mechanical components, resolving the clutch engagement problem will get your vehicle’s air conditioning system back to providing cool and comfortable rides.
By following regular maintenance practices and being vigilant about any potential issues, you can prevent future problems with your AC system and extend its lifespan. Stay cool and drive comfortably!
How to Diagnose and Replace an A/C Compressor Coil, Clutch and Bearing on Your Car
Frequently Asked Questions (FAQ)
Why is the clutch on my AC compressor not engaging?
Can I fix the clutch on my AC compressor myself?
How much does it cost to replace the clutch on an AC compressor?
What are the symptoms of a faulty AC clutch?
Is it possible to drive with a non-engaging AC compressor clutch?
Conclusion: Troubleshooting and Fixing a Non-Engaging AC Compressor Clutch
In conclusion, troubleshooting a clutch on an AC compressor that is not engaging can be a challenging task. However, armed with the knowledge and tips provided in this comprehensive guide, you can diagnose the problem and take the necessary steps to fix it.
The clutch on the AC compressor plays a crucial role in the proper operation of your vehicle’s air conditioning system. When the clutch fails to engage, the compressor does not receive power, resulting in no cold air being produced.
This can be caused by electrical or mechanical issues. Electrical issues, such as blown fuses, faulty relays, or wiring problems, can disrupt the clutch operation. Mechanical issues, such as a worn clutch plate, defective clutch coil, or compressor seizure or damage, can also prevent the clutch from engaging.
To troubleshoot the problem, you can check for power supply, inspect the clutch coil, and verify the functionality of the compressor. Depending on the cause of the problem, you may need to replace blown fuses, swap faulty relays, repair or replace wiring, replace a worn clutch plate, repair or replace a defective clutch coil, or address compressor seizure or damage. To prevent future problems with your AC system, it is important to regularly inspect the system, maintain the clutch components, and check the system pressure.