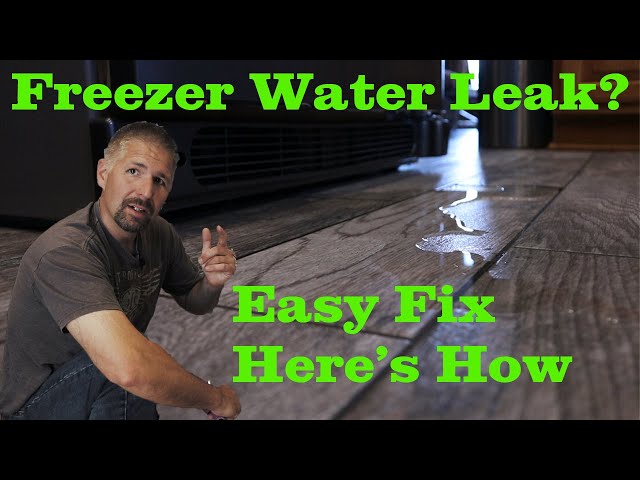
Introduction
Discovering your chest freezer leaking water onto the floor is never a welcome surprise. It can be a sign of a minor issue or something more serious, but either way, it needs to be addressed quickly. A leaking freezer not only creates a slippery hazard and potential water damage, but it also means your freezer isn’t working efficiently, which can lead to food spoilage. This problem is most common after defrosting, after a power outage, or when the freezer is overloaded. Acting fast can prevent bigger problems and save you money in the long run.
Common Causes of chest freezer leaking water onto floor
There are several reasons why your chest freezer might be leaking water. Here are some of the most common:
- Defrosting: Water may be leftover after manual defrosting if not properly drained.
- Overfilling: Overpacking the freezer can block the drain or cause ice to melt unevenly.
- Door Seal Issues: A damaged or dirty door seal allows warm air to enter, causing condensation and ice buildup.
- Drain Clog: The drain that removes melted ice may be blocked by ice or debris.
- Power Outage: A power outage can cause ice to melt, leading to water leakage once power is restored.
- Temperature Setting: Setting the temperature too low can cause excessive ice buildup and melting.
- Freezer Not Level: An unlevel freezer can prevent proper drainage.
- Condensation: High humidity in the room can cause condensation on the freezer’s exterior, which then drips.
Symptoms Checklist
Look for these indicators to identify the issue accurately:
- Puddle of water underneath or around the freezer.
- Excessive ice buildup inside the freezer.
- Water dripping from the freezer’s drain.
- Visible gaps or damage to the door seal.
- Unusual frost patterns on food items.
- The freezer feels warmer than usual inside.
How to Fix chest freezer leaking water onto floor Step-by-Step Guide
- Unplug the Freezer: For safety, always disconnect the freezer from the power outlet before starting any troubleshooting.
- Check the Door Seal: Inspect the door seal for any tears, cracks, or debris. Clean the seal with warm water and a mild detergent. Make sure it’s making full contact with the freezer.
- Defrost the Freezer (if needed): If there’s a lot of ice buildup, manually defrost the freezer. Turn it off, remove all the food, and let the ice melt completely. Use towels to absorb the water.
- Locate the Drain Plug: Most chest freezers have a drain plug located inside at the bottom, or sometimes on the outside near the front.
- Clear the Drain: If there is a drain plug, remove the plug. If the drain is clogged, use a long, flexible object like a pipe cleaner or a straightened coat hanger to carefully clear any blockage. You can also pour warm water down the drain to help melt any ice.
- Level the Freezer: Use a level to ensure the freezer is sitting flat. Adjust the feet (if adjustable) until it’s level.
- Check the Temperature Setting: Make sure the temperature setting is appropriate. A setting that’s too cold can cause excessive ice buildup. The ideal temperature is around 0F (-18C).
- Clean the Condenser Coils (if accessible): Dust and dirt on the condenser coils can reduce efficiency and cause the freezer to work harder, potentially leading to condensation. (Often located on the back of the unit, may require removing a panel)
- Check for Overfilling: Make sure the freezer isn’t overpacked. Leave some space for air circulation to prevent uneven freezing.
- Dry the Interior: After defrosting or clearing the drain, thoroughly dry the inside of the freezer with clean towels.
- Plug the Freezer Back In: Once everything is dry and you’ve checked the components, plug the freezer back into the power outlet.
- Monitor for Leaks: Keep an eye on the freezer for the next few hours (and the next day) to see if the leaking has stopped.
- Observe Condensation: If the air in the room is very humid, try to reduce the humidity with a dehumidifier if possible.
Fix the Issue Without Buying Parts
Before resorting to replacing parts, try these free methods:
- Reset: Unplug the freezer for 30 minutes and then plug it back in. This can sometimes reset the system.
- Cleaning: Regular cleaning of the door seal and interior can prevent ice buildup and drainage problems.
- Recalibration: Check your freezer’s manual for instructions on how to recalibrate the temperature settings.
- Inspection Tips: Routinely check the door seal and drain for any signs of damage or blockage.
- Maintenance Basics: Keep the area around the freezer clean and clear to allow for proper ventilation.
When Replacement Might Be Necessary
If the leaking persists after trying all the troubleshooting steps, or if you notice significant damage to the freezer’s components, replacement might be necessary. Common parts that fail include the door seal (estimated cost: $20-$50 USD) and the thermostat (estimated cost: $30-$70 USD). If the freezer is very old, or the cost of repairs exceeds half the price of a new freezer (expect to pay $200-$800 depending on size), replacement is likely more cost-effective.
Safety Warning
- Always unplug the freezer before performing any maintenance or repairs.
- Be careful when working with water and electricity to avoid electric shock.
- Clean up any water spills immediately to prevent slips and falls.
- If you’re unsure about any step, consult a qualified technician.
Tools You May Need
- Screwdriver (Phillips and flathead)
- Adjustable wrench
- Warm water
- Mild detergent
- Clean towels
- Pipe cleaner or straightened coat hanger
- Level
FAQ
Here are some frequently asked questions:
-
Q: Why is my freezer leaking after I defrosted it?
A: There might be some residual water in the drain pan or drain line. Ensure the drain is completely clear and dry. -
Q: How often should I defrost my chest freezer?
A: Defrost it when the ice buildup is more than inch thick. Usually every 6-12 months. -
Q: Can a leaking freezer cause mold?
A: Yes, if the water isn’t cleaned up properly, it can create a breeding ground for mold. -
Q: Is it normal for my freezer to sweat?
A: Some condensation on the exterior is normal, especially in humid environments. However, excessive sweating can indicate a problem with the door seal or insulation.
Conclusion
Dealing with a leaking chest freezer can seem daunting, but by following these troubleshooting steps, you can often resolve the issue yourself. Remember to prioritize safety and take your time. If you’ve tried everything and the leaking persists, it might be time to call a qualified appliance repair technician. Good luck, and happy freezing!
Youtube Video:
Looking for more useful options?
Check out recommended resources that others find helpful.