Introduction
Finding water dripping from your AC vents can be alarming. This isn’t just a minor inconvenience; it indicates that your air conditioning system isn’t functioning correctly. The dripping water can stain your ceiling, damage your walls, and, more concerningly, create a breeding ground for mold and mildew. It’s especially common during periods of high humidity or when the AC is running frequently. Addressing this issue quickly is crucial to prevent further damage and ensure your home’s air quality.
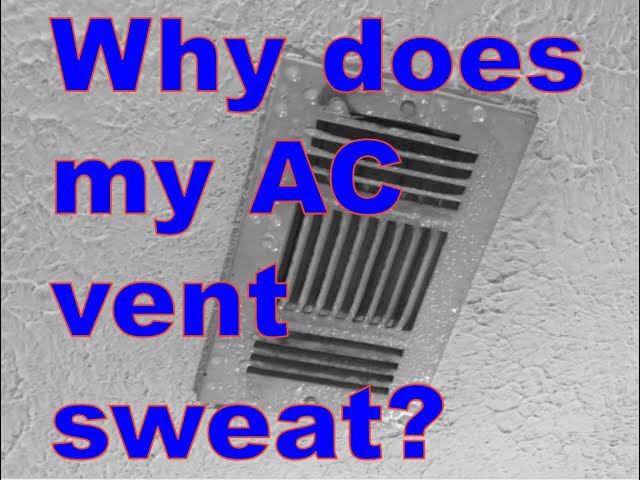
Common Causes of AC Water Dripping From Vents
Here are some common reasons why your AC might be dripping water from the vents:
- Clogged Condensate Drain Line: This is the most frequent culprit. The drain line removes condensation from the AC unit. If it gets clogged with algae, dust, or debris, water can back up and overflow.
- Dirty Air Filter: A dirty air filter restricts airflow, causing the evaporator coil to freeze. When the ice melts, the excess water can overflow and drip from the vents.
- Frozen Evaporator Coil: Similar to a dirty filter, low refrigerant levels or a malfunctioning blower motor can also cause the evaporator coil to freeze.
- Low Refrigerant: Insufficient refrigerant reduces the coil’s temperature, leading to freezing and subsequent water overflow.
- Damaged or Disconnected Drain Pan: The drain pan catches the condensation. If it’s cracked, rusted, or disconnected, water will leak.
- Improperly Insulated Refrigerant Lines: Condensation can form on cold refrigerant lines, especially in humid environments. If these lines aren’t properly insulated, the condensation can drip.
- Leaky Ductwork: Air leaks in your ductwork can cause condensation, especially where warm, humid air meets cold air.
- Incorrect AC Installation: Improperly installed AC units, particularly the drain line, can lead to drainage problems.
- High Humidity: In extremely humid conditions, the AC may struggle to remove moisture fast enough, leading to excessive condensation.
Symptoms Checklist
Look for these indicators to accurately identify the problem:
- Water dripping directly from the AC vents.
- Water stains on your ceiling or walls near the vents.
- A musty or moldy smell in the air, especially when the AC is running.
- Ice forming on the copper lines of the AC unit.
- The AC unit running constantly but not cooling effectively.
- Visible leaks or puddles around the indoor or outdoor AC unit.
- Increased humidity inside your home.
How to Fix AC Water Dripping From Vents Step-by-Step Guide
Follow these steps to troubleshoot and fix the issue:
- Turn Off the AC: Immediately turn off your AC to prevent further water damage and potential electrical hazards.
- Inspect the Air Filter: Remove the air filter and check if it’s dirty or clogged. If it is, replace it with a new, clean filter. A clogged filter restricts airflow and can cause the evaporator coil to freeze.
- Locate the Condensate Drain Line: The drain line is usually a PVC pipe located near your indoor AC unit. It could be inside or outside your house.
- Check for Clogs: Examine the drain line opening for any visible blockages, such as algae or debris.
- Clear the Drain Line with a Wet/Dry Vacuum: Attach the hose of a wet/dry vacuum to the end of the drain line (preferably outside where it exits your home). Turn on the vacuum to suck out any clogs. Repeat several times.
- Flush the Drain Line with Vinegar: Pour a cup of white vinegar down the drain line. Vinegar is a natural disinfectant and can help dissolve algae and other buildup. Let it sit for about 30 minutes, then flush with water.
- Check the Drain Pan: Locate the drain pan underneath the indoor AC unit. Inspect it for cracks, rust, or overflowing water. If the pan is damaged, it may need to be replaced (consider calling a professional).
- Thaw a Frozen Evaporator Coil: If you suspect a frozen coil, turn off the AC and set the fan to “on.” This will help thaw the ice. It can take several hours.
- Check Refrigerant Lines: Inspect the refrigerant lines (copper pipes) for proper insulation. If the insulation is damaged or missing, wrap it with new insulation tape.
- Inspect Ductwork Connections: Visually inspect any accessible ductwork connections near the dripping vent. Secure any loose connections with foil tape designed for HVAC systems.
- Turn the AC Back On: After completing the above steps, turn the AC back on and monitor for further dripping.
- Monitor Humidity Levels: Invest in a dehumidifier if you live in a particularly humid area. This can help reduce the amount of condensation your AC needs to handle.
- Schedule Regular Maintenance: Regular AC maintenance can prevent many of these problems. Schedule a professional checkup at least once a year.
Fix the Issue Without Buying Parts
Before considering replacement parts, try these free methods:
- Reset Your AC: Turn off the AC at the thermostat and the breaker for a few minutes, then turn it back on. This can sometimes resolve minor glitches.
- Clean Air Vents: Clean your AC vents regularly to prevent dust buildup.
- Inspect for Obvious Obstructions: Check around the outdoor unit for leaves, branches, or other debris that could be restricting airflow.
- Regular Filter Changes: Changing your filter every 1-3 months (depending on usage and filter type) is crucial for preventing many AC issues.
When Replacement Might Be Necessary
If the dripping persists after trying the above steps, a part replacement might be needed. Common parts that fail include:
- Condensate Pump: If your AC uses a condensate pump to remove water, it can fail. Replacement cost: $50-$150 (plus installation if needed).
- Drain Pan: A severely cracked or rusted drain pan needs replacement. Replacement cost: $30-$100 (plus installation).
- Refrigerant Lines: Severely damaged or corroded refrigerant lines require professional repair or replacement. This is best left to a qualified technician. Costs can vary widely.
Note: These are estimated costs and can vary based on location and the complexity of the repair. Always get a professional quote before proceeding with any major repairs.
Safety Warning
- Always turn off the power to the AC unit at the breaker before attempting any repairs.
- Be cautious of wet floors and avoid slipping.
- If you’re uncomfortable working with electrical components, call a qualified HVAC technician.
- Avoid over-tightening screws or connections, as this can damage the unit.
Tools You May Need
Here’s a list of simple tools that might come in handy:
- Wet/Dry Vacuum
- Screwdriver (Phillips and flathead)
- Pliers
- Flashlight
- White Vinegar
- New Air Filter
- HVAC Foil Tape
- Insulation Tape
FAQ
Here are some frequently asked questions:
- Q: How often should I change my AC filter? A: At least every 1-3 months, depending on usage and filter type.
- Q: Why is my AC dripping even after I cleaned the drain line? A: There may still be a blockage further down the line, or the evaporator coil could be frozen. Try thawing the coil and re-cleaning the drain line.
- Q: Can low refrigerant cause water to drip from my AC? A: Yes, low refrigerant can cause the evaporator coil to freeze, leading to water dripping when the ice melts.
- Q: Is it normal for my AC to drip a little water outside? A: Yes, it’s normal for the condensate drain line to drip water outside, especially on humid days. The problem is when water is dripping inside from vents.
Conclusion
Finding water dripping from your AC vents can be concerning, but with this guide, you can troubleshoot many common issues yourself. Start with the simple steps, like checking the air filter and cleaning the drain line. If the problem persists, don’t hesitate to contact a qualified HVAC technician. Addressing the issue promptly will prevent further damage and ensure your AC system continues to run efficiently.
Youtube Video:
Looking for more useful options?
Check out recommended resources that others find helpful.