
Introduction
A loud AC unit can be incredibly annoying and often indicates a problem that needs attention. Whether it’s a sudden increase in noise or a consistent, bothersome hum, addressing the issue promptly is crucial. Ignoring a loud AC can lead to further damage, decreased efficiency, and even a complete breakdown of your cooling system. This guide provides simple, step-by-step instructions to help you identify and resolve the problem, saving you money on potentially expensive repairs.
💡 Technical Key Takeaways:
- Core Focus: Diagnostic schematic and terminal connection layout for Ac Very Loud.
- Target Scope: Field technicians, automotive DIYers, and residential/commercial electricians.
- Safety Rule: Always disconnect the primary power source/battery terminal and verify zero voltage with a multimeter before touching wires.
Common Causes of AC Very Loud
Several factors can contribute to a noisy air conditioner. Here are some of the most common:
- Loose Parts: Vibrating panels or loose screws can create rattling sounds.
- Dirty Air Filter: A clogged filter restricts airflow, causing the unit to work harder and louder.
- Debris in the Outdoor Unit: Leaves, twigs, and other debris can get sucked into the fan, creating noise.
- Fan Blade Issues: Bent or damaged fan blades can cause imbalance and vibration.
- Compressor Problems: A failing compressor can produce a loud humming or buzzing sound.
- Refrigerant Leaks: Low refrigerant levels can cause the compressor to work harder and make more noise.
- Worn Bearings: The bearings in the fan motor can wear out over time, leading to squealing or grinding noises.
- Ductwork Issues: Loose or damaged ductwork can rattle or whistle.
Symptoms Checklist
Use this checklist to help pinpoint the source of the noise:
- Rattling Sound: Likely loose parts or debris.
- Humming or Buzzing: Could indicate a compressor or electrical issue.
- Squealing or Screeching: Often points to worn bearings or a slipping belt.
- Grinding Noise: May suggest internal damage to the compressor or fan motor.
- Whistling Sound: Possible ductwork leak or restricted airflow.
- Increased Noise When AC Starts: Suggests a problem with the compressor or starting components.
How to Fix AC Very Loud Step-by-Step Guide
Follow these steps to troubleshoot and potentially fix your noisy AC:
- Turn Off the AC: Switch off the AC unit at the thermostat and the breaker box for safety.
- Inspect the Outdoor Unit: Check for any visible debris, such as leaves, twigs, or grass clippings, around the unit.
- Clean the Outdoor Unit: Use a garden hose (with a gentle spray) to clean the fins of the outdoor unit. Be careful not to bend the fins.
- Check the Air Filter: Locate the air filter (usually inside the indoor unit or behind a vent). Remove and inspect it.
- Clean or Replace the Air Filter: If the filter is dirty, clean it with a vacuum cleaner or replace it with a new one.
- Inspect the Fan Blades: Carefully examine the fan blades (both indoor and outdoor) for any signs of damage or bending.
- Straighten Bent Fan Blades: If you find slightly bent blades, gently try to straighten them. Be careful not to break them.
- Tighten Loose Screws: Inspect the AC unit (both indoor and outdoor) for any loose screws or panels. Tighten them with a screwdriver.
- Listen for the Source of the Noise: With the unit running, try to pinpoint the exact location of the noise. This will help you narrow down the problem.
- Check for Refrigerant Leaks (Visual Inspection): Look for oily residue on the copper lines of the AC unit, which could indicate a refrigerant leak. (Note: confirming this requires professional tools)
- Inspect Ductwork (If Accessible): Check for any loose or damaged sections of ductwork that could be rattling or whistling.
- Secure Ductwork: If you find loose sections of ductwork, try to secure them with duct tape or metal foil tape.
- Lubricate the Fan Motor (If Applicable): Some fan motors have oil ports. If yours does, add a few drops of electric motor oil. (Consult your owner’s manual).
- Turn the AC Back On: After performing these steps, turn the AC unit back on at the breaker box and the thermostat.
- Monitor the Noise: Observe if the noise has decreased or disappeared. If the problem persists, further professional diagnosis might be needed.
Fix the Issue Without Buying Parts
Often, a noisy AC can be resolved with simple maintenance and troubleshooting steps that don’t require purchasing new parts:
- Reset the AC: Turn off the AC at the breaker for 30 minutes, then turn it back on. This can sometimes reset the system and resolve minor issues.
- Deep Cleaning: Thoroughly clean both the indoor and outdoor units, removing all dust, debris, and obstructions.
- Inspect Condenser Fins: Straighten bent condenser fins with a fin comb (available at most hardware stores) to improve airflow.
- Regular Maintenance: Schedule regular AC maintenance to prevent future problems. This includes cleaning the coils, checking refrigerant levels, and inspecting components.
When Replacement Might Be Necessary
In some cases, the noise may indicate a more serious problem that requires professional repair or even replacement. For example:
- Compressor Failure: A failing compressor often requires replacement, which can be expensive (typically ranging from $800 to $2000, including labor).
- Extensive Refrigerant Leak: Repairing a large refrigerant leak can be costly. If the leak is significant and the unit is old, replacement might be more economical.
- Fan Motor Failure: A completely failed fan motor may require replacement (typically costing $200-$500, including labor).
Safety Warning
- Always turn off the AC unit at the breaker box before performing any maintenance or repairs.
- Avoid touching any electrical components with wet hands.
- Be careful when working around sharp edges or moving parts.
- If you are not comfortable performing any of these steps, consult a qualified HVAC technician.
- Never attempt to repair a refrigerant leak yourself; this requires specialized equipment and training.
Tools You May Need
- Screwdriver (Phillips and flathead)
- Garden hose
- Vacuum cleaner
- Fin comb (optional)
- Duct tape or metal foil tape
- Electric motor oil (if applicable)
FAQ
Here are some frequently asked questions about noisy AC units:
- Q: Why is my AC suddenly so loud? A: It could be due to a variety of factors, such as debris in the unit, a dirty air filter, or a failing component.
- Q: Is it safe to run a noisy AC? A: It’s generally not recommended, as the noise could indicate a problem that could lead to further damage or even a breakdown.
- Q: How often should I clean my AC unit? A: At least once a year, preferably before the start of the cooling season.
- Q: Can I fix a refrigerant leak myself? A: No, refrigerant leaks require specialized equipment and training to repair safely and effectively.
Conclusion
A noisy AC unit can be frustrating, but with a little troubleshooting and maintenance, you may be able to resolve the problem yourself. Remember to always prioritize safety and consult a qualified HVAC technician if you are not comfortable performing any of these steps. Addressing the issue promptly can save you money and keep your AC running smoothly for years to come!
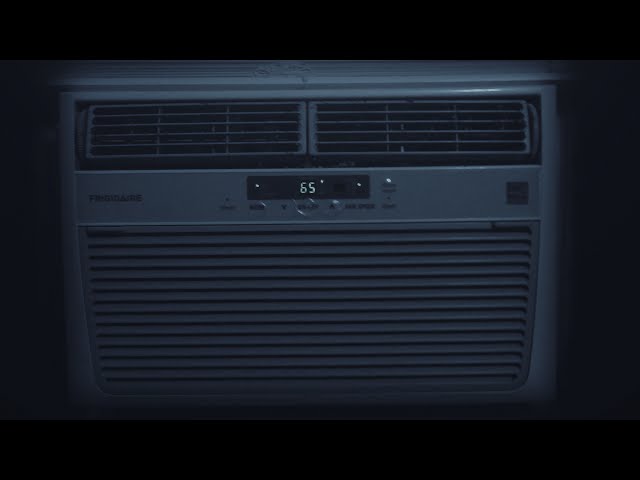
Youtube Video:
Quick Wiring Specifications & Terminal Guide
| Component / Circuit | Standard Wire Gauge | Recommended Protection |
|---|---|---|
| Control & Trigger Signals | 18 – 20 AWG | 5A – 7.5A Inline Fuse |
| Standard Auxiliary Load | 14 – 16 AWG | 15A – 20A Circuit Breaker |
| Main Power Feed / Supply | 10 – 12 AWG | 30A – 40A Heavy-Duty Relay |
Images References
Looking for more diagnostic guides? Explore our complete Air Conditioner Troubleshooting 3 section for step-by-step troubleshooting solutions.
