Troubleshooting Guide: 2013 Chevy Equinox Ac Controls Not Working
The 2013 Chevy Equinox AC controls may not be working due to various reasons. To diagnose and fix the issue, follow these troubleshooting steps: 1. Check the fuse – a blown fuse can cause the AC controls to stop working. 2. Inspect the control panel – ensure that there are no loose or damaged connections. 3. Test the AC compressor – a faulty compressor can prevent the controls from functioning. 4. Check the refrigerant levels – low refrigerant can lead to AC control issues. 5. Consult a professional – if the above steps don’t resolve the problem, it’s best to seek professional help for further diagnosis and repair.
In the sweltering heat of summer, an unreliable air conditioning system can quickly turn a pleasant drive into an uncomfortable ordeal. Picture this: you’re cruising down the highway, windows down, wind in your hair, when suddenly, the cool breeze is replaced by a blast of hot air.
Your heart sinks as you realize that your 2013 Chevy Equinox AC controls have given up on you. It’s a frustrating and inconvenient problem that many Equinox owners face, leaving them wondering how to restore their vehicle’s comfort.
Fortunately, you’ve come to the right place. In this troubleshooting guide, we will delve into the common causes behind the malfunctioning AC controls in your 2013 Chevy Equinox and guide you through the step-by-step process of diagnosing and fixing the issue. So, if you’re tired of sweating behind the wheel and craving the refreshing chill of a functioning AC, stick around.
We’ve got you covered.

- Replace Part Number: 198299, 23106025, 23291879, 23398670, 84786601, 84635623, 84666664
- Compatible with: Chevy Equinox 2018-2021 1.5L, GMC Canyon 2015-2021 2.5L, GMC Terrain 2018-2021 1.5L
- High-Quality: Manufactured from high-strength metal materials, with heat resistance and wear resistance. Ensuring long service life and durable performance
- Package Content: This Kit Included: 1x Pulley With Bearing, 1x Front Plate, 1x Electromagnetic Coil. Please confirm that this AC Compressor Clutch Kit for car will fit your car
- After-Sales Service:If you have any problems, please contact us at any time. We’re glad to help you. Please confirm your model and number carefully before purchase

- Compatible With: The oil pressure sending unit fit 2010-2016 Bui-ck LaCrosse, 2008-2017 Bui-ck Enclave, 2004-2007 Bui-ck Rainier, 2008-2010 Chevy Equinox, 2002-2009 Chevy Trailblazer, 2008-2010 Chevy Malibu, 2009-2017 Chevy Traverse, 2010-2011 Cadillac SRX, 2004-2012 G-M-C Canyon, 2007-2016 G-M-C Acadia, 2002-2009 G-M-C Envoy, 2006-2010 H3, 2007-2009 Pontiac G6, 2008-2010 Saturn Vue, 2007-2009 Suzuki XL-7, 2003-2008 Isuzu Ascender
- Replace OE Part Number: D1843A, 12635957, 12611588, 12579946, 12590793, 12570964, 12576388, D1823A, D1837A, D1838A, PS310, PS477, 8125709640, 8125799460, 8125907930, 8126115880.
- [Features]Directly replace, High-quality material, durable and long lasting;
- [Package list] 1pcs Oil Pressure Sensor Switch
- [Year Warranty]12-Months-Warranty,If you have any questions, please contact us via Amazon Message directly.

- OEM Part Number: The replace part number of engine oil pressure sensor is D1843A, 12570964,12635957, 12611588, 12579946, 12590793, 12576388, D1823A, D1837A, D1838A, PS310, PS477, 8125709640, 8125799460, 8125907930, 8126115880
- Scope of Application: The Oil Pressure Switch Sensor is suitable for Buick LaCrosse 2010-2016, for Buick Enclave 2008-2017, for Buick Rainier 2004-2007, for Chevy Equinox 2008-2010, for Chevy Trailblazer 2002-2009, for Chevy Malibu 2008-2010, Chevy Traverse 2009-2017, for Cadillac SRX 2010-2011, for GMC Canyon 2004-2012, for GMC Acadia 2007-2016, for GMC Envoy 2002-2009, for Pontiac G6 2007-2009, for Saturn Vue 2008-2010, for Suzuki XL-7 2007-2009, for Isuzu Ascende 2003-2008
- Premium Material: This Auto Oil Pressure Switch is made of quality iron and plastic material, not only light weight, but also has good water resistance, corrosion resistance, durable, can be used for a long time
- Function: The role of the oil pressure switch is to determine whether the minimum oil pressure has been reached, when there is no pressure, the oil pressure switch on, if the pressure rises to more than a certain value, the switch off, the engine control unit through the switch off state can determine whether the oil pressure in the oil system is sufficient
- Package contents: The package includes 1 x Engine Oil Pressure Sensor Sender Switch
I. Common Issues with 2013 Chevy Equinox AC Controls
A. Introduction to the Problem
When the temperature rises and the summer heat becomes unbearable, a malfunctioning AC system in your 2013 Chevy Equinox can quickly turn your driving experience into a sweaty and uncomfortable ordeal. The AC controls not working is a common problem that many Equinox owners encounter, leaving them frustrated and desperate for a solution. In this section, we will explore the various symptoms of non-functioning AC controls.
B. Symptoms of AC Controls Not Working
Before we dive into troubleshooting, let’s take a look at some common symptoms that indicate your 2013 Chevy Equinox AC controls are not working properly:
- No air blowing from the vents
- Uneven or weak airflow
- Inability to adjust temperature settings
- Inability to change fan speed
- AC controls freezing or becoming unresponsive
If you’re experiencing any of these issues, it’s time to roll up your sleeves and start troubleshooting.
II. Troubleshooting Steps for Non-Functioning AC Controls
A. Step 1: Checking the AC Fuse
The first step in troubleshooting non-functioning AC controls is to check the AC fuse. A blown fuse can prevent the AC controls from receiving power, causing them to malfunction. Follow these sub-steps to locate and inspect the AC fuse:
1. Locating the Fuse Box
The fuse box in a 2013 Chevy Equinox is usually located under the dashboard on the driver’s side or in the engine compartment. Consult your vehicle’s manual or check online resources for the exact location.
2. Identifying the AC Fuse
Once you’ve located the fuse box, look for a diagram or labeling that indicates the AC fuse. It is typically labeled as “AC” or “Air Conditioning.”
3. Checking the Fuse for Damage
Inspect the AC fuse visually to check for any signs of damage, such as a blown filament or discoloration. If the fuse appears to be damaged, replace it with a new one of the same amperage rating.
B. Step 2: Inspecting the AC Control Module
If the AC fuse is not the culprit, the next step is to inspect the AC control module. Loose connections or power supply issues to the module can cause the AC controls to malfunction. Follow these sub-steps to inspect the AC control module:
1. Locating the AC Control Module
The AC control module is usually located behind the dashboard, near the AC controls. Consult your vehicle’s manual or check online resources for the exact location.
2. Checking for Loose Connections
Inspect the connections between the AC control module and the wiring harness. Make sure all connections are secure and free from corrosion or debris. If any connections are loose, reconnect them firmly.
3. Verifying Power Supply to the Module
Using a multimeter, check the power supply to the AC control module. Ensure that the module is receiving the appropriate voltage. If there is no power supply, further diagnosis may be required to identify the underlying issue.
C. Step 3: Testing the AC Control Panel
If the AC control module is functioning correctly, the next step is to test the AC control panel itself. Physical damage or wear to the control panel can cause it to become unresponsive. Follow these sub-steps to test the AC control panel:
1. Accessing the Control Panel
Remove any panels or trim necessary to access the AC control panel. Be careful not to damage any surrounding components during the removal process.
2. Checking for Physical Damage or Wear
Inspect the AC control panel for any physical damage, such as cracked buttons or a worn-out appearance. Damaged or worn components may need to be repaired or replaced.
3. Using a Multimeter to Test Continuity
Using a multimeter, test the continuity of the buttons on the AC control panel. Press each button and check if the multimeter registers a change in resistance. If a button fails the continuity test, it may need to be replaced.
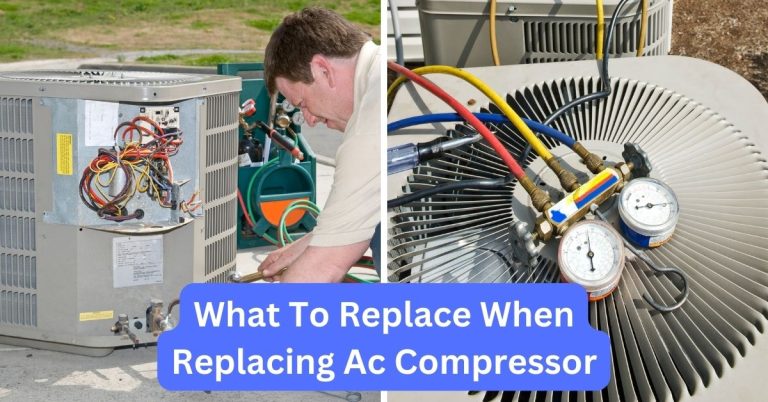
D. Step 4: Verifying AC Compressor Operation
If the AC control panel is in good condition, the next step is to verify the operation of the AC compressor. The compressor is responsible for cooling the air before it’s blown into the cabin. Follow these sub-steps to check the AC compressor:
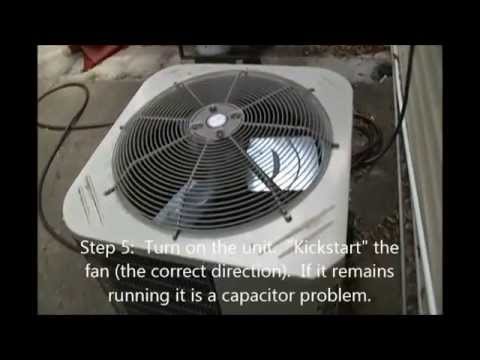
1. Checking for Power Supply to the Compressor
Using a multimeter, check if the AC compressor is receiving power. If there is no power supply, check the wiring and connections between the compressor and the AC control module. Repair any faulty connections or wiring issues.
2. Inspecting the Compressor Clutch
Visually inspect the compressor clutch for any signs of damage or wear. The clutch is responsible for engaging and disengaging the compressor as needed. If the clutch appears damaged or worn, it may need to be replaced.
3. Testing Compressor Functionality
If the compressor is receiving power and the clutch is in good condition, further diagnosis may be required to determine if the compressor is functioning properly. Consult a professional or refer to your vehicle’s manual for guidance on compressor testing.
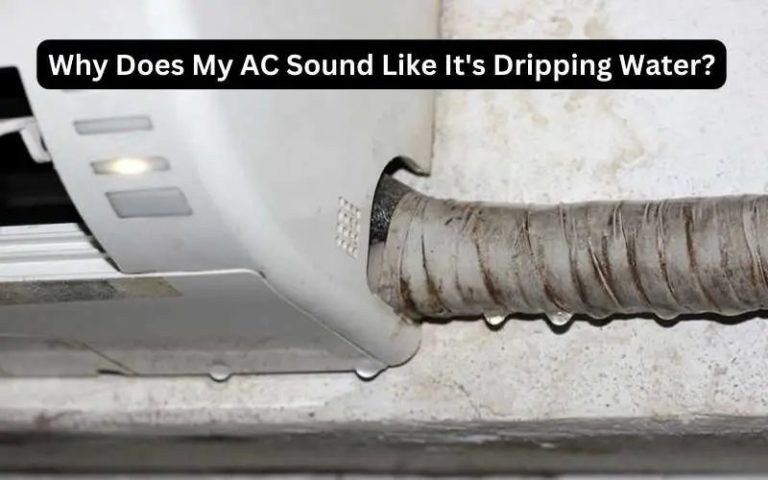
E. Step 5: Checking for AC Refrigerant Leaks
If the AC compressor is operating correctly, the final step is to check for refrigerant leaks. Low refrigerant levels can prevent the AC system from cooling effectively. Follow these sub-steps to check for AC refrigerant leaks:
1. Using a Leak Detection Kit
Obtain a leak detection kit designed for AC systems. Follow the instructions provided with the kit to identify any leaks in the AC system.
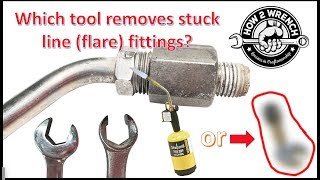
2. Inspecting AC Lines and Components
Visually inspect the AC lines and components for any signs of refrigerant leaks, such as oil stains or residue. Pay close attention to connections, joints, and fittings.
3. Recharging the AC System (if Necessary)
If a refrigerant leak is detected and the refrigerant level is low, the AC system may need to be recharged. Consult a professional or refer to your vehicle’s manual for guidance on recharging the AC system.
III. Repairing or Replacing Faulty AC Components
A. Repairing the AC Control Module or Panel
If any faults are found with the AC control module or panel, you may attempt to repair them before considering a replacement. Follow these sub-steps to repair the AC control module or panel:
1. Reattaching Loose Connections
If the issue with the AC control module or panel was due to loose connections, reattach them firmly. Ensure all connections are secure and free from debris.
2. Cleaning or Repairing Damaged Components
If any components of the AC control module or panel are damaged or worn, attempt to clean or repair them. Use appropriate cleaning agents or adhesives to fix the issue.
3. Reinstalling the Control Module or Panel
Once you’ve repaired the AC control module or panel, reinstall it in its original location. Ensure all connections are secure and properly reattached.
B. Replacing the AC Control Module or Panel
If the AC control module or panel cannot be repaired or the damage is severe, you may need to replace the faulty component. Follow these sub-steps to replace the AC control module or panel:
1. Sourcing a Replacement Module or Panel
Find a suitable replacement for the faulty AC control module or panel. Consult a reputable supplier or dealership to ensure compatibility with your vehicle.
2. Removing the Old Module or Panel
Remove the old AC control module or panel from its location. Disconnect any wiring harnesses or connectors attached to the component.
3. Installing the New Module or Panel
Install the new AC control module or panel in the same location as the old one. Reattach any wiring harnesses or connectors and ensure they are securely connected.
C. Repairing or Replacing the AC Compressor
If the AC compressor is found to be faulty, it may need to be repaired or replaced. Follow these sub-steps to repair or replace the AC compressor:
1. Assessing Compressor Damage
Consult a professional or refer to your vehicle’s manual to assess the damage to the AC compressor. Determine if it can be repaired or if a replacement is necessary.
2. Repairing Minor Issues (if Possible)
If the damage to the AC compressor is minor, such as a faulty valve or seal, it may be possible to repair it. Consult a professional to perform the necessary repairs.
3. Replacing the Compressor (if Necessary)
If the damage to the AC compressor is significant or it cannot be repaired, it will need to be replaced. Consult a professional or refer to your vehicle’s manual for guidance on replacing the AC compressor.
D. Fixing AC Refrigerant Leaks
If AC refrigerant leaks are detected, they should be addressed promptly to ensure proper functioning of the AC system. Follow these sub-steps to fix AC refrigerant leaks:
1. Identifying Leak Sources
Locate the sources of the refrigerant leaks by following the instructions provided with the leak detection kit. Identify the components or connections that need to be repaired or replaced.
2. Repairing Minor Leaks
If the refrigerant leaks are minor, such as small cracks or holes, they may be repairable. Use appropriate sealants or repair kits to fix the leaks.
3. Replacing Leaking Components (if Necessary)
If the refrigerant leaks are severe or the components are damaged beyond repair, they will need to be replaced. Consult a professional or refer to your vehicle’s manual for guidance on replacing AC components.
IV. Common Mistakes to Avoid
A. Incorrectly Diagnosing the Problem
One common mistake when troubleshooting AC control issues is incorrectly diagnosing the problem. It’s essential to follow a systematic approach and thoroughly inspect each component before concluding the root cause.
B. Neglecting Routine AC Maintenance
Another mistake to avoid is neglecting routine AC maintenance. Regularly cleaning or replacing air filters, checking refrigerant levels, and performing other recommended maintenance tasks can prevent AC control problems from occurring.
C. Using Incorrect Parts or Components During Repairs
Using incorrect parts or components during repairs can exacerbate the issue or cause further damage to the AC system. Always ensure that you are using the correct parts recommended by the manufacturer or consult a professional for guidance.
V. Conclusion
A. Recap of Common Issues with 2013 Chevy Equinox AC Controls
In conclusion, the 2013 Chevy Equinox AC controls not working is a frustrating problem that can ruin your driving experience. We have discussed the common issues faced by Equinox owners and provided a step-by-step troubleshooting guide to help you diagnose and fix the problem.
B. Importance of Proper Troubleshooting and Maintenance
Proper troubleshooting and maintenance of your AC system are crucial to ensure its reliable and efficient operation. By following the steps outlined in this guide and performing regular maintenance tasks, you can prevent AC control issues and enjoy a comfortable driving experience.
C. Final Tips for Resolving AC Control Problems
Here are some final tips to keep in mind when resolving AC control problems:
- Refer to your vehicle’s manual for specific instructions and guidelines.
- Consult a professional if you are unsure or uncomfortable performing any troubleshooting or repairs.
- Always prioritize safety and use appropriate protective equipment when working on your vehicle.
With the knowledge and guidance provided in this troubleshooting guide, you can conquer the AC control issues in your 2013 Chevy Equinox and enjoy a cool and comfortable ride all summer long.
AC not working!!! The CAR WIZARD shows how to easily isolate the problem
Why are my AC controls not working in my 2013 Chevy Equinox?
How can I troubleshoot my AC controls in my 2013 Chevy Equinox?
Can I fix the AC controls myself?
How much does it cost to repair the AC controls in a 2013 Chevy Equinox?
Can I still drive my 2013 Chevy Equinox with non-functioning AC controls?
Final Summary: Troubleshooting and Repairing 2013 Chevy Equinox AC Control Issues
In conclusion, the 2013 Chevy Equinox AC controls not working is a common issue that many owners face. The symptoms of non-functioning AC controls include no air blowing from the vents, uneven or weak airflow, inability to adjust temperature settings, inability to change fan speed, and freezing or unresponsive controls.
To troubleshoot this problem, you should first check the AC fuse and replace it if necessary. If the fuse is not the issue, inspect the AC control module for loose connections and verify the power supply.
Next, test the AC control panel for physical damage or wear and check the continuity of the buttons. If the controls are functioning properly, verify the operation of the AC compressor and check for refrigerant leaks. When repairing or replacing faulty AC components, you can try to repair the control module or panel by reattaching loose connections or cleaning damaged components.
If these methods don’t work, you may need to replace the faulty component. For the AC compressor, assess the damage and decide whether it can be repaired or needs to be replaced. If refrigerant leaks are detected, try to repair minor leaks or replace the leaking components if necessary.