
Introduction
Discovering a puddle of water inside your KitchenAid refrigerator can be frustrating. Not only can it damage your food and create a mess, but it also indicates a potential problem that, if left unaddressed, could lead to more serious issues with your appliance. Leaks often happen when the defrost drain is clogged, causing ice to melt and overflow. Addressing this promptly is important to prevent mold growth, food spoilage, and costly repairs.
💡 Technical Key Takeaways:
- Core Focus: Diagnostic schematic and terminal connection layout for Kitchenaid Refrigerator Leaking Water Inside.
- Target Scope: Field technicians, automotive DIYers, and residential/commercial electricians.
- Safety Rule: Always disconnect the primary power source/battery terminal and verify zero voltage with a multimeter before touching wires.
Common Causes of KitchenAid Refrigerator Leaking Water Inside
Here are some of the most frequent reasons for a leaking refrigerator:
- Clogged Defrost Drain: This is the most common culprit. Ice buildup blocks the drain, causing meltwater to overflow inside the fridge.
- Frozen Water Line: If you have an ice maker or water dispenser, the water line can freeze, causing a backup and eventual leak when it melts.
- Faulty Door Seal: A damaged or dirty door seal lets warm air in, causing condensation and water accumulation.
- Full Drain Pan: The drain pan located at the bottom of the fridge collects excess water. If it’s full, it can overflow.
- Improper Leveling: If your refrigerator isn’t level, water can accumulate in areas where it shouldn’t.
- Clogged Water Filter: A clogged filter restricts water flow, increasing pressure and potentially causing leaks around the filter housing.
- Internal Cracks or Damage: Small cracks in the fridge’s lining or internal components can lead to water leaks.
- High Humidity: In humid environments, condensation can form more easily inside the refrigerator.
Symptoms Checklist
Look for these indicators to confirm the source of the leak:
- Pooling water on the bottom of the refrigerator.
- Ice buildup on the back wall of the freezer.
- Water dripping from the ceiling of the refrigerator compartment.
- Excessive condensation inside the refrigerator.
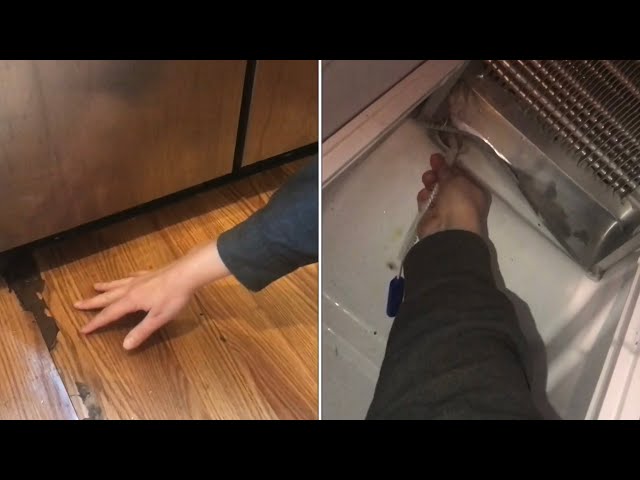
- Water leaking from under the refrigerator.
- A foul odor inside the refrigerator.
- Ice maker not working correctly or dispensing less ice.
How to Fix KitchenAid Refrigerator Leaking Water Inside Step-by-Step Guide
Follow these steps to troubleshoot and fix the leak:
- Unplug the Refrigerator: Always disconnect the power before working on any appliance.
- Locate the Defrost Drain: It’s usually located on the back wall of the freezer compartment, often behind a panel. Consult your owner’s manual if needed.
- Melt Any Ice Buildup: If you see ice blocking the drain, use a hairdryer on a low setting to melt it. Avoid using sharp objects that could damage the drain.
- Clear the Defrost Drain: Use a long, flexible object like a pipe cleaner, a thin wire, or a turkey baster to clear the drain. You can also use a mixture of warm water and baking soda.
- Flush the Drain: Pour a cup of warm water down the drain to flush out any remaining debris.
- Inspect the Door Seal: Check the door seal (gasket) for any damage, cracks, or dirt. Clean the seal with warm, soapy water and a soft cloth.
- Level the Refrigerator: Use a level to ensure the refrigerator is sitting correctly. Adjust the leveling feet at the bottom if needed.
- Check the Drain Pan: Locate the drain pan (usually at the bottom or back of the refrigerator) and empty it. Inspect it for cracks or damage.
- Inspect the Water Line (If Applicable): If you have an ice maker or water dispenser, check the water line for any kinks, cracks, or leaks. Ensure it’s properly connected.
- Replace the Water Filter (If Applicable): A clogged filter can cause leaks. Replace the water filter according to the manufacturer’s instructions.
- Plug in the Refrigerator: After completing the above steps, plug the refrigerator back in and monitor it for any further leaks.
- Give It Time: It may take a few hours for the refrigerator to stabilize after you’ve cleared the drain. Continue to monitor for leaks.
Fix the Issue Without Buying Parts
Before considering replacement parts, try these free methods:
- Reset the Refrigerator: Unplug the refrigerator for 10 minutes, then plug it back in. This can sometimes resolve minor issues.
- Clean Regularly: Wipe up spills promptly and clean the interior of the refrigerator regularly to prevent buildup and odors.
- Inspect Regularly: Periodically inspect the door seal, drain pan, and water lines for any signs of wear or damage.
- Ensure Proper Ventilation: Make sure the refrigerator has adequate space around it for proper airflow.
When Replacement Might Be Necessary
If the leak persists after trying the above steps, or if you notice significant damage to internal components, you may need to consider replacing parts or the entire refrigerator. A new door seal can cost between $50 and $150. If the leak stems from a faulty water valve or another internal component, repairs could range from $100 to $300. If the issue is widespread and the refrigerator is old, consider a new appliance, ranging from $800 to $3000. For more related activities, check out our My Fridge Is Not Making Any Sound.
Safety Warning
- Always unplug the refrigerator before performing any maintenance or repairs.
- Avoid standing in water while working on the refrigerator to prevent electric shock.
- Be careful when using sharp objects to clear the defrost drain.
- If you are uncomfortable performing any of these steps, contact a qualified appliance repair technician.
Tools You May Need
- Screwdriver (Phillips and flathead)
- Pipe cleaner or thin wire
- Turkey baster
- Warm water
- Baking soda
- Soft cloth
- Level
- Hairdryer (optional)
FAQ
Here are some frequently asked questions about refrigerator leaks:
-
Q: Why is my KitchenAid refrigerator leaking after I defrost it?
A: Defrosting can release a large amount of water that overwhelms a partially blocked drain. Clear the drain thoroughly after defrosting. -
Q: How often should I clean the defrost drain?
A: It’s recommended to clean the defrost drain every 6 months, or more often if you notice frequent leaks. -
Q: Can a clogged water filter cause a refrigerator leak?
A: Yes, a clogged water filter can increase pressure and cause leaks around the filter housing. -
Q: What should I do if the drain pan is cracked?
A: A cracked drain pan should be replaced to prevent water from leaking onto the floor.
Conclusion
Finding a leak in your KitchenAid refrigerator can be alarming, but many causes are simple to fix. By following this troubleshooting guide, you can often resolve the issue yourself and save money on repair costs. If you’ve tried these steps and the leak persists, it might be time to call a qualified technician. Don’t delay addressing the problem prompt action can prevent further damage and keep your refrigerator running efficiently.
Youtube Video:
Quick Wiring Specifications & Terminal Guide
| Component / Circuit | Standard Wire Gauge | Recommended Protection |
|---|---|---|
| Control & Trigger Signals | 18 – 20 AWG | 5A – 7.5A Inline Fuse |
| Standard Auxiliary Load | 14 – 16 AWG | 15A – 20A Circuit Breaker |
| Main Power Feed / Supply | 10 – 12 AWG | 30A – 40A Heavy-Duty Relay |
Images References
Looking for more diagnostic guides? Explore our complete Refrigerator Problems 4 section for step-by-step troubleshooting solutions.
