Introduction
A loud buzzing sound coming from your HVAC (Heating, Ventilation, and Air Conditioning) system can be alarming. It often indicates a problem that, if left unaddressed, can lead to more significant and costly repairs. Buzzing can occur during the heating or cooling cycle, and sometimes even when the unit is off. Ignoring it can lead to reduced efficiency, higher energy bills, or even complete system failure. This guide provides a step-by-step approach to diagnose and potentially fix the buzzing issue yourself.
Common Causes of HVAC Loud Buzzing
Here are some common reasons why your HVAC might be making a buzzing noise:
- Loose Parts: Screws, panels, or even the fan blades can become loose over time, vibrating and causing a buzzing sound.
- Debris in Fan: Leaves, twigs, or other debris can get caught in the outdoor unit’s fan, causing a buzzing or rattling noise.
- Electrical Issues: A failing capacitor, loose wiring, or a short circuit can all cause a buzzing sound.
- Dirty Condenser Coils: A build-up of dirt and debris on the condenser coils can restrict airflow, causing the unit to work harder and buzz.
- Refrigerant Leaks: A leak in the refrigerant line can cause the compressor to work overtime and produce a buzzing sound.
- Compressor Problems: The compressor is the heart of the system, and a failing compressor can produce a loud buzzing or humming noise.
- Contactor Problems: The contactor is an electrical switch that controls the compressor. A faulty contactor can buzz or hum loudly.
- Frozen Evaporator Coil: Restricted airflow caused by a dirty filter can lead to a frozen evaporator coil inside the indoor unit, resulting in unusual noises.
Symptoms Checklist
Use this checklist to help identify the issue accurately:
- Buzzing noise occurs only when the AC or heat is running.
- Buzzing noise is constant, regardless of the system’s mode (heating or cooling).
- Buzzing noise is louder at certain times.
- Buzzing noise is accompanied by a decrease in cooling or heating efficiency.
- You can see ice forming on the outdoor unit (especially in cooling mode).
- You can smell a burning odor.
- The circuit breaker for the HVAC system trips frequently.
How to Fix HVAC Loud Buzzing Step-by-Step Guide
Follow these steps to troubleshoot the buzzing sound:
- Safety First: Turn off the power to your HVAC system at the circuit breaker. This is crucial for your safety.
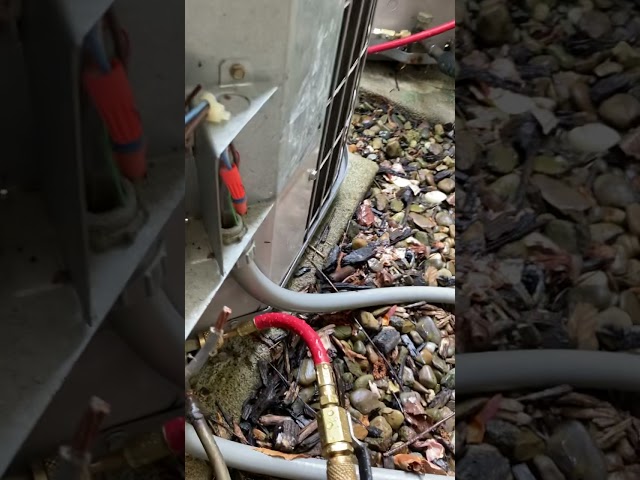
- Inspect the Outdoor Unit: Visually inspect the outdoor condenser unit. Look for loose panels, debris, or anything that might be causing a vibration.
- Clean the Outdoor Unit: Remove any leaves, twigs, or other debris from inside the unit. Use a garden hose (with a gentle spray) to clean the condenser coils.
- Check for Loose Screws: Tighten any loose screws or bolts on the unit’s panels, fan housing, and motor mounts.
- Inspect the Fan Blades: Ensure the fan blades are not bent or damaged. Gently try to spin the fan; it should move freely. If it’s difficult to turn, the motor might be failing.
- Check the Indoor Unit: Inspect the indoor unit (furnace or air handler). Look for any signs of damage or loose parts.
- Replace the Air Filter: A dirty air filter restricts airflow, which can cause the system to work harder and make noise. Replace it with a new, clean filter.
- Listen Closely: Turn the power back on and listen carefully to pinpoint the source of the buzzing. Be cautious and do not touch any electrical components.
- Check the Contactor: If you’re comfortable doing so, visually inspect the contactor (located inside the outdoor unit, behind a panel). Look for signs of damage or corrosion. This component controls power to the compressor. Note: If you don’t have experience with electrical work, skip this step and call a professional.
- Turn Off the Unit Again: Turn off the power at the breaker before doing anything further.
- Tighten Electrical Connections: (If comfortable and ONLY after shutting off power) Use a screwdriver to gently tighten any loose wiring connections that you can safely access. Be very careful not to touch any exposed wires.
- Listen One More Time: Turn the power back on and listen to the HVAC system, paying attention to where the buzzing sound is coming from.
- Document the Noise: If the buzzing persists, make a recording of the sound to show a technician.
- Note the Symptoms: Document everything you have observed like when the buzzing sound appears, and what you’ve done to troubleshoot the issue.
Fix the Issue Without Buying Parts
Many times, the buzzing can be resolved without needing to buy new parts:
- Reset the System: Sometimes, simply turning off the power at the breaker for 30 minutes and then turning it back on can reset the system and resolve minor issues.
- Deep Cleaning: Thoroughly clean both the indoor and outdoor units, removing all dust, debris, and obstructions.
- Inspection Tips: Regularly inspect the unit for loose parts, debris buildup, and any signs of damage. Early detection can prevent more serious problems.
- Maintenance Basics: Change your air filter regularly (every 1-3 months) and schedule annual professional maintenance to keep your system running smoothly.
When Replacement Might Be Necessary
If the buzzing persists after trying the above steps, it might indicate a more serious problem requiring professional attention. In some cases, a failing compressor, a faulty contactor, or a refrigerant leak might necessitate a replacement part. Compressor replacement can range from $800 to $2,500, while contactor replacement might cost between $100 and $300. Refrigerant leaks require professional repair and refrigerant refills, typically costing $200 to $800. In these cases, consulting with a qualified HVAC technician is crucial for accurate diagnosis and repair.
Safety Warning
Please adhere to these safety warnings:
- Always turn off the power to the HVAC system at the circuit breaker before performing any maintenance or inspection.
- Never touch any electrical components or wiring unless you are qualified and comfortable doing so.
- Avoid working on the HVAC system in wet or damp conditions.
- If you smell gas, immediately turn off the gas supply and evacuate the area. Contact your gas company or fire department.
Tools You May Need
Here’s a list of simple tools that might be helpful for this repair:
- Screwdriver (Phillips and flathead)
- Wrench set
- Garden hose with a gentle spray nozzle
- Vacuum cleaner with a brush attachment
- Work gloves
FAQ
Here are some frequently asked questions:
-
Q: Why is my AC buzzing even when it’s not running?
A: This could indicate an electrical issue, such as a faulty capacitor or a loose wire. Turn off the power and inspect the wiring. If unsure, call a professional. -
Q: How often should I change my air filter?
A: Change your air filter every 1-3 months, depending on usage and air quality. A dirty filter restricts airflow and can cause problems. -
Q: Can I clean the condenser coils myself?
A: Yes, you can gently clean the condenser coils with a garden hose and a soft brush. Be careful not to damage the fins. -
Q: What does it mean if I see ice forming on my outdoor unit?
A: Ice forming on the outdoor unit usually indicates restricted airflow or a refrigerant leak. Check your air filter and consider calling a professional.
Conclusion
Troubleshooting a loud buzzing sound in your HVAC system can seem daunting, but by following these steps, you can often identify and resolve the issue yourself. Remember to prioritize safety and turn off the power before performing any maintenance. If the buzzing persists or if you are uncomfortable working with electrical components, don’t hesitate to call a qualified HVAC technician for assistance. Taking proactive steps can save you money on costly repairs and extend the life of your HVAC system.
Youtube Video:
Looking for more useful options?
Check out recommended resources that others find helpful.