
Introduction
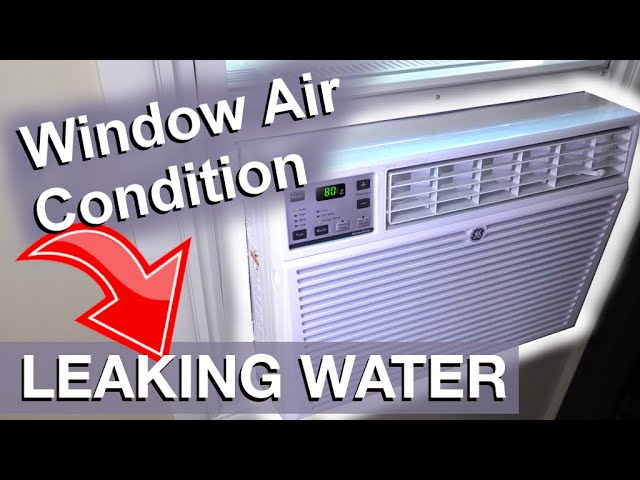
A window AC unit leaking water outside can be a common and sometimes alarming issue, especially during peak cooling season. While a little condensation is normal, excessive leaking can indicate a problem that, if left unaddressed, could lead to water damage inside your home, reduced cooling efficiency, or even damage to the unit itself. It’s important to identify the cause of the leak quickly to prevent further complications and keep your AC running smoothly.
💡 Technical Key Takeaways:
- Core Focus: Diagnostic schematic and terminal connection layout for Window Ac Unit Leaking Water Outside.
- Target Scope: Field technicians, automotive DIYers, and residential/commercial electricians.
- Safety Rule: Always disconnect the primary power source/battery terminal and verify zero voltage with a multimeter before touching wires.
Common Causes of Window AC Unit Leaking Water Outside
Here are several reasons why your window AC unit might be leaking water outside:
- Clogged Drain Hole: This is the most frequent culprit. Dust, dirt, and debris can accumulate in the drain hole, preventing water from escaping properly.
- Improper Installation Angle: Window AC units are designed to be slightly tilted downwards to allow condensation to drain outwards. If the unit is level or tilted inwards, water will leak outside.
- Dirty Air Filter: A clogged air filter restricts airflow, causing the evaporator coil to freeze. When the ice melts, it produces a large amount of water that the drainage system can’t handle.
- Damaged or Cracked Drain Pan: The drain pan collects condensation. If it’s cracked, water will leak out.
- High Humidity: Extremely humid conditions can produce more condensation than the unit is designed to handle, leading to overflow.
- Frozen Evaporator Coils: Similar to a dirty air filter, low refrigerant levels can cause the evaporator coils to freeze.
- Blocked or Kinked Drain Line (if applicable): Some units have a drain line that carries water away. If this line is blocked or kinked, it can cause a backup and leak.
- Debris Accumulation Outside: Leaves, dirt, or nests built around the outside of the unit can block proper drainage.
Symptoms Checklist
Here are some indicators to help you confirm that the leaking water is indeed a problem:
- Visible water dripping or pooling outside the unit.
- More water than usual dripping outside. A few drips are normal, but a steady stream isn’t.
- Water stains or dampness around the window or wall beneath the AC unit.
- Reduced cooling performance of the AC unit.
- Ice forming on the evaporator coils (you might need to remove the front panel to see this).
- Unusual noises coming from the AC unit.
How to Fix Window AC Unit Leaking Water Outside Step-by-Step Guide
Follow these steps to troubleshoot and fix the leaking water issue:
- Safety First: Unplug the AC unit from the electrical outlet before beginning any inspection or repair.
- Inspect the Installation Angle: Ensure the unit is slightly tilted downwards towards the outside. Use a level to check. If it’s not tilted properly, adjust the mounting brackets or shims.
- Check the Drain Hole: Locate the drain hole (usually on the back or bottom of the unit). Use a straightened paperclip, wire, or small screwdriver to gently clear any blockage.
- Clean the Air Filter: Remove the air filter and wash it with mild soap and water. Rinse thoroughly and let it dry completely before replacing it. Replace the filter if it’s old or damaged.
- Inspect the Drain Pan: Carefully remove the AC unit from the window (with assistance if it’s heavy). Check the drain pan for cracks or damage. If it’s cracked, you might consider a temporary patch with waterproof tape, but professional repair/replacement is recommended.
- Remove Debris: Clear away any leaves, dirt, or debris around the outside of the unit that could be blocking drainage.
- Check for Ice Buildup: If you suspect frozen coils, unplug the unit and let it thaw completely (this could take several hours).
- Inspect the Drain Line (if applicable): If your unit has a drain line, check it for kinks, clogs, or damage. Disconnect it and flush it out with water.
- Reassemble and Test: Carefully reinstall the AC unit in the window. Plug it back in and turn it on. Observe if the leaking has stopped.
- Monitor for a Few Hours: Continue to monitor the unit for a few hours to ensure the leaking doesn’t return.
Fix the Issue Without Buying Parts
Many leaking problems can be resolved without purchasing new parts:
- Cleaning is Key: Regular cleaning of the air filter and drain hole is crucial for preventing future leaks.
- Proper Installation: Ensuring the unit is properly angled during installation is essential.
- Seasonal Maintenance: At the beginning of each cooling season, inspect the unit for any signs of damage or wear and tear.
- Reset the Unit: Sometimes simply unplugging the unit for 15-20 minutes and plugging it back in can reset internal components and resolve minor issues.
When Replacement Might Be Necessary
If the drain pan is severely cracked, or if the unit is old and inefficient despite your troubleshooting efforts, replacement might be the best option. Replacement costs can range from $150 to $500+ USD, depending on the size and features of the new unit. Commonly failing parts that might warrant replacement considerations include the compressor and the evaporator coil. However, addressing the water leak first might prolong the life of the unit.
Safety Warning
- Always unplug the AC unit before performing any maintenance or repairs.
- Never work on electrical appliances while standing in water or on a wet floor.
- Use caution when handling the AC unit, as it can be heavy. Get assistance if needed.
- Avoid touching any internal components of the unit while it is plugged in.
Tools You May Need
Here’s a list of tools you might find helpful for troubleshooting and fixing the leak:
- Screwdrivers (Phillips and flathead)
- Level
- Paperclip or wire
- Mild soap
- Water hose (for cleaning)
- Waterproof tape (for temporary drain pan repair)
FAQ
Here are some frequently asked questions about window AC unit leaks:
- Q: Is it normal for my window AC unit to leak water outside? A: A small amount of condensation is normal, but excessive dripping or a steady stream indicates a problem.
- Q: How often should I clean my AC unit’s air filter? A: Ideally, you should clean your air filter every 2-4 weeks, or more often if you have pets or allergies.
- Q: What happens if I ignore the leaking water? A: Ignoring the leak can lead to water damage in your home, reduced cooling efficiency, and potential damage to the AC unit itself.
- Q: Can I use bleach to clean the drain hole? A: It’s generally not recommended to use bleach, as it can damage the plastic components. Use a mild soap and water solution instead.
Conclusion
A leaking window AC unit can be a nuisance, but with a little troubleshooting and some basic maintenance, you can often resolve the issue yourself. By following these steps, you can identify the cause of the leak and take the necessary actions to fix it. If you’ve tried these steps and the problem persists, it’s always best to consult with a qualified HVAC technician to avoid further damage to your unit or your home. Remember, proper maintenance is key to keeping your AC unit running efficiently and preventing future leaks.
Youtube Video:
Quick Wiring Specifications & Terminal Guide
| Component / Circuit | Standard Wire Gauge | Recommended Protection |
|---|---|---|
| Control & Trigger Signals | 18 – 20 AWG | 5A – 7.5A Inline Fuse |
| Standard Auxiliary Load | 14 – 16 AWG | 15A – 20A Circuit Breaker |
| Main Power Feed / Supply | 10 – 12 AWG | 30A – 40A Heavy-Duty Relay |
Images References
Looking for more diagnostic guides? Explore our complete Air Conditioner Troubleshooting 6 section for step-by-step troubleshooting solutions.
