
Introduction
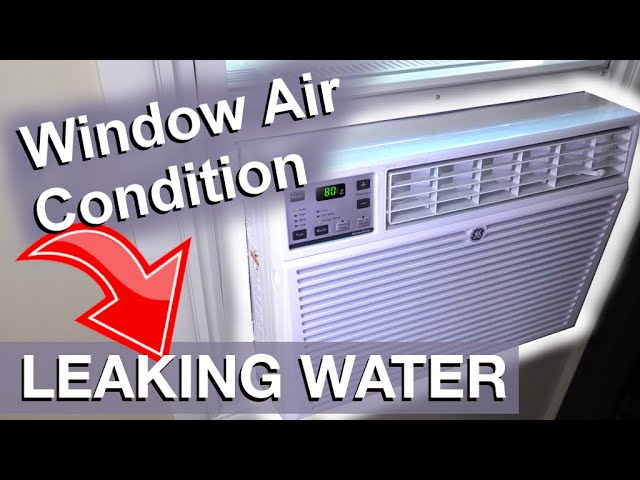
A window AC unit leaking water from the front is a common problem, especially during periods of high humidity. It can be a nuisance, potentially damaging your floors or walls, and indicates that your AC isn’t functioning optimally. Addressing this issue promptly is important to prevent further damage and maintain the efficiency of your cooling system.
💡 Technical Key Takeaways:
- Core Focus: Diagnostic schematic and terminal connection layout for Window Ac Unit Leaking Water From Front.
- Target Scope: Field technicians, automotive DIYers, and residential/commercial electricians.
- Safety Rule: Always disconnect the primary power source/battery terminal and verify zero voltage with a multimeter before touching wires.
Common Causes of Window AC Unit Leaking Water From Front
Here are some common reasons why your window AC unit might be leaking water from the front:
- Clogged Drain: The most frequent culprit is a blocked drainpipe or drain hole. Condensation can’t escape, backing up and leaking out the front.
- Incorrect Installation Angle: Window AC units are designed to tilt slightly backward so condensation can drain outside. If it’s tilted forward or level, water will leak inside.
- Dirty Air Filter: A clogged air filter restricts airflow, causing the evaporator coil to freeze. When the ice melts, the excess water overflows the drain pan.
- Damaged Drain Pan: The drain pan collects condensation. If it’s cracked or damaged, it can leak.
- High Humidity: Extremely humid conditions can overwhelm the unit’s ability to drain water efficiently.
- Frozen Evaporator Coils: Restricted airflow or low refrigerant can cause the evaporator coils to freeze, leading to excessive water when they thaw.
- Dirty Evaporator Coils: Dust and debris on the coils can reduce their ability to cool effectively, contributing to ice formation and subsequent leaks.
- Damaged Seal: A damaged or worn seal around the AC unit’s housing can allow condensation to escape from the front.
Symptoms Checklist
Check if you observe any of these symptoms to help diagnose the problem:
- Water dripping from the front of the AC unit.
- Pooling water on the floor beneath the unit.
- Ice buildup on the cooling fins inside the unit.
- Musty or moldy odors coming from the AC.
- Reduced cooling efficiency.
- Loud or unusual noises coming from the unit.
- Water stains on the wall around the AC unit.
How to Fix Window AC Unit Leaking Water From Front Step-by-Step Guide
Follow these steps to troubleshoot and potentially fix the leak:
- Unplug the AC Unit: For safety, always disconnect the power before working on your AC.
- Inspect the Installation Angle: Use a level to ensure the unit is slightly tilted backward, sloping downwards toward the outside. Adjust as needed by shimming the unit.
- Check the Air Filter: Remove the air filter and inspect it. If it’s dirty, clean or replace it. A clean filter is crucial for airflow.
- Locate the Drain Hole: Most window AC units have a drain hole on the back or bottom. Refer to your owner’s manual if you can’t find it.
- Clear the Drain Hole: Use a straightened paperclip, pipe cleaner, or small wire to gently clear any debris blocking the drain hole.
- Flush the Drain Pan: Pour a small amount of diluted bleach or white vinegar into the drain pan to kill any mold or algae that might be contributing to the blockage. Let it sit for 30 minutes, then flush with clean water.
- Inspect the Drain Pan: Check the drain pan for cracks or damage. If you find any, you may need to consider replacing the unit if the pan isnt easily replaceable.
- Clean the Evaporator Coils: Carefully clean the evaporator coils (the cooling fins) with a soft brush or vacuum cleaner attachment. Be gentle to avoid damaging the fins.
- Check the Unit’s Seal: Examine the seal between the AC unit and the window frame. If it’s damaged or missing, replace it with weather stripping or foam to create a tight seal.
- Run the AC on Fan-Only Mode: After cleaning, run the AC on fan-only mode for a few hours to dry out any remaining moisture.
- Monitor for Leaks: After completing these steps, plug the AC back in and turn it on. Monitor it closely for any signs of leakage.
- Lower the Thermostat (Gradually): Don’t immediately crank the AC to the coldest setting. Lower the temperature gradually to prevent the coils from freezing up.
- Ensure Proper Ventilation: Make sure there is adequate ventilation around the AC unit. Avoid blocking the airflow with curtains or furniture.
Fix the Issue Without Buying Parts
Before you consider buying replacement parts, try these free methods:
- Reset the AC Unit: Unplug the AC unit for 15-20 minutes to reset it. Sometimes, a simple reset can resolve minor issues.
- Cleaning: Regularly clean the air filter and surrounding areas to prevent debris buildup.
- Inspection: Regularly inspect the drain hole and pan for any signs of blockage or damage.
- Maintenance: Keep the area around the AC unit clean and free of obstructions to ensure proper airflow.
When Replacement Might Be Necessary
If the leak persists after trying all the troubleshooting steps, or if the drain pan is severely damaged, replacement might be necessary. Replacing a window AC unit typically costs between $150 and $500, depending on the size and features. Common parts that might fail include the compressor, evaporator coils, or the drain pan itself.
Safety Warning
- Always unplug the AC unit before performing any maintenance or repairs.
- Avoid working on the AC unit while standing on a wet floor.
- Be careful when handling sharp objects or tools to avoid injury.
- If you’re uncomfortable performing any of these steps, consult a qualified technician.
Tools You May Need
- Screwdriver
- Level
- Paperclip or pipe cleaner
- Soft brush or vacuum cleaner attachment
- Clean cloths
- Mild detergent or cleaner
FAQ
Here are some frequently asked questions about window AC unit leaks:
- Q: Why is my AC leaking even after I cleaned the filter? A: There might be a blockage in the drainpipe or the evaporator coils could be frozen.
- Q: How often should I clean the air filter? A: Ideally, clean the air filter every 2-4 weeks, or more often if you have pets or allergies.
- Q: Is it safe to use bleach to clean the drain pan? A: Yes, but dilute it with water to avoid damaging the plastic.
- Q: Can a refrigerant leak cause water to leak from the front? A: While refrigerant leaks typically don’t cause water leaks, low refrigerant can lead to coil freezing, and then water leaking. Its best to consult a professional for refrigerant-related issues.
Conclusion
Don’t let a leaky window AC unit ruin your comfort! By following these steps, you can often diagnose and fix the problem yourself. Remember to prioritize safety and be patient. If the problem persists, don’t hesitate to call a qualified technician for assistance. Good luck!
Youtube Video:
Quick Wiring Specifications & Terminal Guide
| Component / Circuit | Standard Wire Gauge | Recommended Protection |
|---|---|---|
| Control & Trigger Signals | 18 – 20 AWG | 5A – 7.5A Inline Fuse |
| Standard Auxiliary Load | 14 – 16 AWG | 15A – 20A Circuit Breaker |
| Main Power Feed / Supply | 10 – 12 AWG | 30A – 40A Heavy-Duty Relay |
Images References
Looking for more diagnostic guides? Explore our complete Air Conditioner Troubleshooting 6 section for step-by-step troubleshooting solutions.
