
Introduction
Is your window AC unit leaking water inside your home? A common culprit is a problem with the drip pan. The drip pan is designed to collect condensation produced by your AC unit as it cools the air. When the drip pan malfunctions, it can lead to water damage on your window sill, walls, and even your floors. Addressing this issue promptly is essential to prevent mold growth and costly repairs. This guide will walk you through common causes, troubleshooting steps, and how to fix your window AC unit drip pan problem without needing to be a professional.
💡 Technical Key Takeaways:
- Core Focus: Diagnostic schematic and terminal connection layout for Window Ac Unit Drip Pan.
- Target Scope: Field technicians, automotive DIYers, and residential/commercial electricians.
- Safety Rule: Always disconnect the primary power source/battery terminal and verify zero voltage with a multimeter before touching wires.
Common Causes of Window AC Unit Drip Pan Problems
Here are some of the most frequent reasons why your window AC unit’s drip pan might be causing trouble:. For more related activities, check out our Ac Running No Air Blowing.
- Clogged Drain Hole: Dirt, dust, and debris can accumulate and block the drain hole, preventing water from escaping.
- Drip Pan Cracks or Damage: Physical damage to the drip pan can cause leaks.
- Improper Installation Angle: If the AC unit isn’t tilted slightly outward, water can pool in the pan and overflow inwards.
- Dirty Air Filter: A dirty air filter restricts airflow, causing the evaporator coil to freeze up. When it melts, it creates excessive water.
- Extremely High Humidity: On very humid days, your AC unit may produce more condensation than the drip pan can handle.
- Loose or Damaged Drain Tube (if applicable): Some units have a drain tube connected to the drip pan. If this tube is loose or cracked, it will leak.
- Frozen Evaporator Coils: As mentioned above, a dirty filter, or even a refrigerant leak, can cause ice to form on the coils. This ice melts and overflows the drip pan.
- Debris in the Drip Pan: Leaves, insects, or other debris can block the drain hole or simply take up space in the pan, causing it to overflow.
Symptoms Checklist
If you’re experiencing any of these symptoms, your window AC unit drip pan may be the source of the problem:
- Water dripping inside your home from the AC unit.
- Water stains on your window sill or wall beneath the AC unit.
- A musty or moldy odor near the AC unit.
- Visible standing water in the drip pan.
- The AC unit is making unusual gurgling or sloshing sounds.
- Increased humidity in the room.
How to Fix Window AC Unit Drip Pan Step-by-Step Guide
Follow these steps to troubleshoot and fix your window AC unit drip pan problem:
- Safety First: Unplug the AC unit from the power outlet before you begin any troubleshooting.
- Inspect the Installation Angle: Make sure the AC unit is slightly tilted outward, allowing water to drain away from your home. Use shims if needed to adjust the angle.
- Remove the AC Unit (Carefully!): Have someone help you lift the AC unit out of the window. It can be heavy. Place it on a protected surface.
- Locate the Drip Pan: This is usually at the bottom of the unit, underneath the cooling components.
- Visually Inspect the Drip Pan: Look for cracks, holes, or other damage.
- Clean the Drip Pan: Remove any standing water and debris from the pan. Use a wet/dry vacuum to suck up any remaining water or small particles.
- Locate the Drain Hole: This is usually a small hole in the bottom of the drip pan.
- Clear the Drain Hole: Use a pipe cleaner, small wire, or even a cotton swab to gently dislodge any clogs in the drain hole. Be careful not to puncture the pan.
- Flush the Drain Hole: Use a small amount of water to flush out any remaining debris in the drain hole. Watch to see if the water drains freely.
- Inspect and Clean the Air Filter: A dirty air filter can lead to icing. Remove the filter and wash it with mild soap and water. Let it dry completely before replacing it.
- Inspect the Evaporator Coils: While the unit is out, visually check the evaporator coils (usually behind the air filter). If they are coated in ice, allow the unit to thaw completely before proceeding. Ensure proper airflow once thawed.
- Check the Drain Tube (if applicable): If your unit has a drain tube, inspect it for kinks, cracks, or loose connections. Reattach or replace if necessary (though, we’re trying to avoid replacements for now).
- Reinstall the AC Unit: Carefully place the AC unit back into the window, ensuring it maintains the correct outward tilt.
- Plug in the AC Unit: Turn on the AC unit and monitor it for leaks.
Fix the Issue Without Buying Parts
Many drip pan issues can be resolved without replacing any parts. Here are some free ways to keep your AC running smoothly:
- Regular Cleaning: Clean your AC unit’s air filter every month to prevent dust buildup and icing.
- Seasonal Inspection: Before turning on your AC for the season, thoroughly inspect the unit, including the drip pan, for any signs of damage or blockage.
- Proper Installation: Ensure your AC unit is installed correctly with the proper outward tilt.
- DIY Drain Cleaning: Regularly clear the drain hole to prevent clogs and overflow.
When Replacement Might Be Necessary
While many drip pan problems can be fixed with simple cleaning and adjustments, sometimes replacement is unavoidable. If the drip pan is severely cracked or damaged beyond repair, it will need to be replaced. Replacement drip pans can range from $20 to $80, depending on the AC unit model. Other commonly failing parts that can contribute to drip pan issues include the air filter and, in rare cases, the entire AC unit if internal components are heavily corroded due to prolonged leaking.
Safety Warning
- Always unplug the AC unit before performing any maintenance or repairs.
- Avoid touching any electrical components inside the AC unit.
- Be careful when lifting the AC unit, as it can be heavy. Get help if needed.
- Do not operate the AC unit if it is leaking water and there is a risk of electrical shock.
- Ensure your hands and the surrounding area are dry when working with electrical appliances.
Tools You May Need
- Screwdriver (Phillips and Flathead)
- Pipe Cleaner or Small Wire
- Wet/Dry Vacuum
- Small Bucket
- Clean Rags
- Shims (if needed for adjusting the tilt)
FAQ
Here are some common questions related to window AC unit drip pan problems:
-
Q: Why is my AC unit leaking even after I cleaned the drain hole?
A: There may be a crack in the drip pan, the AC unit is not tilted properly, or the evaporator coils may still be freezing. -
Q: How often should I clean my AC unit’s air filter?
A: At least once a month, or more often if you have pets or allergies. -
Q: Can I use bleach to clean the drip pan?
A: It’s best to avoid harsh chemicals like bleach. Mild soap and water are usually sufficient. -
Q: What should I do if the evaporator coils are frozen?
A: Unplug the unit and allow it to thaw completely. Then, clean the air filter and ensure proper airflow. If it continues to freeze, you may have a refrigerant leak and need to contact a technician. -
Q: How do I know if my drip pan is cracked?
A: Visually inspect the pan. Look for cracks, especially along the bottom and sides. You may see water leaking directly from the crack. -
Q: My AC doesn’t have a drain hole, what do I do?
A: Some newer units are designed to evaporate the condensation. If yours overflows, ensure proper tilt and clean the air filter thoroughly as excessive condensation might indicate a problem. Check the manual for specific instructions for your model.
Conclusion
Fixing a leaking window AC unit drip pan can seem intimidating, but with a systematic approach and these troubleshooting steps, you can often resolve the problem yourself. Addressing the issue promptly will protect your home from water damage and ensure your AC unit continues to cool efficiently. Try these steps before calling a technician you might be surprised at how much you can do yourself!
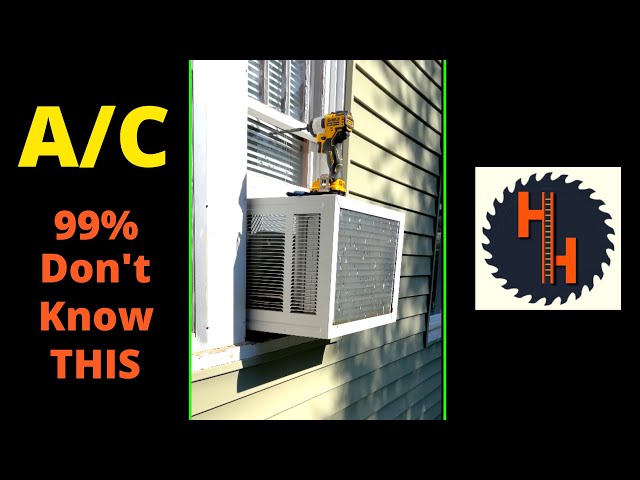
Youtube Video:
Quick Wiring Specifications & Terminal Guide
| Component / Circuit | Standard Wire Gauge | Recommended Protection |
|---|---|---|
| Control & Trigger Signals | 18 – 20 AWG | 5A – 7.5A Inline Fuse |
| Standard Auxiliary Load | 14 – 16 AWG | 15A – 20A Circuit Breaker |
| Main Power Feed / Supply | 10 – 12 AWG | 30A – 40A Heavy-Duty Relay |
Images References
Looking for more diagnostic guides? Explore our complete Air Conditioner Troubleshooting 2 section for step-by-step troubleshooting solutions.
