
Introduction
Is your window air conditioner blowing cold air, but you’re not seeing any water dripping outside? This is a common issue that many homeowners face, and it can be concerning. The water dripping is a normal part of the cooling process, as it’s the condensation being drained away. When it stops, it could indicate a problem that, if left unchecked, can lead to decreased cooling efficiency, mold growth inside the unit, or even damage to your AC. It’s important to address this issue promptly to keep your home cool and your AC running smoothly.
💡 Technical Key Takeaways:
- Core Focus: Diagnostic schematic and terminal connection layout for Window Ac Not Dripping Water Outside.
- Target Scope: Field technicians, automotive DIYers, and residential/commercial electricians.
- Safety Rule: Always disconnect the primary power source/battery terminal and verify zero voltage with a multimeter before touching wires.
Common Causes of Window AC Not Dripping Water Outside
Here are some common reasons why your window AC might not be dripping water outside:
- Low Humidity: On drier days, there might simply be less moisture in the air to condense, resulting in less dripping.
- Clogged Drain: The drain hole or tube that leads outside can become blocked with dust, dirt, or mold.
- Incorrect Installation Angle: If the AC unit isn’t tilted slightly downward towards the outside, water can’t drain properly.
- Frozen Evaporator Coils: Ice buildup on the coils can prevent condensation from forming. This is often caused by restricted airflow.
- Damaged Drain Pan: The drain pan collects the condensation. If it’s cracked or damaged, the water might be leaking elsewhere.
- Dirty Air Filter: A clogged air filter restricts airflow, leading to the evaporator coils freezing.
- Kinked or Blocked Drain Hose: Some AC units have a drain hose. Kinks or blockages will stop water from draining.
- Loose Drain Plug: If the drain plug isn’t secured well, water can leak back into the pan.
Symptoms Checklist
Here are some indicators that can help you identify the issue accurately:
- AC unit is blowing warm air, or not cooling as effectively as before.
- No water is dripping outside during normal operation (when it’s humid).
- Visible ice buildup on the inside coils of the AC unit.
- Water leaking inside your home around the AC unit.
- A musty or moldy smell coming from the AC unit.
- The AC unit is making unusual noises.
How to Fix Window AC Not Dripping Water Outside Step-by-Step Guide
- Unplug the AC unit: Always start by disconnecting the power to avoid electric shock.
- Check the Air Filter: Remove the filter and inspect it. If it’s dirty, clean it with water and soap or replace it.
- Inspect the Evaporator Coils: Look for ice buildup. If present, let the unit thaw completely (unplugged) before proceeding.
- Check the Installation Angle: Ensure the AC unit is tilted slightly downward towards the outside. Use a level to verify.
- Locate the Drain Hole: Find the drain hole on the outside or back of the unit.
- Clean the Drain Hole: Use a straightened paperclip, small wire, or pipe cleaner to gently clear any obstructions in the drain hole.
- Flush the Drain: Use a small syringe or squeeze bottle filled with warm water to flush out any debris from the drain.
- Check the Drain Pan: Inspect the drain pan for cracks or damage. If found, consider sealing it with waterproof sealant.
- Check the Drain Hose (if applicable): If your AC unit has a drain hose, inspect it for kinks or blockages. Straighten any kinks and flush it with water.
- Reassemble and Test: Once you’ve cleared any blockages, reassemble the AC unit (if disassembled) and plug it back in. Monitor for dripping water outside.
- Run the AC: Turn the AC on and set it to a cooling setting. Let it run for at least 30 minutes.
- Observe for Dripping: After running the AC, check outside for any water dripping from the drain hole or hose.
Fix the Issue Without Buying Parts
Many times, you can resolve this issue without buying any new parts:
- Reset: Unplug the AC unit for 15-20 minutes. This can sometimes reset the system and resolve minor issues.
- Cleaning: Regularly cleaning the air filter and drain hole can prevent blockages.
- Inspection Tips: Regularly visually inspect the unit for any signs of leaks, ice buildup, or debris.
- Maintenance Basics: Keep the area around the AC unit clear of obstructions to ensure proper airflow.
When Replacement Might Be Necessary
If you’ve tried all the troubleshooting steps and your AC still isn’t dripping and cooling properly, replacement might be necessary. Common parts that fail include the compressor, fan motor, or the control board. The cost to replace a window AC unit can range from $150 to $500 USD, depending on the size and features.
Safety Warning
- Always unplug the AC unit before performing any maintenance or repairs.
- Be careful when working with electrical components.
- Avoid getting water on electrical parts.
- If you’re uncomfortable performing any of these steps, consult a qualified technician.
Tools You May Need
- Screwdriver (Phillips and flathead)
- Paperclip or small wire
- Pipe cleaner
- Small syringe or squeeze bottle
- Warm water
- Level
- Waterproof sealant (if drain pan is cracked)
FAQ
- Q: Why is my AC not dripping even on humid days? A: This usually indicates a clogged drain hole or frozen evaporator coils.
- Q: How often should I clean my AC filter? A: At least once a month, or more often if you have pets or allergies.
- Q: Can a dirty filter cause the AC to stop dripping? A: Yes, a dirty filter can restrict airflow, causing the coils to freeze and preventing dripping.
- Q: Is it normal for my AC to not drip at all during certain times of the year? A: Yes, during very dry periods, there might not be enough humidity for condensation to form.
Conclusion
Troubleshooting a window AC unit that’s not dripping water outside can seem daunting, but by following these simple steps, you can often resolve the issue yourself. Start with the basics like cleaning the filter and drain, and then move on to more detailed inspections. Remember to prioritize safety and unplug the unit before starting any work. If you’ve exhausted all these options and your AC still isn’t working correctly, it might be time to call a qualified technician. However, with a little patience and effort, you can often get your AC unit back to cooling efficiently and saving you money on energy bills.
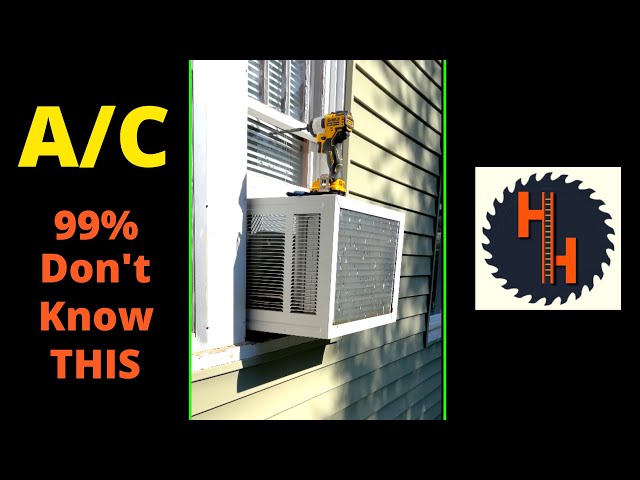
Youtube Video:
Quick Wiring Specifications & Terminal Guide
| Component / Circuit | Standard Wire Gauge | Recommended Protection |
|---|---|---|
| Control & Trigger Signals | 18 – 20 AWG | 5A – 7.5A Inline Fuse |
| Standard Auxiliary Load | 14 – 16 AWG | 15A – 20A Circuit Breaker |
| Main Power Feed / Supply | 10 – 12 AWG | 30A – 40A Heavy-Duty Relay |
Images References
Looking for more diagnostic guides? Explore our complete Air Conditioner Troubleshooting 6 section for step-by-step troubleshooting solutions.
