
Introduction
Finding your Whirlpool washer full of water after a wash cycle is frustrating. Not only does it leave your clothes sopping wet, but it can also lead to musty odors and potential water damage. This problem often happens when small items block the drain, or the drain hose becomes kinked. Addressing this quickly prevents further damage and keeps your laundry routine running smoothly. Lets get that water out!
💡 Technical Key Takeaways:
- Core Focus: Diagnostic schematic and terminal connection layout for Whirlpool Washer Not Draining Completely.
- Target Scope: Field technicians, automotive DIYers, and residential/commercial electricians.
- Safety Rule: Always disconnect the primary power source/battery terminal and verify zero voltage with a multimeter before touching wires.
Common Causes of Whirlpool Washer Not Draining Completely
Here are some common reasons why your Whirlpool washer might not be draining:
- Clogged Drain Pump Filter: This filter catches lint, coins, and other debris that can clog the drain pump.
- Kinked or Blocked Drain Hose: The drain hose can get kinked, preventing water from flowing freely. Debris can also build up inside.
- Clogged Drainpipe: The drainpipe where the washer’s hose connects could be blocked.
- Faulty Drain Pump: The drain pump itself might be malfunctioning.
- Blocked Air Vent: Some washers have an air vent that prevents a vacuum from forming, hindering drainage.
- Overloaded Washer: Packing too many clothes in the washer can sometimes interfere with the draining process.
- Lid Switch Malfunction: Although rare, a faulty lid switch can sometimes prevent the drain cycle from starting.
- Software Glitch: Occasionally, a simple software glitch can cause draining issues.
Symptoms Checklist
Check these indicators to accurately identify the problem:
- Washer tub is full of water after the cycle ends.
- You hear a humming noise from the washer, but no draining occurs.
- The drain cycle doesnt start at all.
- Error code displayed on the washer’s control panel related to draining.
- Clothes are wetter than usual after the spin cycle.
- Water drains very slowly.
How to Fix Whirlpool Washer Not Draining Completely Step-by-Step Guide
Follow these steps to troubleshoot and fix the issue:
- Unplug the Washer: For safety, always unplug the washer from the power outlet before starting any repairs.
- Check the Drain Hose: Locate the drain hose at the back of the washer. Inspect it for kinks, bends, or obstructions. Straighten any kinks and detach the hose from the drainpipe.
- Clear the Drain Hose: Hold the drain hose over a bucket and check for any clogs. You can use a straightened wire hanger or a small brush to dislodge any debris.
- Check the Drainpipe: Ensure the drainpipe where the hose connects isn’t clogged. You can use a plumbing snake or a wet/dry vacuum to clear any blockages.
- Locate the Drain Pump Filter: The drain pump filter is usually located at the bottom front of the washer behind a small access panel. Consult your washer’s manual for the exact location.
- Drain Remaining Water: Place a shallow pan or towels under the access panel, as water will spill out when you remove the filter.
- Clean the Drain Pump Filter: Carefully unscrew and remove the drain pump filter. Clean it thoroughly, removing any lint, coins, or other debris.
- Reinstall the Drain Pump Filter: Once cleaned, securely reinstall the drain pump filter, ensuring it’s properly tightened.
- Check the Air Vent (if applicable): Locate the air vent, usually a small hole or opening near the top of the washer tub. Clear any obstructions from the vent.
- Reset the Washer: Plug the washer back in. Sometimes, a simple reset can resolve minor glitches. Unplug for 1 minute then plug back in.
- Run a Test Cycle: Select a short wash cycle and observe if the washer drains properly.
- Check for Error Codes: If the washer displays an error code, consult your user manual to find out the meaning of the error and any specific troubleshooting steps.
- Avoid Overloading: Make sure you’re not overloading the washer with too many clothes. This can strain the pump and prevent proper draining.
- Check the Lid Switch (advanced): (If you’re comfortable) The lid switch ensures the washer only operates with the lid closed. Check for any damage.
Fix the Issue Without Buying Parts
Before considering replacement parts, try these free methods:
- Reset the Washer: As mentioned earlier, simply unplugging the washer for a minute and plugging it back in can sometimes resolve the issue.
- Deep Cleaning: Run an empty wash cycle with hot water and a cup of white vinegar or a washing machine cleaner to dissolve buildup.
- Regular Maintenance: Regularly clean the drain pump filter (every 1-3 months, depending on usage) to prevent clogs.
- Inspection Tips: Visually inspect the drain hose and drainpipe regularly for kinks or obstructions.
When Replacement Might Be Necessary
If you’ve tried all the troubleshooting steps and your washer still isn’t draining, the drain pump itself might be faulty. A new drain pump typically costs between $50 and $150 USD, depending on the model. Other less common parts that might need replacement include the lid switch or the drain hose.
Safety Warning
- Always unplug the washer from the power outlet before performing any repairs.
- Be careful when handling water; wipe up any spills to prevent slips and falls.
- Avoid touching any electrical components inside the washer.
- If you are not comfortable performing the repairs yourself, contact a qualified appliance repair technician.
Tools You May Need
- Screwdriver (Phillips and flathead)
- Pliers
- Bucket or shallow pan
- Towels
- Straightened wire hanger or small brush
- Plumbing snake (optional)
- Wet/dry vacuum (optional)
FAQ
Here are some frequently asked questions about Whirlpool washer draining issues:
- Q: Why is my washer draining slowly? A: This is usually caused by a partial clog in the drain hose, drainpipe, or drain pump filter.
- Q: How often should I clean the drain pump filter? A: It’s recommended to clean the drain pump filter every 1-3 months, depending on your usage.
- Q: Can I use a drain cleaner in my washing machine? A: It’s generally not recommended, as harsh chemicals can damage the washer’s components.
- Q: What does it mean if my washer is displaying an error code related to draining? A: Consult your user manual to find out the meaning of the error code and any specific troubleshooting steps.
Conclusion
Don’t let a washer full of water ruin your day! By following these simple troubleshooting steps, you can often fix the problem yourself and save money on repair costs. If you’ve exhausted all options and your washer still isn’t draining, consider contacting a qualified appliance repair technician for assistance.
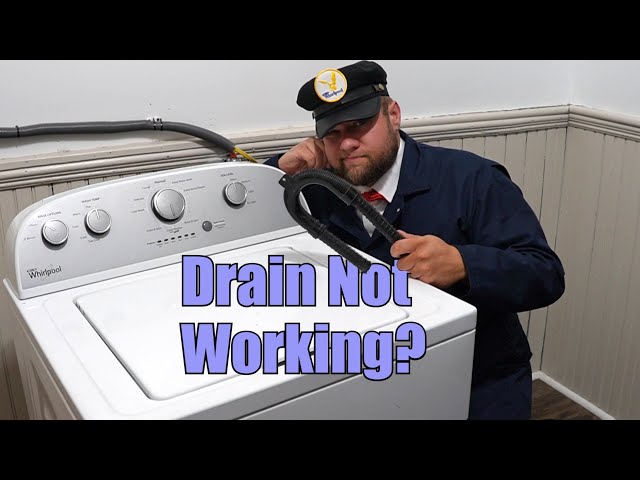
Youtube Video:
Quick Wiring Specifications & Terminal Guide
| Component / Circuit | Standard Wire Gauge | Recommended Protection |
|---|---|---|
| Control & Trigger Signals | 18 – 20 AWG | 5A – 7.5A Inline Fuse |
| Standard Auxiliary Load | 14 – 16 AWG | 15A – 20A Circuit Breaker |
| Main Power Feed / Supply | 10 – 12 AWG | 30A – 40A Heavy-Duty Relay |
Images References
Looking for more diagnostic guides? Explore our complete Washing Machine Problems 1 section for step-by-step troubleshooting solutions.
