
Introduction
A washing machine that doesn’t fill with enough water can be incredibly frustrating. Your clothes come out dingy, detergent residue lingers, and you’re left with a load that’s not truly clean. This issue is especially common with newer, high-efficiency (HE) top load washers designed to conserve water. If you’re experiencing this problem, don’t panic! Often, the solution is simple and doesn’t require expensive repairs. Addressing it promptly will prevent damage to your clothes and ensure your washer operates efficiently. Let’s get started on troubleshooting the problem.
💡 Technical Key Takeaways:
- Core Focus: Diagnostic schematic and terminal connection layout for Whirlpool Top Load Washer Not Filling With Enough Water.
- Target Scope: Field technicians, automotive DIYers, and residential/commercial electricians.
- Safety Rule: Always disconnect the primary power source/battery terminal and verify zero voltage with a multimeter before touching wires.
Common Causes of Whirlpool Top Load Washer Not Filling With Enough Water
Here are some of the most frequent culprits behind a Whirlpool top load washer not filling properly:
- Clogged Water Inlet Valves: Mineral deposits or debris can block the valves that allow water into the washer.
- Low Water Pressure: Insufficient water pressure in your home can prevent the washer from filling adequately.
- Kinked or Damaged Water Hoses: A kinked or damaged hose restricts water flow.
- Faulty Water Level Sensor: The sensor that tells the washer how much water is present might be malfunctioning.
- Air Lock in the Water Lines: Air trapped in the water lines can prevent proper filling.
- Incorrect Load Size Setting: Some washers adjust water levels based on the selected load size. Choosing a smaller load size than the actual load can lead to insufficient water.
- Clogged Drain Hose: If the drain hose is clogged, the washer might be prematurely draining water while filling.
- Defective Inlet Valve Solenoid: The solenoid controls the opening and closing of the water inlet valve. If it’s defective, the valve might not open fully.
- User Error with HE Detergent: Using too much HE detergent can create excessive suds, tricking the water level sensor.
- Drainage Problems: Partial blockages in the drain system can lead to siphoning during the fill cycle.
Symptoms Checklist
Confirm if you’re experiencing these symptoms to accurately identify the issue:
- Washer starts, but little to no water enters the drum.
- Clothes are not fully submerged in water during the wash cycle.
- The wash cycle takes longer than usual.
- You notice excessive detergent residue on clothes after washing.
- Error codes related to water level or fill time appear on the washer’s display (if applicable).
- Water is trickling in, but not at the expected rate.
- The washer is making unusual noises during the fill cycle.
- Clothes are damp, but not thoroughly washed.
How to Fix Whirlpool Top Load Washer Not Filling With Enough Water Step-by-Step Guide
Follow these steps to troubleshoot and resolve the issue:
- Check Water Supply: Ensure both hot and cold water supply valves are fully open behind the washer.
- Inspect Water Hoses: Look for kinks, bends, or damage in the hoses connected to the washer. Straighten any kinks and replace damaged hoses.
- Check Water Pressure: Test the water pressure at a faucet in your home. Low pressure indicates a household plumbing issue that needs to be addressed.
-
Clean Inlet Valve Screens:
- Turn off the water supply valves to the washer.
- Disconnect the water hoses from the back of the washer.
- Locate the small screens (filters) inside the water inlet valves.
- Carefully remove the screens and clean them with a brush or under running water to remove any debris.
- Reinstall the screens and reconnect the water hoses.
- Check the Drain Hose: Ensure the drain hose is properly positioned and not clogged. It should not be inserted too far into the drainpipe, as this can cause siphoning.
- Run a Diagnostic Cycle (if available): Consult your washer’s user manual to see if it has a diagnostic cycle that can help identify problems.
-
Check for Air Locks:
- Turn off the water supply to the washer.
- Disconnect the hoses and place them in a bucket.
- Slowly turn the water supply on to allow the air to escape from the lines.
- Reconnect the hoses to the washer.
- Reset the Washer: Unplug the washer from the power outlet for 1-2 minutes. Then, plug it back in. This can sometimes reset the electronic controls.
- Check the Water Level Sensor (Advanced): This requires some disassembly. Refer to your washer’s service manual to locate and inspect the water level sensor. Look for any signs of damage or corrosion. (This step might be better left to a professional if you’re not comfortable disassembling appliances.)
- Reduce Detergent Usage: Use only the recommended amount of HE detergent. Excessive suds can interfere with the water level sensor.
- Run a Cleaning Cycle: Run a washer cleaning cycle with a washing machine cleaner to remove buildup and residue that might be affecting performance.
- Consider Load Size: Make sure the load size setting matches the amount of laundry you are washing.
Fix the Issue Without Buying Parts
Many times, the issue can be resolved without spending any money:
- Resetting the washer (as described above) is a free and simple solution.
- Cleaning the inlet valve screens requires only a brush and water.
- Checking and straightening water hoses takes just a few minutes.
- Adjusting detergent usage is a free preventative measure.
- Regularly running a washer cleaning cycle prevents future problems.
When Replacement Might Be Necessary
If you’ve tried all the troubleshooting steps and the washer still isn’t filling properly, you might need to consider replacing a part. The most common parts that fail are the water inlet valve (estimated cost: $30-$70 USD) and the water level sensor (estimated cost: $40-$80 USD). However, consider the age of your washer. If it’s more than 8-10 years old, it might be more cost-effective to replace the entire machine.
Safety Warning
- Always unplug the washer from the power outlet before performing any repairs.
- Turn off the water supply to the washer before disconnecting any water hoses.
- Be careful when handling water; clean up any spills immediately to avoid slips and falls.
- If you are uncomfortable performing any of these repairs, consult a qualified appliance repair technician.
Tools You May Need
- Screwdrivers (Phillips and flathead)
- Pliers
- Adjustable wrench
- Bucket
- Small brush
- Towel
FAQ
Here are some frequently asked questions:
- Q: Why is my new HE washer using so little water? A: HE washers are designed to use less water for efficiency. Ensure you’re using HE detergent and the correct load size setting.
- Q: How do I know if my water inlet valve is clogged? A: If water trickles in very slowly even when the water supply is fully open, the valve is likely clogged.
- Q: What happens if I use regular detergent in an HE washer? A: Regular detergent produces too many suds, which can interfere with the water level sensor and cause the washer to malfunction.
- Q: Can low water pressure damage my washing machine? A: Yes, consistently low water pressure can strain the inlet valve and shorten its lifespan.
Conclusion
Troubleshooting a Whirlpool top load washer that’s not filling with enough water can seem daunting, but by following these steps, you can often resolve the issue yourself. Start with the simplest solutions, such as checking the water supply and cleaning the inlet valve screens. Remember to prioritize safety and consult your washer’s user manual for specific instructions. Before calling a technician, take the time to diagnose the problem; you may be surprised at how easy it is to fix. Good luck!
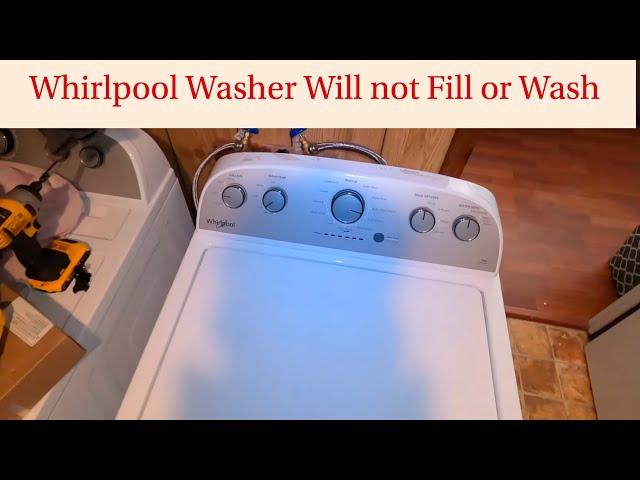
Youtube Video:
Quick Wiring Specifications & Terminal Guide
| Component / Circuit | Standard Wire Gauge | Recommended Protection |
|---|---|---|
| Control & Trigger Signals | 18 – 20 AWG | 5A – 7.5A Inline Fuse |
| Standard Auxiliary Load | 14 – 16 AWG | 15A – 20A Circuit Breaker |
| Main Power Feed / Supply | 10 – 12 AWG | 30A – 40A Heavy-Duty Relay |
Images References
Looking for more diagnostic guides? Explore our complete Washing Machine Problems 6 section for step-by-step troubleshooting solutions.
