
Introduction
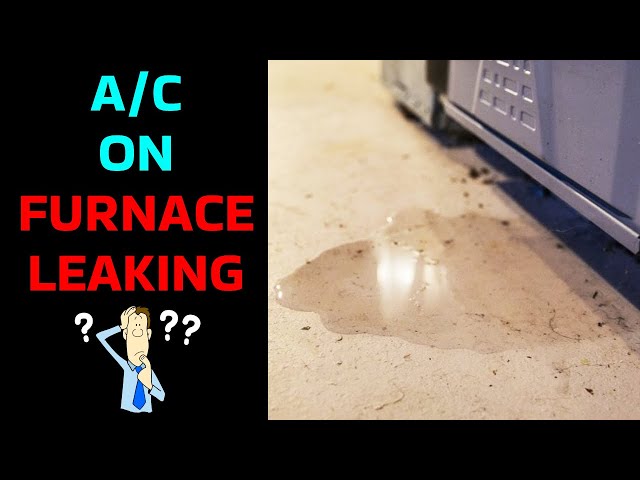
Finding water leaking from your air conditioner can be frustrating and even a little alarming. It’s a common issue, especially during hot and humid weather when your AC is working overtime. While a little condensation is normal, a steady drip or pooling water is a sign that something isn’t right. Ignoring this leak can lead to water damage to your walls and floors, mold growth, and even impact your AC’s efficiency, causing higher energy bills. Addressing the problem quickly can save you money and headaches down the road.
💡 Technical Key Takeaways:
- Core Focus: Diagnostic schematic and terminal connection layout for Water Leaking From The Ac.
- Target Scope: Field technicians, automotive DIYers, and residential/commercial electricians.
- Safety Rule: Always disconnect the primary power source/battery terminal and verify zero voltage with a multimeter before touching wires.
Common Causes of Water Leaking From The AC
Several factors can cause your AC to leak water. Here are some of the most common:
- Clogged Drain Line: This is the most frequent culprit. Condensation drains through a pipe, and if it gets blocked by algae, mold, or debris, the water backs up and leaks.
- Dirty Air Filter: A dirty filter restricts airflow, causing the evaporator coil to freeze. When the ice melts, it overwhelms the drain pan.
- Low Refrigerant: Low refrigerant can also cause the evaporator coil to freeze, leading to the same melting problem as a dirty filter.
- Broken Drain Pan: The drain pan collects condensation. If it’s cracked or rusted, water will leak out.
- Incorrect AC Installation: A poorly installed AC unit might not be properly leveled, causing water to overflow the drain pan.
- Damaged or Disconnected Drain Line: The drain line itself can become damaged, disconnected, or kinked, preventing proper drainage.
- Cold Weather: In very cold climates, even with good maintenance, condensation can freeze and then leak as it thaws when the unit is not designed for such temperature.
Symptoms Checklist
Look for these signs to confirm your AC is leaking water:
- Water dripping from the indoor AC unit.
- Water stains on the ceiling or walls near the AC unit.
- A musty or moldy smell coming from the AC unit or vents.
- Pooling water around the indoor or outdoor AC unit.
- The AC unit isn’t cooling as efficiently as it used to.
- Ice forming on the evaporator coils (inside the indoor unit).
How to Fix Water Leaking From The AC Step-by-Step Guide
Here’s a step-by-step guide to troubleshoot and fix a leaky AC:
- Turn off the AC: Before you start, turn off the air conditioner at the thermostat and the breaker box for safety.
- Inspect the Air Filter: Remove the air filter and check if it’s dirty. If it is, clean or replace it. A clean filter ensures proper airflow.
- Locate the Drain Line: Find the PVC drain line, usually located outside near the outdoor unit or in a utility area near the indoor unit.
- Check for Clogs: Inspect the drain line opening for any visible obstructions.
- Flush the Drain Line: Use a wet/dry vacuum to suck out any clogs from the drain line. Place the vacuum hose over the drain line opening and run it for a few minutes. Alternatively, you can try using a garden hose to flush out the line, but be careful not to use too much pressure.
- Pour Vinegar into the Drain Line: Pour a cup of white vinegar into the drain line opening to kill any mold or algae. Let it sit for about 30 minutes before flushing with water.
- Inspect the Drain Pan: Locate the drain pan under the indoor unit. Check for cracks or rust. If it’s damaged, it will need to be replaced (see “When Replacement Might Be Necessary” below).
- Check the Evaporator Coils: Carefully inspect the evaporator coils (behind the air filter) for ice buildup. If there’s ice, let it thaw completely. Ensure the filter is clean afterwards.
- Ensure Proper Unit Leveling: Check if the indoor AC unit is level. If it’s tilted, the water may not drain properly. Use shims to level it if needed.
- Check the Drain Line Insulation: Ensure the drain line is properly insulated to prevent condensation from forming on the outside of the pipe and dripping.
- Run the AC and Monitor: Turn the AC back on and monitor for leaks. Check the drain line and drain pan to ensure water is draining properly.
- Repeat if Necessary: If the leak persists, repeat steps 5 and 6. Sometimes, stubborn clogs require multiple attempts.
- Contact a Professional: If you’ve tried all these steps and the leak continues, it’s time to call a qualified HVAC technician.
Fix the Issue Without Buying Parts
Many times, you can resolve a leaky AC without buying any new parts:
- Regular Cleaning: Clean your air filter regularly (every 1-3 months) to prevent coil freezing.
- Drain Line Maintenance: Pour a cup of white vinegar into the drain line every few months to prevent clogs.
- Inspect and Clear Regularly: Inspect the drain line opening regularly for visible debris and clear it out.
When Replacement Might Be Necessary
Sometimes, a part replacement is unavoidable:
- Drain Pan Replacement: If the drain pan is cracked or rusted, it needs to be replaced. A new drain pan typically costs between $50 and $200, depending on the model and size.
- Drain Line Replacement: A damaged or kinked drain line should be replaced. Replacement lines are inexpensive, usually under $20.
Safety Warning
- Always turn off the AC unit at the thermostat and breaker box before attempting any repairs.
- Be careful when working with electrical components. If you’re not comfortable, call a professional.
- Avoid getting water on electrical components.
- Wear gloves to protect your hands from dirt and debris.
- Be careful when using ladders to access the AC unit.
Tools You May Need
- Wet/dry vacuum
- Screwdriver
- White vinegar
- Bucket
- Garden hose (optional)
- Gloves
- Flashlight
- Shims (for leveling)
FAQ
Here are some frequently asked questions about leaky ACs:
- Why is my AC leaking even after I cleaned the drain line? There might be a crack in the drain pan or a refrigerant leak causing ice buildup.
- How often should I clean my AC drain line? At least twice a year, preferably before the cooling season starts and mid-summer.
- Can low refrigerant cause my AC to leak water? Yes, low refrigerant can cause the evaporator coil to freeze, leading to water leakage.
- Is it dangerous to have a leaky AC? Yes, it can cause water damage, mold growth, and potentially electrical hazards.
Conclusion
Dealing with a leaky AC can seem daunting, but with a little knowledge and effort, you can often fix the problem yourself. By following these steps, you can save money and prevent further damage to your home. However, if you’re uncomfortable with any of these steps, or if the problem persists, don’t hesitate to call a qualified HVAC technician. Addressing the issue promptly will ensure your AC runs efficiently and keeps you cool all summer long!. For more related activities, check out our Window Type Aircon Water Leak.
Youtube Video:
Quick Wiring Specifications & Terminal Guide
| Component / Circuit | Standard Wire Gauge | Recommended Protection |
|---|---|---|
| Control & Trigger Signals | 18 – 20 AWG | 5A – 7.5A Inline Fuse |
| Standard Auxiliary Load | 14 – 16 AWG | 15A – 20A Circuit Breaker |
| Main Power Feed / Supply | 10 – 12 AWG | 30A – 40A Heavy-Duty Relay |
Images References
Looking for more diagnostic guides? Explore our complete Air Conditioner Troubleshooting 6 section for step-by-step troubleshooting solutions.
