
Introduction
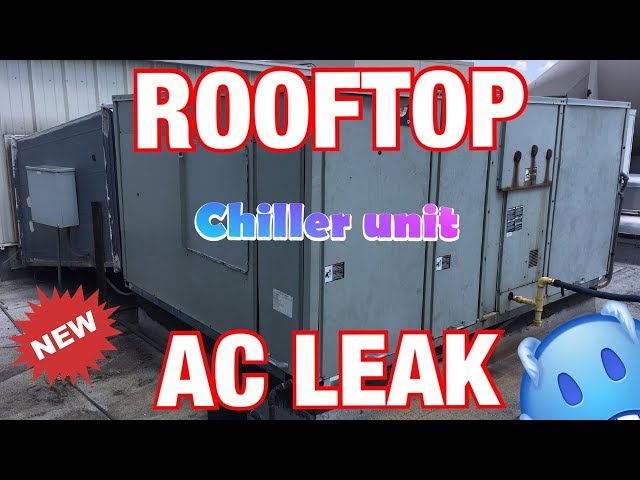
Discovering water leaking from your rooftop AC unit can be alarming. It’s a sign that something isn’t working correctly, and ignoring it can lead to bigger problems like water damage to your roof and interior, reduced cooling efficiency, and even costly repairs down the road. This guide helps you understand why your rooftop AC unit might be leaking water and provides simple steps to troubleshoot and potentially fix the issue yourself. Addressing the leak promptly prevents further damage and ensures your AC unit operates efficiently. Explore more in our Air Conditioner Troubleshooting 2 collection.
💡 Technical Key Takeaways:
- Core Focus: Diagnostic schematic and terminal connection layout for Rooftop Ac Unit Leaking Water.
- Target Scope: Field technicians, automotive DIYers, and residential/commercial electricians.
- Safety Rule: Always disconnect the primary power source/battery terminal and verify zero voltage with a multimeter before touching wires.
Common Causes of Rooftop AC Unit Leaking Water
Here are some of the most common reasons why your rooftop AC unit might be leaking water:
- Clogged Condensate Drain Line: This is the most frequent culprit. The drain line carries condensation away from the unit, and if it’s blocked, water will back up and overflow.
- Dirty Air Filter: A clogged air filter restricts airflow, causing the evaporator coil to freeze. When the ice melts, it overwhelms the drain pan.
- Low Refrigerant: Low refrigerant can also cause the evaporator coil to freeze, leading to the same problem as a dirty air filter.
- Damaged or Rusted Drain Pan: The drain pan catches condensation. If it’s cracked or rusted through, water will leak.
- Improper Unit Installation: A unit that isn’t level can cause water to pool in the drain pan instead of flowing out.
- High Humidity: In very humid conditions, your AC unit may produce more condensation than the drain can handle, resulting in minor overflow.
- Kinked or Disconnected Drain Line: The drain line may have a kink or disconnect, preventing proper drainage.
- Frozen Evaporator Coils: In addition to the causes listed above, something else can cause the evaporator coils to freeze up entirely, leading to excessive melting and overflowing water.
Symptoms Checklist
Look for these signs to accurately identify the issue:
- Water dripping from the side of the AC unit on the roof.
- Water stains or dampness on the ceiling below the AC unit.
- Pooling water around the base of the AC unit.
- Reduced cooling performance from the AC unit.
- Musty or moldy odors coming from the vents.
- Visible ice buildup on the AC unit’s coils (especially in warmer weather).
How to Fix Rooftop AC Unit Leaking Water Step-by-Step Guide
Here’s a step-by-step guide to troubleshoot and fix the problem:
- Turn Off the AC Unit: Before you start, turn off the power to your AC unit at the breaker box for safety.
- Locate the Condensate Drain Line: This is usually a PVC pipe extending from the unit. It might be on the side or bottom.
- Check for Obvious Obstructions: Visually inspect the drain line for any kinks, clogs, or disconnections.
- Clear the Drain Line with a Wet/Dry Vacuum: Attach the vacuum hose to the end of the drain line and suck out any debris. Do this for several minutes. You may need to seal the connection with a rag to improve suction.
- Flush the Drain Line with Vinegar: Pour a cup of white vinegar into the drain line opening. Vinegar helps dissolve algae and mold. Let it sit for 30 minutes, then flush with water.
- Check the Air Filter: Remove and inspect the air filter. If it’s dirty, replace it with a clean one.
- Thaw Frozen Coils (If Applicable): If you suspect frozen coils, turn off the AC unit and allow the ice to melt completely. This may take several hours. You can speed up the process by using a fan to circulate air.
- Inspect the Drain Pan: Carefully examine the drain pan for cracks, rust, or other damage. If you find any damage, you may need to replace the pan.
- Ensure the Unit is Level: Use a level to check if the AC unit is sitting level. If it’s not, use shims to adjust the leveling.
- Reconnect Disconnected Drain Lines: If you find any disconnected drain lines, reattach them securely. Use PVC cement if necessary.
- Monitor for Leaks: After completing these steps, turn the AC unit back on and monitor it closely for any leaks.
- Check for Refrigerant Leaks (Visual): Look for oily residue on connections, which may indicate a refrigerant leak (note: you won’t be able to fix refrigerant issues yourself and will need a professional).
Fix the Issue Without Buying Parts
Before rushing to buy parts, try these free methods:
- Reset the AC Unit: Turn off the power at the breaker for 10 minutes, then turn it back on. This can sometimes resolve minor electrical issues.
- Regular Cleaning: Clean the area around the AC unit to prevent debris from entering the system.
- Regular Inspection: Check the drain line and air filter monthly to catch problems early.
- Basic Maintenance: Keep the area around the unit clear of obstructions like leaves and branches.
When Replacement Might Be Necessary
While attempting to repair your AC unit yourself is a great idea, there are times when replacement is necessary. If the drain pan is severely damaged, the coils are corroded, or the compressor is failing, replacement might be the best option. Replacing a rooftop AC unit can range from $3,000 to $7,000, depending on the size and efficiency of the unit. Common parts that often fail include the compressor, evaporator coil, and condenser fan motor. For more related activities, check out our 2012 Camaro Ac Blowing Hot Air.
Safety Warning
Follow these safety precautions:
- Always turn off the power to the AC unit at the breaker box before working on it.
- Avoid working on the unit during wet weather.
- Be careful when working on the roof. Use appropriate safety equipment.
- If you are uncomfortable performing any of these steps, contact a qualified HVAC technician.
Tools You May Need
Here are some tools that may come in handy:
- Wet/Dry Vacuum
- White Vinegar
- Screwdriver
- Level
- Shims
- PVC Cement (if needed)
- Gloves
FAQ
Here are some common questions and answers:
- Q: How often should I clean my AC unit’s drain line? A: At least once a year, or more often if you notice signs of clogging.
- Q: Can a dirty air filter really cause a water leak? A: Yes, a dirty air filter can cause the evaporator coil to freeze, leading to a water leak.
- Q: What does it mean if the water dripping is rusty colored? A: This could indicate a rusted drain pan, which may need to be replaced.
- Q: Why is my AC unit leaking more water on humid days? A: AC units naturally produce more condensation on humid days, which can sometimes overwhelm the drain system.
Conclusion
Troubleshooting a leaking rooftop AC unit may seem daunting, but by following these steps, you can often identify and resolve the issue yourself. Addressing the problem promptly prevents further damage and saves you money. Remember to prioritize safety and don’t hesitate to call a qualified HVAC technician if you’re uncomfortable performing any of these steps or if the problem persists. Discover more free resources across our collection library.
Youtube Video:
Quick Wiring Specifications & Terminal Guide
| Component / Circuit | Standard Wire Gauge | Recommended Protection |
|---|---|---|
| Control & Trigger Signals | 18 – 20 AWG | 5A – 7.5A Inline Fuse |
| Standard Auxiliary Load | 14 – 16 AWG | 15A – 20A Circuit Breaker |
| Main Power Feed / Supply | 10 – 12 AWG | 30A – 40A Heavy-Duty Relay |
